Posts Tagged ‘green’

color block pillow tutorial

color block pillow

Here is a little project to spring up your home.  I made this pillow in springy greens, but any colors would of course work. Ticking would look very nice, with the stripes going opposite ways. The pillow is based on a simple quilt square (does it have a name?) and comes together super fast.  Happy Spring!

color block pillow

color block pillow materials

materials:

  • two squares of fabric slightly larger than your pillow
  • square pillow form
  • zipper slightly smaller than your pillow


directions:

1.  Cut your fabric 2 inches larger than your pillow. For example: my pillow was 13in square, so I cut my fabric into 15in squares.

color block pillow step one and two

2. Put the squares together, right sides facing. Using a straight edge, draw a line diagonally across the fabric. No one will see the line, so you can use a regular pencil or pen.

3. Sew 1/4in from the line. First sew on one side of the line, and then on the other. You will have two seams, one on each side of the line. This is shown more clearly in the photo below.

color block pillow step three

4. Cut directly on the line you drew.

color block pillow step four

5. Ta Da! You now have two squares. Open them up and press the seam to one side–the side with the darker colored fabric.

color block pillow step five

6. Now you have a choice. You can line the squares up, right sides facing, with the seams also alined like I did in the photo above. Or you can arrange it so the triangles are oriented differently on each side–the seams will not line up, but will make an X. Play around with it and see what you like. But unless you have a clear fiberglass couch no one is going to see both sides at once.

7. I am not going to explain how to do the zipper, because there is a good tutorial that does it already–Sewing 101: Zippered Throw Pillows. This is the method I use for putting zippers in pillows and it is dead easy. There are other ways that look a bit nicer, but this one is super fast and hard to screw up. I encourage you to try it if you haven’t used zippers before–you will succeed, I know it!

color block pillow done!

8. Try the pillow on your pillow form. It might need some taking in. I had to take mine off and sew it a bit smaller to make it fit. Hey look, you’re done! And you made a super chic, color block, geometric, trendy as all get out pillow. Your couch will thank you.

kcwc spring 2011: day four

board shorts in green gingham

Just some simple board shorts today. Though now that I look at them, they look more like old timey golfing slacks. Am I subconsciously trying to get my son on the course before he’s even held a golf club? He can rock the style without playing the game, right?

green shorts

The pattern is from Happy Homemade vol. 2 again. Lots more of them cut out and ready to sew up, too. I told you you were going to get sick of this pattern. It’s got simple, easy to put together slash pockets and a totally useless, but awesome fake fly. Seriously, I love the fake fly. Makes the pants look a little more pulled together, a little less becky homecky.

kcwc day four

1.garden party frock 2. sun hat 3. skirt that swings 4. smocked sundress

oops! I realized as I was putting this collection up that it’s all girl clothes today, but there are some fantastic boy clothes in the flickr mix too. Like this slammin red parachute jacket and these stylish jeans and this adorable baby sweater. I find that boys are a bit harder to sew for the in the summer. Maybe it’s because all those easy, summery dresses are calling to me to sew them up. What about you? Are you sewing frilly dresses or twenty pairs of boy shorts?

paper christmas tree ornament tutorial

paper christmas ornaments

a paper christmas tree ornament

This as simple as it gets. A few scraps of paper, one seam and in minutes you’ve make a pretty, handmade ornament. I used paint chips (in lovely martha stewart colors) from the hardware store because I had them on hand, but cardstock or thin cardboard or old christmas cards would all work well.

an ornament from paint chips

Cut out one star and three to five strips of paper.  If you’d like to use the same measurements I used, you can download the pattern pictured below. If you would rather do it freehand, cut progressively longer strips for the tree, as wide as you like, and cut a good size trunk.

paper tree pattern

You are going to sew a seam down the middle of everything on your sewing machine. Sewing on paper is really not that much different than sewing on fabric, except that you use a slightly longer stitch and it’s ok to use a dull needle. If you are anything like me, there is one in your machine right now! Make a bunch of paper tree ornaments with that perfectly dull specimen and then do yourself a favor: take it out! And get a nice, new sharp one in there for the rest of your christmas sewing.

First make sure you have about three inches of slack from the bobbin and past the needle before you begin sewing. Then place the star under the presser foot of your machine take one stitch forward and then one stitch back (a little sewing dance!) to secure the thread and then sew down the middle of the star. Before you get to the bottom nudge the shortest strip of paper under the presser foot and sew down the middle of it.  And so on, with the rest of the strips and the trunk.

sewing paper trees

When you get to the bottom of the trunk, sew back and forth a few times to secure the thread again. Tie the ends on top of the ornament together, so it makes a loop for hanging. Snip the thread ends on the bottom of the trunk and you’re done!

christmas tree ornament made out of paint chips

variations

I included a pattern for a snowman in the PDF pattern as well, but a million other things are possible: candy canes, bells, santas, pretty much anything you can think of to cut out and sew together!

snowman ornament made from paint chips

a christmas present for my lovely readers: a week of handmade ornament tutorials!

I will be accepting advertisers  on Elsie Marley starting January 2011. If you would like to reserve a spot please email me and we can discuss the specifics! Thanks! elsiemarleyblog@gmail.com

kids clothes week challenge: day 5

After some pretty obvious frustration yesterday, I finished some projects. Some I just put away for another time and some I started because I knew I could finish them without loosing my mind.  This shirt pattern is from the super fantastic japanese book Happy Homemade Vol. 2.

There is a little keyhole detail in the back, but except for that it’s just a few pieces of fabric cinched together with a tie.  The tie works as the straps too and ties in a pretty bow in the back.  If I didn’t have to hem the entire tie  (and next time I’ll just cut two, sew them together and turn them out) it would have taken an hour start to finish. I don’t know if it fits yet, because little miss is at school, but it turned out so well I won’t even mind if it doesn’t.

I know for sure these shorts don’t fit, but they might in a few years. My son doesn’t care though. He wore them yesterday and today and the front is covered in breakfast, which is why I am only showing you the back. To make these you take a pattern for shorts cut the front and back pieces down the middle (slash and spread) so when you cut out your fabric you should have eight pieces total. Then sew the middle seams with the seam exposed and sew the side seams normally.  It’s kind of a cool detail, but I’m not sure how they’ll look out of the wash. I made them from a knit, so they shouldn’t unravel. If they come out ok I’ll make some more in the right size. someday. The pattern is “i” from Everyday Bottoms.

kid clothes week part three

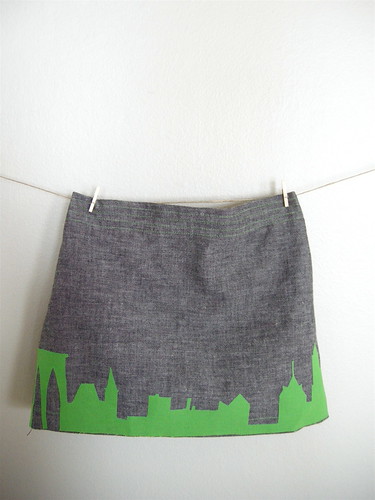
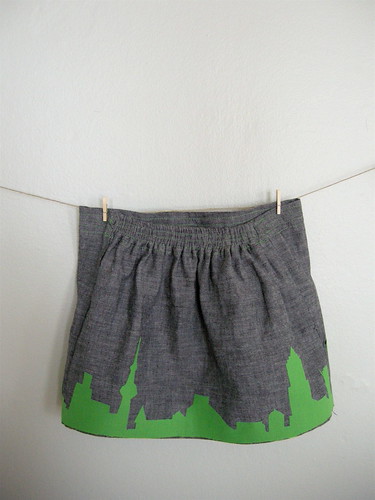
just one more and then kid clothes week is over for reals. I think the skirt was actually the first thing I finished, but I ran out of double sided fusible interfacing and it took me a few weeks to get my butt to the fabric store for more.  First I drew a skyline without any reference and it was pretty sad, so I looked up skyline on flickr and ta da! There’s a little New York, a little Shanghai, and a little Cleveland on this skirt and maybe some Chicago on the back.

I’m thinking about selling a few of these in my shop, maybe doing a county version too.  I still have no idea how to size a pattern (anyone? anyone?) but I’m confident I can wing it. Next week is making stuff for the shop week, so we’ll see. I put a few things up (have a look!) but there are many diggers to make, so I don’t know if I’ll even get to the skirts. Hope everyone had a good weekend. I’m off to have cocktails and listen to some french gypsy music with my best pal.