Posts Tagged ‘snowman’

paper christmas tree ornament tutorial

paper christmas ornaments

a paper christmas tree ornament

This as simple as it gets. A few scraps of paper, one seam and in minutes you’ve make a pretty, handmade ornament. I used paint chips (in lovely martha stewart colors) from the hardware store because I had them on hand, but cardstock or thin cardboard or old christmas cards would all work well.

an ornament from paint chips

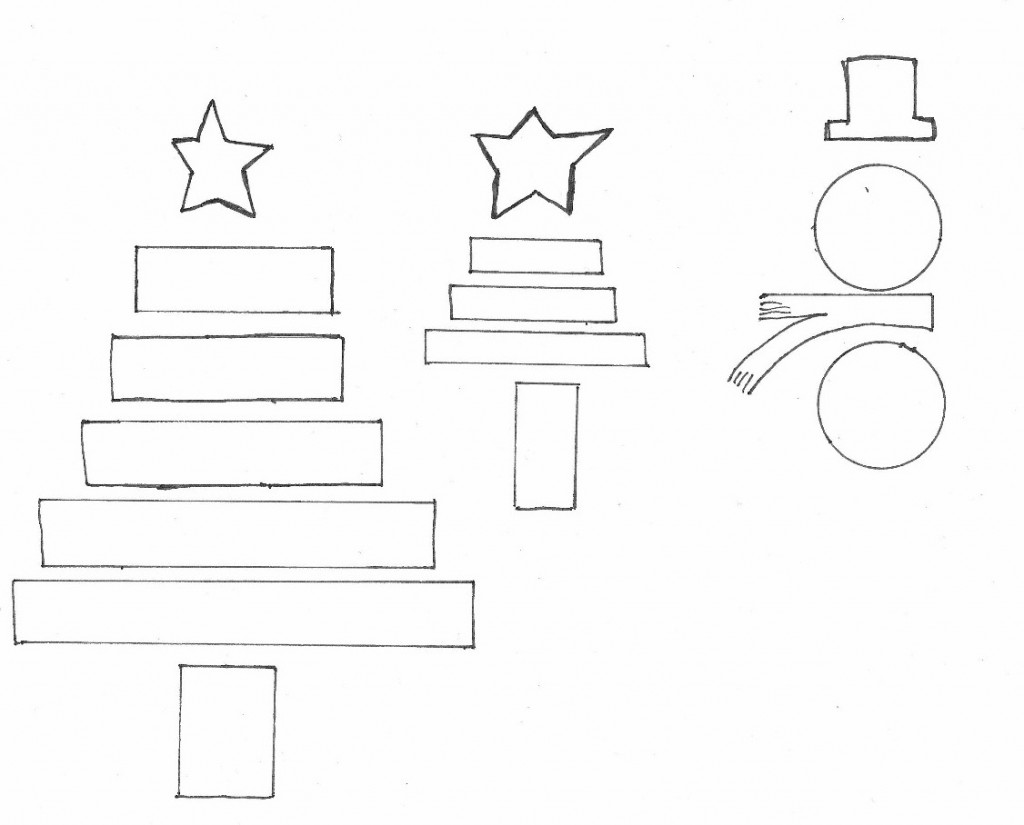
Cut out one star and three to five strips of paper.  If you’d like to use the same measurements I used, you can download the pattern pictured below. If you would rather do it freehand, cut progressively longer strips for the tree, as wide as you like, and cut a good size trunk.

paper tree pattern

You are going to sew a seam down the middle of everything on your sewing machine. Sewing on paper is really not that much different than sewing on fabric, except that you use a slightly longer stitch and it’s ok to use a dull needle. If you are anything like me, there is one in your machine right now! Make a bunch of paper tree ornaments with that perfectly dull specimen and then do yourself a favor: take it out! And get a nice, new sharp one in there for the rest of your christmas sewing.

First make sure you have about three inches of slack from the bobbin and past the needle before you begin sewing. Then place the star under the presser foot of your machine take one stitch forward and then one stitch back (a little sewing dance!) to secure the thread and then sew down the middle of the star. Before you get to the bottom nudge the shortest strip of paper under the presser foot and sew down the middle of it.  And so on, with the rest of the strips and the trunk.

sewing paper trees

When you get to the bottom of the trunk, sew back and forth a few times to secure the thread again. Tie the ends on top of the ornament together, so it makes a loop for hanging. Snip the thread ends on the bottom of the trunk and you’re done!

christmas tree ornament made out of paint chips

variations

I included a pattern for a snowman in the PDF pattern as well, but a million other things are possible: candy canes, bells, santas, pretty much anything you can think of to cut out and sew together!

snowman ornament made from paint chips

a christmas present for my lovely readers: a week of handmade ornament tutorials!

I will be accepting advertisers  on Elsie Marley starting January 2011. If you would like to reserve a spot please email me and we can discuss the specifics! Thanks! elsiemarleyblog@gmail.com

fifth day of advent

snowman

Download this portly little snowman here and color him for the fifth day of advent. Remember to put out your shoes for St. Nicholas day tomorrow! He might just leave you an advent calendar coloring book of your very own!

snowmen

Yesterday we were buried under almost a foot of snow, so we made meringue snowmen.  I had this little project stored somewhere in the back of my brain for a while and it was the perfect day for it. I whipped up some meringue, piped them onto a sheet pan, and the kids decorated them.  We didn’t have much (and there was no going to the store) so I cut raisins up for the eyes and we used the 10 red hots that were left. I didn’t want to use chocolate chips because I thought they would melt. But now I’m realizing I should have cut up some dried apricots for noses! oh well. I also forgot the peppermint extract, so they don’t really taste like much, but the kids don’t care at all. The meringue is sticky as all get out, so it’s a good idea to wet your fingers a little before you start decorating.

snowman meringues adapted from martha stewart

  • 3 large egg whites
  • 3/4 cup sugar
  • 1/2 teaspoon peppermint extract (or vanilla if you don’t have peppermint)
  • raisins, currants, dried fruit, red hots, or whatever else you have on hand for decorating

directions

  1. Put egg whites and sugar in the bowl of an electric mixer. Set bowl over a pan of simmering water, and stir until sugar has dissolved and mixture is warm to the touch, 2 to 3 minutes.
  2. Transfer bowl to an electric mixer fitted with the whisk attachment. Mix on medium-high speed until stiff peaks form.
  3. Mix in peppermint extract (don’t forget)
  4. Put the meringue into a piping bag with a large tip (or a ziploc bag with a clipped corner, or just use two spoons). If you have a silpat, use it. If not put some parchment paper on a cookie sheet and “glue” the corners down with a dab of meringue. Then pipe three adjoining circles–a snowman, silly.
  5. Decorate and pop in a 175 degree (Fahrenheit) oven for two hours. They will look exactly the same when you take them as they did when you put them in.

This is turning into a tutorial week! Tomorrow I’ll have the directions for the string of lights advent calendar and who knows maybe I can rustle up another tutorial for Friday (but don’t hold your breath). Also, a couple people have emailed me asking whether or not the mobile swap is happening again this year. And yes! it is. Sign up will start in January. Last year it was a big success! And I’ve even got an idea for my mobile already.