Archive for the ‘tutorials’ Category

tin can cover

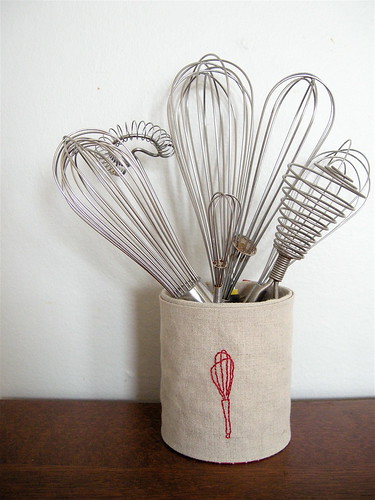
This project is from an old issue of Cotton Friend, a japanese magazine that my husband brought back for me from Singapore.  These are incredibly handy and I have many more in the works: for all the crap little things in my studio and all the markers, crayons and glue sticks that are under the couch.  I thought you would like to make some too, so I whipped up a tutorial. Here you go:

Materials:
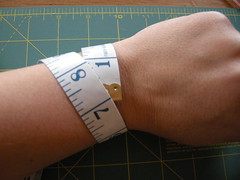
28 oz. tin can (if you have a different size can, just measure the height and circumference, add seam allowances, and the rest is the same)
linen, or other fabric
lining fabric
embroidery floss
glue (I used rubber cement, but plain white glue should do just fine)
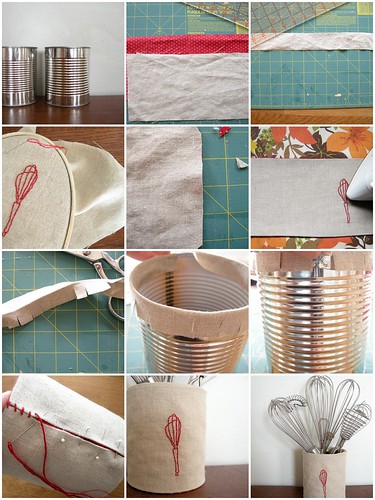
Directions:

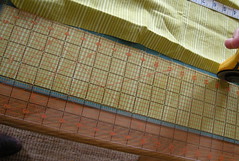
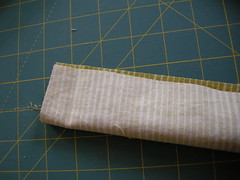
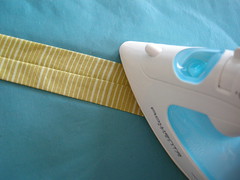
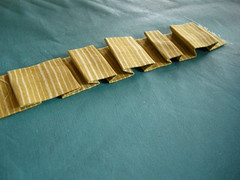
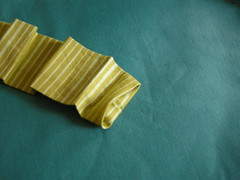
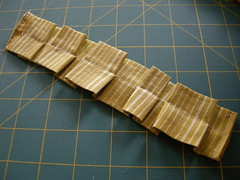
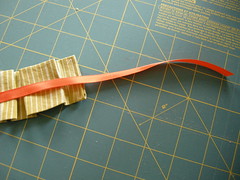
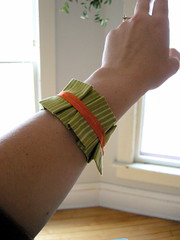
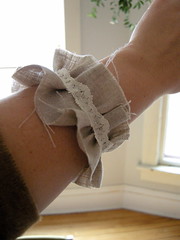
Wash your tin can and take off the paper.  Cut two 13″ X 4.75″ rectangles–one from linen and one from the lining fabric–and one 13″ X 1.5″ strip of linen.  Embroider the design of your choice on the fabric or leave it plain if you like. Place the two large rectangles together right sides facing, and sew around using a 1/4 inch seam allowance.  Leave a 2 inch opening in the middle of one of the short sides for turning out.  Clip the corners, turn and press (I like to press it so a little of the lining shows).  Sew the opening closed.  Fold the strip of fabric in half the long way and press.  All the way along one side clip almost up to the fold.  Glue the unclipped side to the inside of the tin can, then glue the outside.  Wrap the finished piece around the can and sew shut (I like my stitches to show, but you could of course use an invisible stitch).

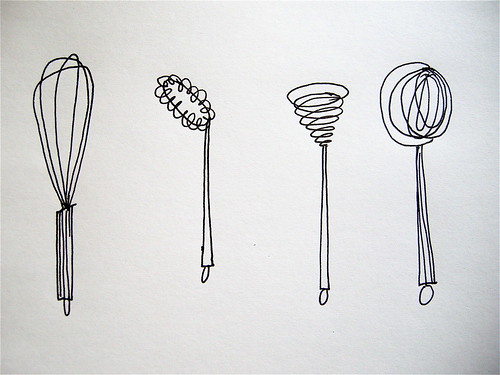
I was planning on having a pdf file with embroidery designs you could download, but I’m not having much luck with that at the moment.  Until I figure it out here are pictures of the designs you can print out and use (you will probably have to resize them a bit). If you want to see these or any of the instructional photos more clearly, click over to my flickr site.

Edited to add: please click here and you can download both sets of designs for your own stylish, embroidered tin can cover.

drop me a line if you make one!

pattern for a half eaten gingerbread man

Only six days until christmas and amazingly there is no furious sewing in this house. Just one more gift to make and then we’re off to Grandma’s house. There are always a couple people I forget and they are always the ones ready with a gift for me. So I thought I’d make a few ornaments to keep in my bag for those awful, awkward moments. I’m sure there are people like that in your life too: the weird cousin, the super smiley coworker. I thought I’d pass on a pattern for a gingerbread man ornament that can be whipped up quickly just in case you forgot someone. Click here to download the gingerbread man pattern and instructions. I included some pictures with the instructions below as well. If you make one let me know!

materials
brown or tan wool felt
a tiny bit of white felt too
some stuffing (polyfil, etc.)
red, white, and black embroidery thread
white mini rickrack
fray check
two red buttons
glue stick

directions

1. cut out template and pin to felt. Cut out one gingerbread man out of felt.

2. for the eyes cut two small circles out of the white felt and attach them to the gingerbread man with one black french knot each. With a backstitch, sew a small circle for the mouth. Sew buttons on with white embroidery thread–to make them look like candies, sew from the button holes to the outside edge of the button. Cut pieces of mini rickrack for trim on two arms and the leg, dab all the ends with fray check, and use the glue stick to tack them down.

3. cut a rectangle as big as your gingerbread man out of felt. Pin your decorated man to this rectangle. Make a loop of rickrack and tuck it in between the layers on your gingerbread man’s head (to hang him from later). Stitch by machine or by hand from A to B (the long way) 1/8inch from the edge. Be sure to catch all the rickrack as you stitch.

4. cut off the extra felt.

5. stuff the little man lightly and sew up the opening.

6. hang him up or give him away!

pleated bracelet

I don’t really wear much jewelry, but I’ve always wanted to try my hand at whipup’s assignments. And this month the theme is fiber jewelry. The only things other than my wedding ring that I wear are bracelets, so I made myself a bracelet. It is basically just a pleated strip of fabric (there may be a special name for this kind of pleat, I don’t know, but if you do please let me know) with a ribbon as a tie. Infinitely customizable and easy to whip up–it would be quick to make to match an outfit before going out. Not that I ever go out. But you do, so here’s a tutorial.

First measure your wrist, then multiply that by 2.5

Cut a large rectangle of fabric that is 4inches by (wrist measurement x 2.5)

fold it in half the long way (hot dog style), right sides facing, and sew down the long edge leaving the ends open.

Turn the resulting tube right side out, fold it in half so the seam is in the middle and press.

Starting about and inch from the raw edge, make one accordion fold one way and press, then another the other way and press, continuing until you’ve used the entire strip. Don’t worry about making them perfectly even–variation in size makes the bracelet interesting.

Pin the pleats in place and (carefully) try the bracelet on. Snip the ends off if it is too long, fiddle with the pleats if it is too small. When the bracelet is the right length, tuck the ends under and sew the opening shut.

Then tack down all the pleats with a long stitch. Go slowly!

Sew a pretty ribbon on top of the stitching you just did, leaving a couple inches at each end to tie a bow.

Put it on and your ready to go.

You could use a button and elastic loop for a closure, or button and button hole, or snap, or whatever you think would work. Even faster and a little more girly, is a ruffle bracelet. Just a strip of fabric (I used linen and left the edges raw) with a ribbon or some lace down the middle.

so there you go: my first whiplash entry and my first tutorial all rolled in one.

cardboard dollhouse

Here it is the second installment of Making Mondays: a cardboard dollhouse. Sounds simple enough, butI think the project was a little over my daughter’s head–she is only 2 after all. I was inspired by the Constantine dollhouse (pictured below). It’s a lovely and simple idea, but unfortunately there isn’t a spare $145 lying around these days. So we made our own.

We started with a box, cut it apart, and used one long side and the two shorter sides. I cut a slit in each of the short sides almost up to the top and slid them on top of the longer piece of cardboard, so they were perpendicular to it. Then I tried to make the walls a little sturdier by taping the corners and my daughter pulled the rest of the tape off the roll. To decorate, we looked through magazines and cut out pictures of kitchens and bathrooms and couches and chairs, and she picked some pretty paper for the walls as well. I thought this would be the best part, but really she had no patience for it, thankfully the glue stick made up for that. And with that glue stick we slapped it all on, cut some doors and the dollhouse was done.

I think this is a good project for kids that are a little older–hell, I might just make another one myself. There are a couple things I would do differently the second time around. I think it would be nice if the house came apart and could be stored flat. This would make decorating both a little easier (you can lay everything flat on a table and work on it) and more difficult (you have to remember what walls go to what room). Also, in order for the house to be stable the shorter walls must be taller than the long wall they fit over (I didn’t do this and our house is very wobbly). And though I think it’s fun to find pictures of things in magazines to decorate the house, it would be nice if the walls were felt. You could cut couches and chairs out of felt as well and stick it to the walls–then you always would have the option of redecorating!

To see all the rooms, you can go to my flickr page. Even though my daughter was frustrated with the amount of time it took to make, in the end, of course, she loved it. And now she calls it her castle (where did she learn that word?). If there is interest I would be happy to make up a pattern (obviously with the improvements I mentioned) and have it be available to download and print.

One more thing: if it wasn’t obvious,this is my little post for Blog Action Day. Reuse your old boxes and magazines by turning them into dollhouses and Recycle them when that dollhouse falls apart.