Posts Tagged ‘recycle’

shirred check top

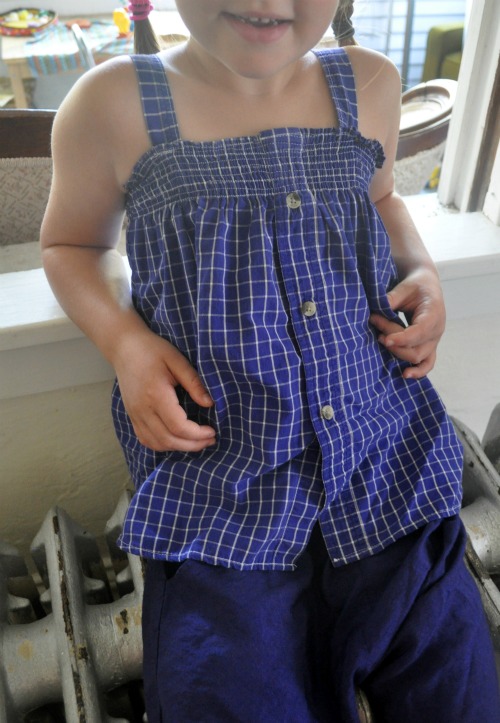
girl's check shirt made from men's shirt

Here is a little shirred top I made for my daughter from an old men’s shirt. When I started I was trying to make something more like this, but the yoke was a leeetle too tight. Luckily there was just enough length to cut it off and try something new.

That damn elastic thread everyone raves about seemed like the best bet for actually coming out with a wearable top in the end. I’ve tried it before, but there are so many conflicting explainations on how to use it–wind it loose, wind it tight, wind it not too loose and not too tight (that one is particularly helpful, thank you), pull it to gather, don’t pull it, iron it, steam it. Whatever. I already screwed up the shirt once, so I didn’t have much to lose by screwing it up again.

But hey! it’s not so bad.  I have no idea how I wound the bobbin (not too loose and not too tight–sorry) but it worked well enough. Definintly of the homemade varitey.  She likes it, but elastic thread is not all that pleasant against the skin–anyone have any ideas for lining shirring? Or have any horror stories about elastic thread?

pillow week: two

Wow pillows are crazy fast to make.  Even if you put a zipper in. Actually putting a zipper in takes less time than doing the overlapping fabric deeliboper I usually do. This pillow came from a skirt that I got at clothes swap looong ago. It was a fancy anthropologie skirt that never fit me (or the orginal owner) quite right. I think it looks much better as a pillow anyway. Now I’m going through my closet trying to find other clothes I can use. Keep your shirt on–I’m making anything I can get my hands on into a pillow this week.

tin can cover

This project is from an old issue of Cotton Friend, a japanese magazine that my husband brought back for me from Singapore.  These are incredibly handy and I have many more in the works: for all the crap little things in my studio and all the markers, crayons and glue sticks that are under the couch.  I thought you would like to make some too, so I whipped up a tutorial. Here you go:

Materials:
28 oz. tin can (if you have a different size can, just measure the height and circumference, add seam allowances, and the rest is the same)
linen, or other fabric
lining fabric
embroidery floss
glue (I used rubber cement, but plain white glue should do just fine)

Directions:

Wash your tin can and take off the paper.  Cut two 13″ X 4.75″ rectangles–one from linen and one from the lining fabric–and one 13″ X 1.5″ strip of linen.  Embroider the design of your choice on the fabric or leave it plain if you like. Place the two large rectangles together right sides facing, and sew around using a 1/4 inch seam allowance.  Leave a 2 inch opening in the middle of one of the short sides for turning out.  Clip the corners, turn and press (I like to press it so a little of the lining shows).  Sew the opening closed.  Fold the strip of fabric in half the long way and press.  All the way along one side clip almost up to the fold.  Glue the unclipped side to the inside of the tin can, then glue the outside.  Wrap the finished piece around the can and sew shut (I like my stitches to show, but you could of course use an invisible stitch).

I was planning on having a pdf file with embroidery designs you could download, but I’m not having much luck with that at the moment.  Until I figure it out here are pictures of the designs you can print out and use (you will probably have to resize them a bit). If you want to see these or any of the instructional photos more clearly, click over to my flickr site.

Edited to add: please click here and you can download both sets of designs for your own stylish, embroidered tin can cover.

drop me a line if you make one!

olaf

Meet Olaf. He is the answer to the question: “Can this outfit be turned into a soft toy?”  The pants were mine a long time ago and the shirt I picked up at a thrift store for a different project.  I should have taken a picture actually wearing the outfit before I cut it all up, but there was a big, gaping hole in the shirt in a very conspicuous spot. I wasn’t sure if the pants would work, but my trusty little machine sewed through all those layers with just a little pushing on my part (and no swearing!).  All the pockets still work and I may whip up a little polka dotted toy for Olaf to put in a pocket, but he may be to serious for that.