Archive for the ‘tutorials’ Category

how to make english toffee

This is my little bit for holidays at home.

English toffee was the first christmas candy my mom made each year.  After we were done with all the Thanksgiving leftovers, she would make a huge batch and stick it all in the freezer. And I would spend the entire month of December sneaking pieces of it thinking no one would notice. I think probably half was gone by the time Christmas rolled around! So now I make english toffee every year for Christmas and though I still eat my fair share I try to give most of it away.  The recipe below makes a smallish batch–enough for a nice gift or your own personal use–but it is easily doubled or tripled.  Don’t be intimidated by the long (winded) directions, this toffee is easy and quick to make, I just wanted them to be extra clear.

ingredients
2/3 cup butter
1/2 cup sugar
1/3 cup water
1/2 tsp salt
2/3 cup blanched slivered almonds
1/4 tsp baking soda
1/2 cup chocolate chips or 2 small chocolate bars
1/2 cup chopped pecans

you will also need
saucepan
candy thermometer
cookie sheet  (I used a small one, but the size doesn’t really matter)
a silpat if you have one, extra butter if you don’t

directions

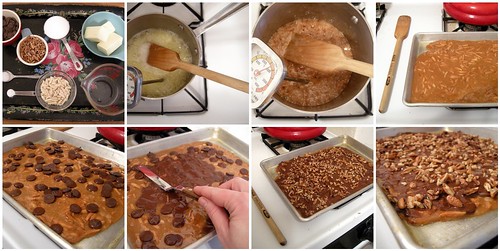
Before you jump right in, measure out all your ingredients so they are all ready to go. If you’ve never worked with boiling sugar before (or if you are prone to accidents) keep a small bowl of ice water next to the stove in case you burn yourself. Boiling sugar is super hot, so this isn’t one for the kids. If you have a silpat (and you really should get one–they are awesome) put in on your cookie sheet and you’re good to go. If not, butter your cookie sheet like crazy.

Now that everything is ready, put the sugar, butter, water and salt into your saucepan. Cook over medium heat, stirring occasionally, until it reaches 236 degrees Fahrenheit (soft ball) .  This will take a while and the chocolate chips are not there for you to snack on while you wait. The mixture will bubble up quite a bit.  It will stay around 200 degrees for longer than you think it should, but the temperature will shoot up quickly so don’t walk away. Make sure your candy thermometer is not resting on the bottom of the pan, but taking the temperature of the actual candy.

While you are waiting you can warm up the slivered almonds in the microwave. This will keep the candy’s temperature moving up instead of cooling down when you add them (but if you don’t have a microwave, you can skip it).

When the mixture is 236 degrees add the almonds. Stir constantly until it reaches 290 degrees (soft crack). The candy will turn a lovely amber shade and give off a nice, nutty smell. That when you know it’s done. I might have gone a tad too far with mine, but you’re not going to stop and take pictures while you cook.

Add the baking soda and stir.  Pour onto the prepared pan and spread it as best you can. Sprinkle the chocolate chips on top, wait a minute for them to melt and then spread them all over the top of the toffee. Sprinkle the chopped pecans on top of the chocolate and let cool.  You can speed up the cooling by popping the toffee in the freezer. When it’s completely cool break up into pieces and give away all that you don’t eat.
half eaten gingerbread man ornament

I made this half eaten gingerbread man last year, but I thought I’d post it again in case you are starting to freak out about how soon Christmas is (16 days). He’s super simple to sew up. I wrote up instructions and there is a pattern you can download too. If you’d like to see the other mutant gingerbread man I made click here and to know why I made them click here.

Plenty of you want a tutorial for the string of lights advent calendar, so look for that in a couple days. Now get off the computer and finish those christmas presents already.

happy thanksgiving

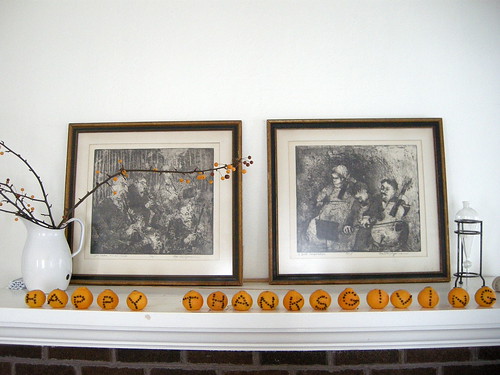
I have zero thanksgiving decorations, so I came up with this little project. It doesn’t really need any explanation, just push some cloves into some clementines and spell a word.  You could get all fancy with fonts and it might be good to sketch the letters on first. I just did it freehand (and I’m sure you can tell). Clementines have a thinner skin than oranges so it makes pushing the cloves in much easier. This is a great project for kids and a good spelling lesson to boot. My daughter is really into letters right now and  it went over big. I didn’t dry them so they won’t keep, but they still smell pretty. Now we just have to make some hand turkeys and we’re set!

woodland ornaments

It’s Handmade Holidays all month long at Sew Mama Sew (if you didn’t know already).  They, so kindly, asked me to be on their board and come up with a few ideas for their amazing blog.  After crossing out many bad ideas, I came up with these little plush ornaments. They are simple to make and you can find all the tutorials here: woodland ornament tutorials.  If you make one, be sure to show it off on the Handmade Holidays flickr pool! Only 33 days until Christmas.

post office bag tutorial

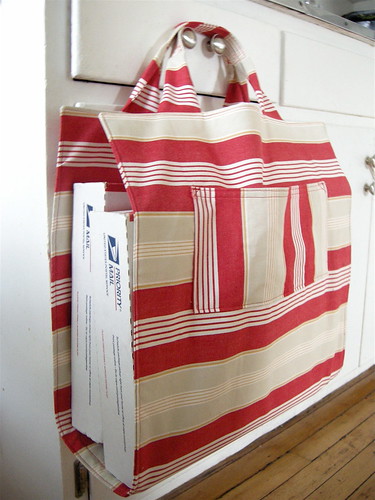
Now that I have an etsy shop I find myself at the post office more than ever. Along with all the packages I have to carry I have a stroller to push and a toddler’s hand to hold.  The packages are always weird sizes and never seem to fit in a paper bag, so I came up this handy dandy post office bag. It’s just a long piece of fabric with some handles and pockets, but it works like a charm. The pockets are sized to fit a long envelope and there is one on each side. I put my receipts, my stamps, and my custom forms in the pockets so they don’t get lost in the bottom of my purse or the diaper bag (which they usually do).  I figured since there are so many etsy sellers there must be a lot of you who have this package transport problem (kids or no kids) and so I wrote a simple tutorial for this super easy bag. It shouldn’t take more than a couple hours from start to finish. And if you make one drop me a line so I can see!

post office bag tutorial

materials

  • 1 1/2 yards heavy duty fabric (I used some home dec fabric I had on hand, but canvas, denim, corduroy, or even twill would work)
  • a little more than 1/2 yard interfacing (somewhat stiff)
  • thread to match

directions

CUT:

  1. two 18″ X 40″ pieces of fabric
  2. one 18″ X 40″ pieces of interfacing
  3. four 3″ X 18″ pieces of fabric for the handles
  4. two 7″ X 12″ pieces of fabric for the pockets

SEW:

  1. fuse or sew the interfacing to the wrong side of one of the large pieces (this will be the lining)
  2. with wrong sides facing sew each of the two handles together
  3. turn out and press
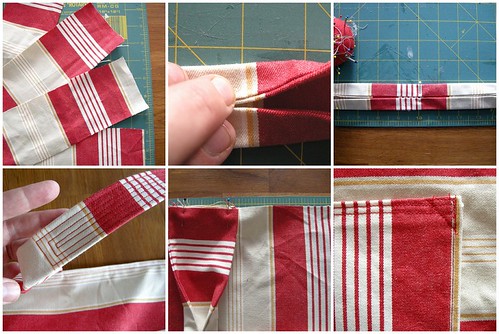
  4. find the middle of one of the handles and fold the long sides in to meet and pin
  5. continue the fold 4″ out from the middle on either side and pin
  6. do this to the other handle and press both
  7. your handles should have a 8″ folded part in the middle and the ends will still lie flat
  8. sew concentric rectangles on the folded area to anchor it down
  9. stop to admire your work
  10. take the two pocket pieces and fold the short sides in 1/4″ and press and 1/4″ again and press
  11. do the same on the top and bottom
  12. sew the across the top of both the pockets
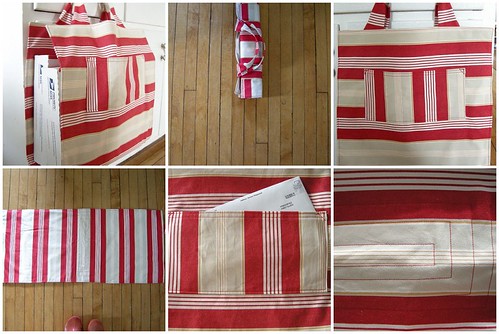
  13. pin the pockets 5″ inches from each short side of the outside piece.
  14. sew the pocket on and reinforce the top two corners (with an X or a triangle)
  15. pin the handles to end of the lining, right sides facing (you should see the fold line)
  16. place the outside piece on top of the lining right sides facing (pocket should be down) and sew all
  17. around with a 1/2″ seam, leaving an opening for turning out
  18. trim the seams, turn out and press
  19. topstitch all around
  20. create a bottom by stitching large concentric rectangles equidistant from both the handles
  21. that’s it! you’re done! off to the post office…

To see any of these pictures in more detail, please go to my flickr site. If there are any problems with this tutorial, please tell me . It turns out it’s much harder to explain how to make this bag than it is to actually make it!