happy homemade sew-along: day four
June 19th, 2014

It’s day four and today’s the day we tackle the tough part of this hoodie: the hood. Even though I’ve made this hoodie 4 times before, I always felt like I was attaching the hood incorrectly. The first thing I did when I got the English version of this book was to flip to the directions for the hood. Sadly, they were no clearer in English than in Japanese (which I don’t know). Well, after looking much more closely, I realized there was a typo:
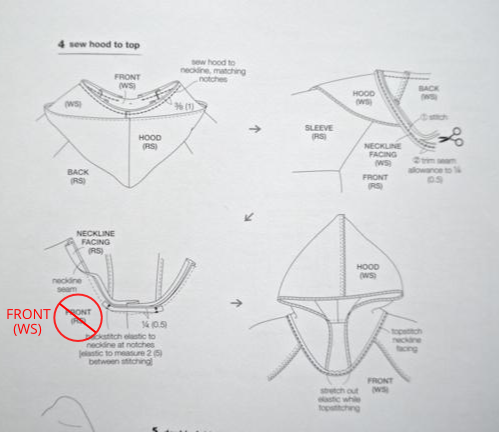
Where it is marked right side, should actually be wrong side. Little things like that make fiddly things to sew downright impossible! But now you know, so let’s start attaching the hood.

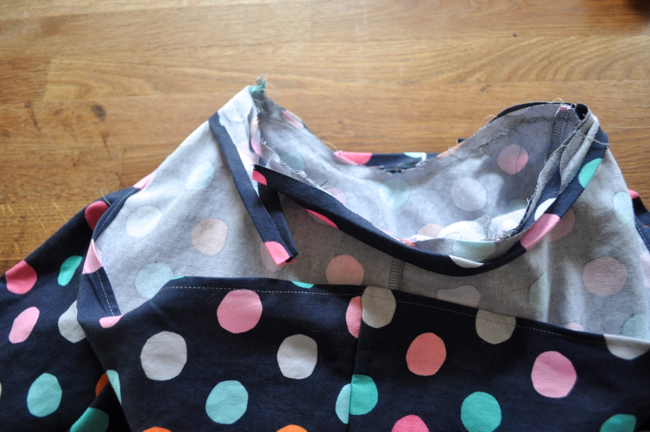
Pin the hood to the body of the hoodie with right sides together, making sure to line up the hood’s notches with the hoodie’s seams. The front parts of the hood will NOT meet. Sew.
Pin and sew the neck facing onto the hood, with the right side of the neck facing placed on the wrong side of the hood. The neck facing will be longer than you need. I like to sew all of it on, stopping an inch before they meet. Then I sew the neck facing together and then continue sewing it to the hood. Or you could do it the proper way and actually measure :)
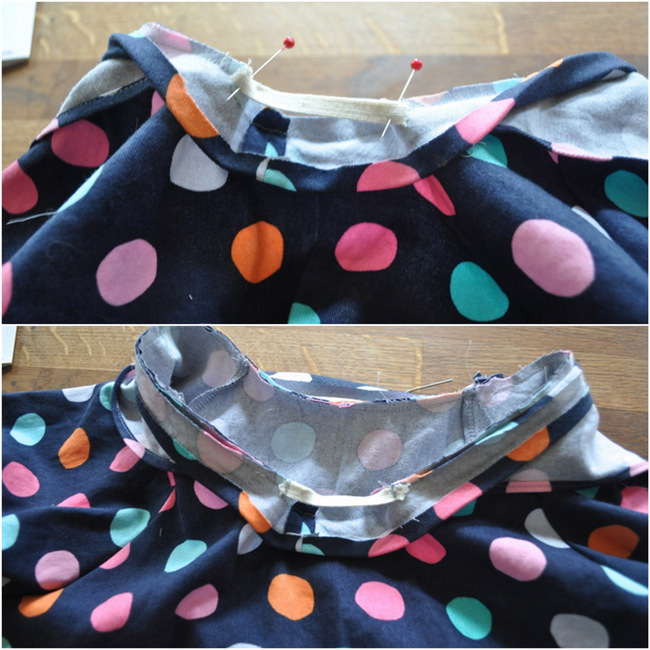
Pin and sew the 1/4 wide elastic (that you cut 2 3/8 inches long) to the front of the hoodie. The ends of the elastic should match up with the ends of the hood. Sew the elastic to the wrong side of the neck facing within the seam allowance. This is small and fussy, but it can be done.
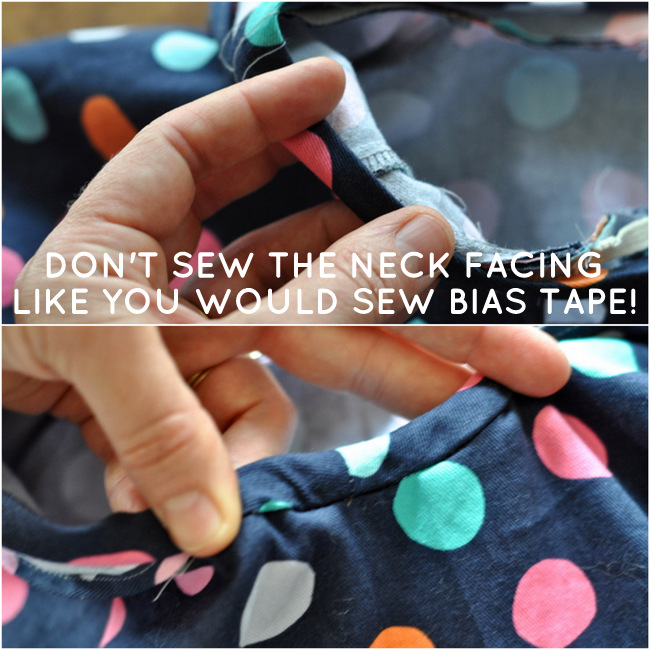
Now you need to fold over the neck facing and sew it down, stretching the elastic bit when you come to it. What you don’t want to do (and what I have done many times in the past) is fold the neck facing like you would double fold bias tape, with half of the facing showing on the right side and half on the wrong side. The photos above show what you should NOT do.
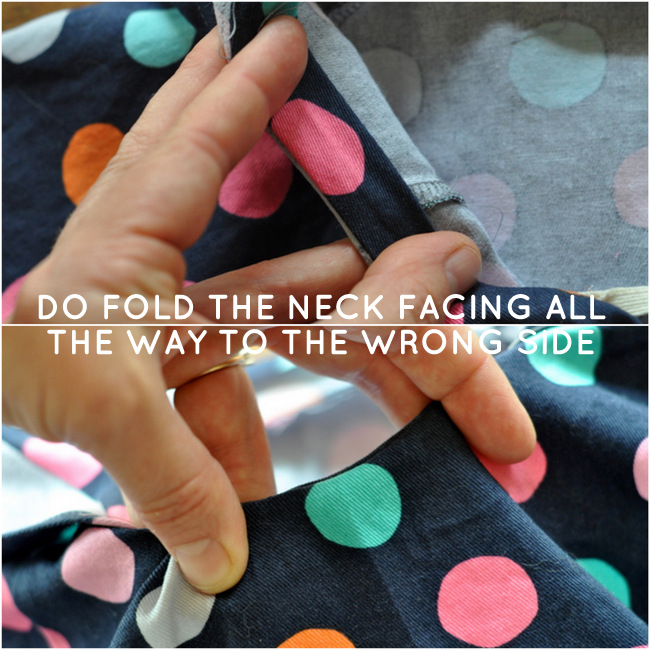
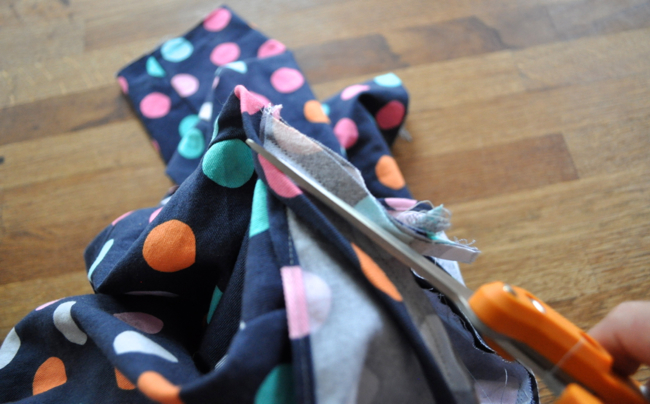
What you should do is fold the entirety of the facing to the wrong side and sew it down. Now that I understand what you are supposed to do, the original measurements for the neck facing don’t seem so insanely tiny (but I do still think it’s a little small). I cut out my neck facing wider and now it was too wide. Before I sewed it down I cut about 1/4 inch off, then folded the raw edge up and ironed again.
Now that you’ve figured out how the neck facing goes, it’s time to sew it down:
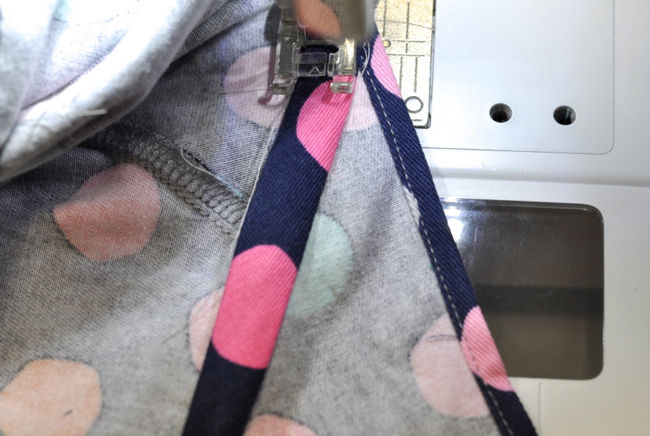
Sew along the edge of the neck facing, making sure the hood is out of the way (see above photo). When you get to the elastic bit make sure to stretch the elastic all the way so the neck facing isn’t bunching up anywhere.
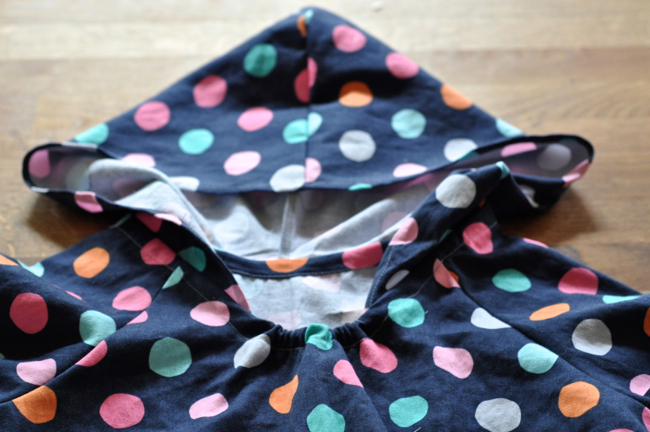
Voila! Well, voila after some seam ripping and angry mumbling. I’ve made this hoodie many times, but this step is always at least a little frustrating. So don’t get discouraged if it doesn’t go smoothly. Take a break, pat yourself on the back, and Cherie will be back tomorrow finishing up the hoodie! We’re almost done!!
See the rest of the sew-along posts here:
Announcing . . .
Where to buy the book
Hoodie Inspiration
Mixing it Up
Fabrics
What you’ll need
Schedule and Sew-along Prize
DAY ONE


Omg, I am so happy that you pointed out that typo. I thought I was going crazy… I couldn’t figure out what the book was telling me to do! Glad I waited for your helpful post ;-)
us Megs got to stick together :)
I knew this part would be tricky, but sheesh! There would have been so much more seam ripping and angry mumbling without your tutorial. As it is, the hood attachment needed only a moderate amount of swearing. Thank you! :)
I left out the photos of when I was seam ripping (and swearing). So glad I could help with yours ;)
How such a little piece of elastic give me so much trouble!? I seam ripped so much, I’m just going to have to leave it the way it is, that interfacing won’t take another round of ripping! So don’t look too close at the top stitching at the front of the neck. I just tell myself it is for a 4 year old, he won’t judge me! Is it possible to used store bought single fold bias as the interfacing for this project?
Thanks for the identifying that typo in the book!
I know. I had to rip my elastic out a few times before it worked. And no, he won’t notice–and neither will anyone else!
it’s so cute!!!! I love that print. Good thing you got that typo.
[…] Day 4, and today we’re tackling the trickiest part of constructing the pull-over. Meg is going to take us through attaching the hood to the pull-over and finishing the neckline. My […]
[…] See the rest of the sew-along posts here: Announcing . . . Where to buy the book Hoodie Inspiration Mixing it Up Fabrics What you’ll need Schedule and Sew-along Prize Day One Day Two Day Three Day Four […]
It’s looking great but I have a question about the neckline seam allowance once the facing is sewn on – did you trim the SA? It looks like the instructions say to do that but I’m not completely sure. Thank you so much for clearing up that typo too..!
Yes, trim away!
I’ve had the Happy Homemade book sitting on my shelf for a few months now, unused. I am so glad I found out about the sew along today and was able to whip up one of these pullovers for my daughter. Thanks so much for your fantastic tutorials! Hope you’ll be doing more sew alongs in the future!
[…] make this top, it all would have become clear. Turns out that this very question is addressed in Meg’s post this week over at Elsie Marley about the same type of neck facing on the Happy Homemade Pullover […]
[…] Mixing it Up Fabrics What you’ll need Schedule and Sew-along Prize Day One Day Two Day Three Day Four Day […]
[…] Mixing it Up Fabrics What you’ll need Schedule and Sew-along Prize Day One Day Two Day Three Day Four Day […]
Hi!
I also made the hood bigger like you offered but as a result I have something like a beak sticking out ;))))))))))))) what did I do wrong?
– See more at: .//happy-homemade-sew-along-day-two.html#sthash.zHbddlql.dpuf
Hi!
I also made the hood bigger like you offered but as a result I have something like a beak sticking out ;))))))))))))) what did I do wrong?
[…] Mixing it Up Fabrics What you’ll need Schedule and Sew-along Prize Day One Day Two Day Three Day Four Day […]