A year or so ago I was invited to join a facebook group filled with mothers, bloggers, sewers, bakers, and makers of all types. The idea behind the group was to have a place to talk about blog things, get support when we needed it, and have a sounding board for new ideas. The group is absolutely amazing, and the women in it doubly so.
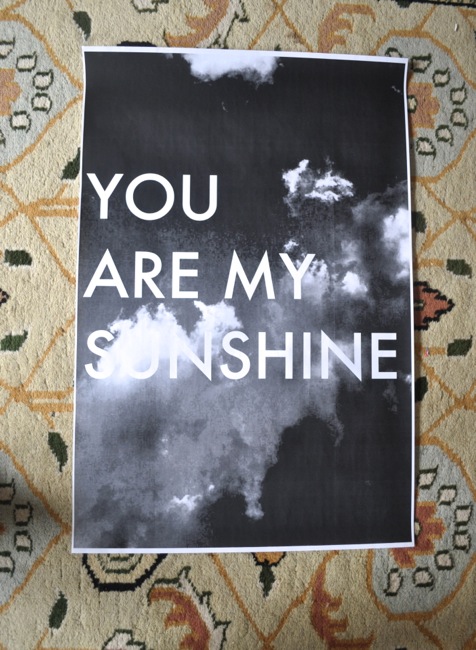
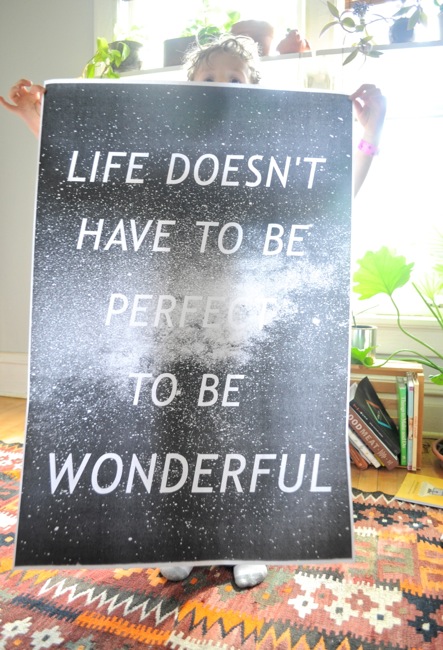
Two of those women, Carla and Lacy, are pregnant and due any day now! We’ve come together to throw a kind of virtual baby shower. Some people make decorations, some people make the food, some make gifts, and then we send it all to the pregnant ladies. It’s like an awesome party via post. I signed up for decoration duty. Right away I knew I wanted to make large-scale posters. We peeked in their pinterest boards and discovered Lacy was digging a cloud theme, and Carla was more for the moon and stars.
(more…)