Posts Tagged ‘pants’

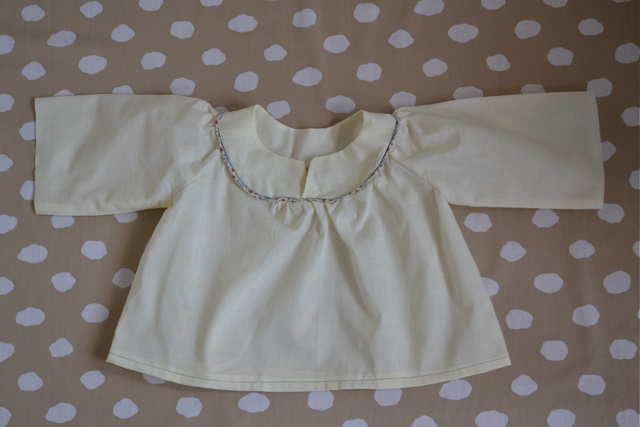
guest post: tutorial for a cuffy outfit

I want to welcome Sophie from Roubidou as our first guest poster this week! I have been watching her sew tiny, beautiful clothes all through her pregnancy: quilted jackets and fuzzy vests and amazing ensembles! Even though she was very, very pregnant, she agreed to write up a tutorial for us. And wow, what a tutorial it is! A cuff is a lovely detail and now you can put it on a shirt, a jacket, a pair of pants, or all three. After you’ve finished reading the tutorial she made, go have a look at the lovely baby she just made! Congratulations Sophie!
* * * * * * * * * * * * * * * * * * * * * * * * * * * * * * * * * * * * * *

Hello dear Elsie Marley readers,

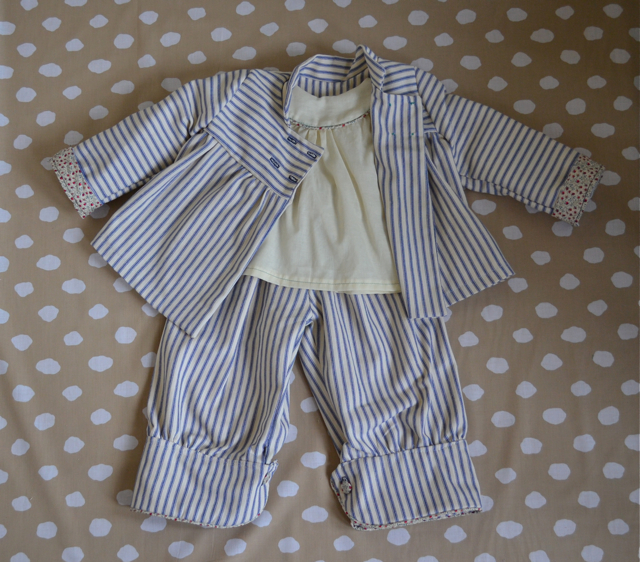
When Meg asked me to do a little tutorial for KCWC I was pleased as punch not only for an opportunity to be a guest on one of my favourite blogs but also to be part of this autumn’s sewing frolic after all (our daughter is supposed to arrive on the 10th). I sewed the outfit to introduce three slightly different types of cuffs and hope you can follow the instructions without too much effort. I’m a self-trained dilettante so the tutorial below is merely what worked for me.

Happy KCWC,

Sophie

* * * * * * * * * * * * * * * * * * * * * * * * * * * * * * * * * * * * * * *

Shirt:

1. Sew the shirt as indicated by your pattern ignoring the instructions for the sleeve finish. Look at the given seam allowance and the sleeve finish method of the pattern, calculate the length of your cuff plus seam allowance to determine how much you’ll shorten the sleeve before adding the cuff and placket. To save fabric you could do this before cutting the fabric. If you have your little client ready and willing have her/him put on the garment to tailor the sleeves according to his/her measurement.

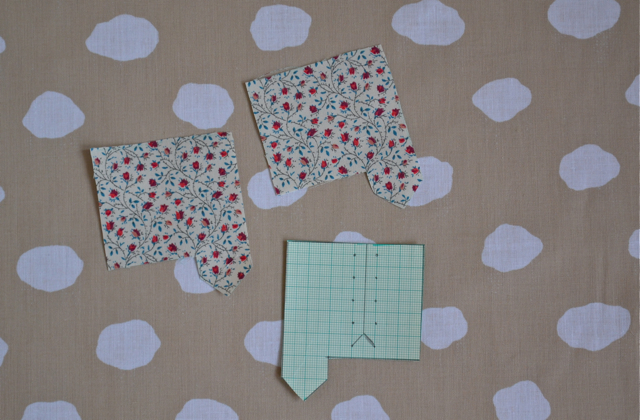
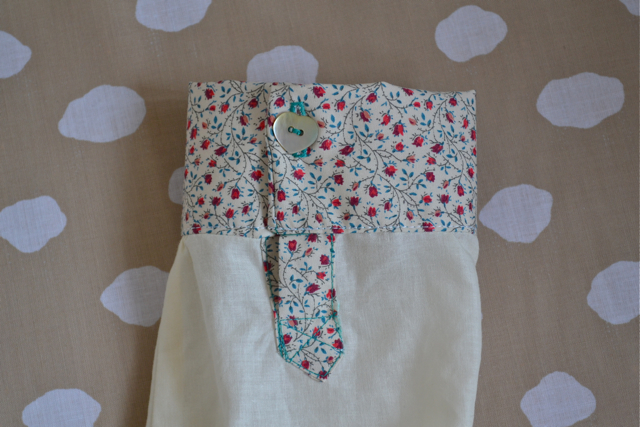
2. Make a pattern for you placket and cut out the placket twice (you’ll want mirroring plackets unlike the ones in the photo).

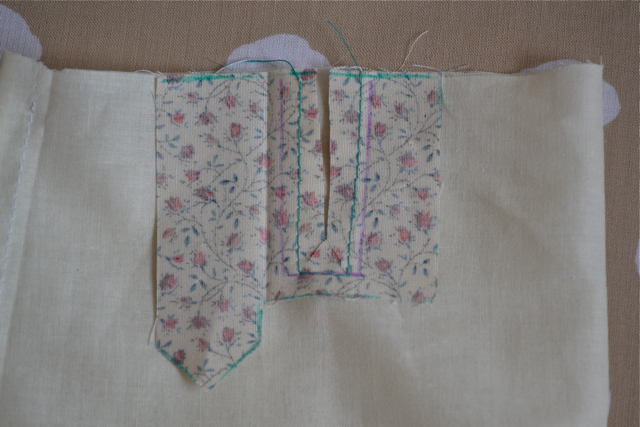
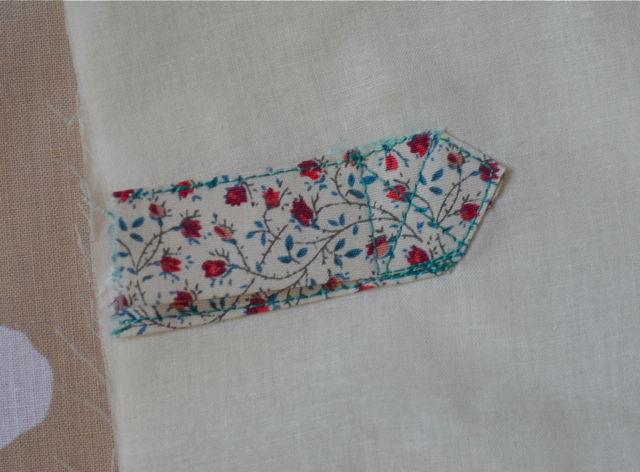
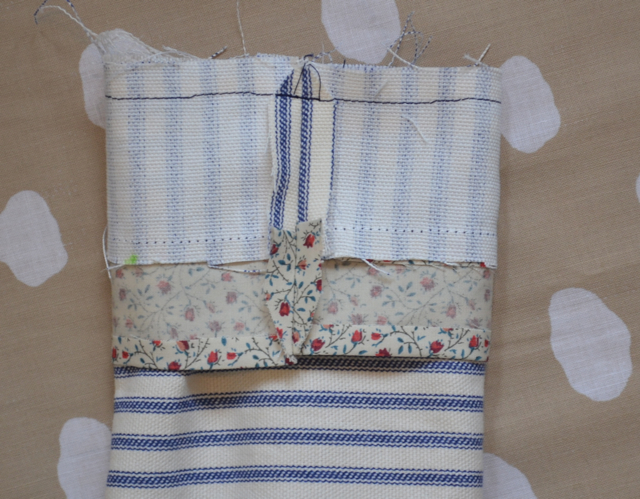
3. Place the placket with its ride side onto the wrong side of the sleeve and sew a little rectangle. Slash through the placket and sleeve down centre right between the stitches and carefully clip to the corners of the rectangle.

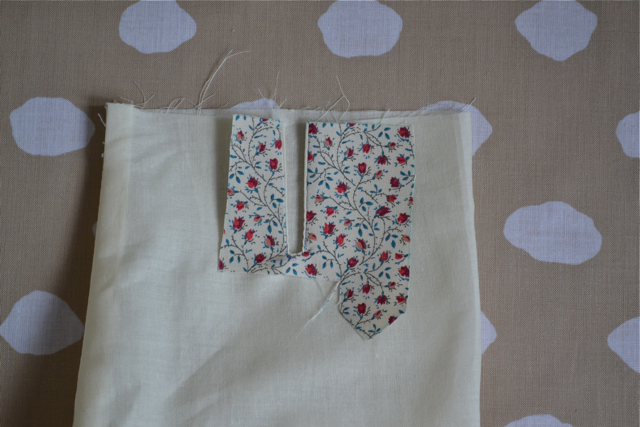
4. Turn the placket to the right side of the fabric and press. Now it’s likely to become a bit finicky. I very much prefer sewing for kids since it is so much quicker, pieces are easier to handle and you need less fabric. But sewing this placket, especially for a size 2 shirt, I wished I was sewing an adult sized shirt. To help you through this fabric origami it might be good idea to have a ‘real’ shirt with a placket lying next to you for visual guidance.

5. Fold back the long edge of the shorter side of the placket and pin in place. Then sew the folded edge in place stopping at the top of the gap. Tie the thread ends securely on the wrong side.

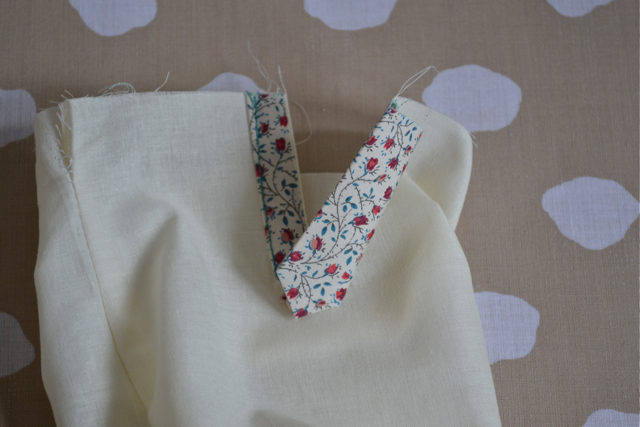
6. Next, fold the other side of the placket across the shorter side and press under the long edge. Fold back so that the pressed-under edge is on the sewing line and pin in place. Now, fold under the top pointed end,and press. Sew the long folded edge and make sure the underside of the placket is not caught in the stitching. Stitch an X at the end of the placket. Finish by tying the thread ends on the wrong side.

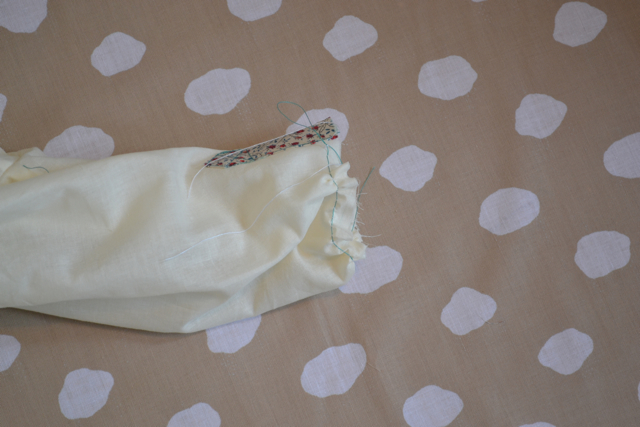
7. Now, gather the sleeve, stitching along the sleeve line with the longest stitch available on your sewing machine. Pull on the threads to manipulate the sleeve.

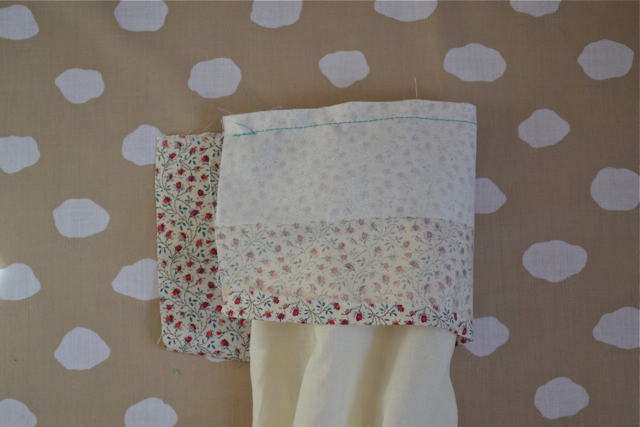
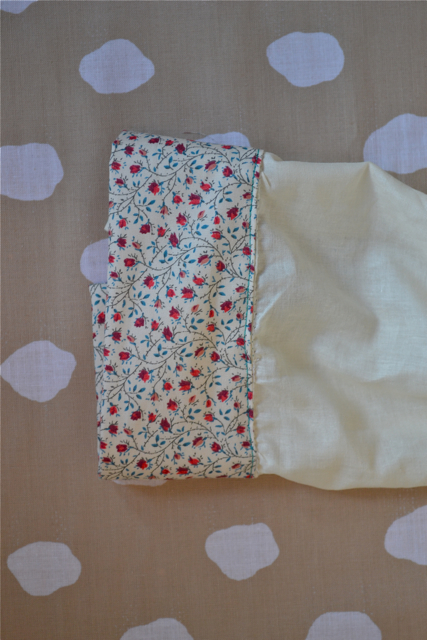
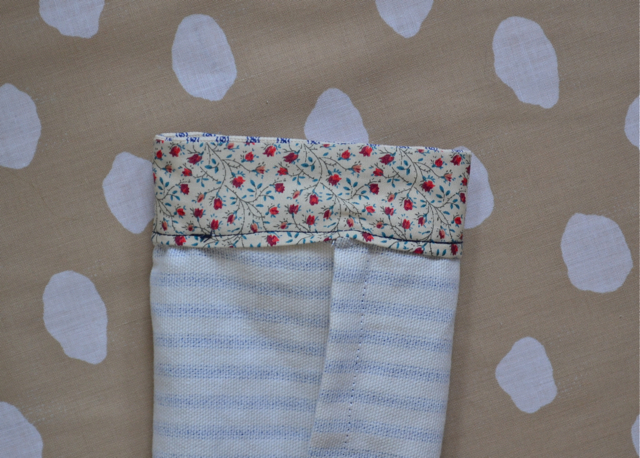
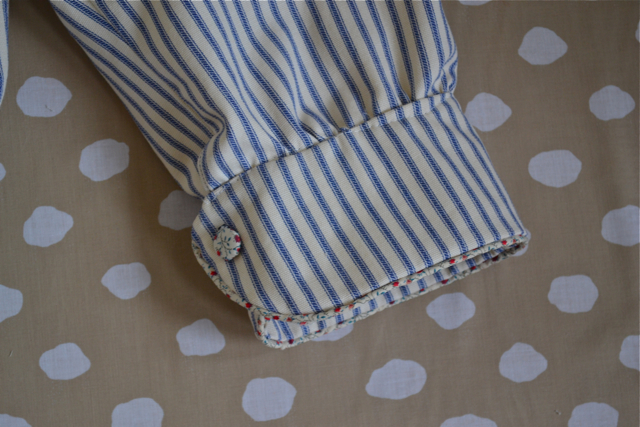
8. Cut out the cuff in the desired size. I used a one-piece cuff cut from the fabric in one piece and applied fusible interfacing to the half of the cuff that will be the upper cuff. Fold the seam of the non-interfaced side and press. Next sew the cuff onto the sleeve, right side to right side and trim the seam allowance. It’s important that you have an overlap as large as your seam allowance on both sides.

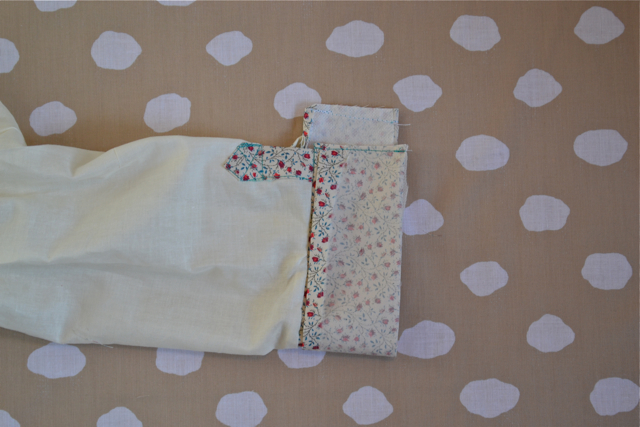
9. Fold and press the cuff to itself, right side to right side, so the folded side of the cuff comes to the sleeve-to-cuff seamline. Sew the ends in line with the two openings, cut the seam allowance, and press the seams open.

10. Trim, turn and press the cuff to the right side. I sewed the folded under cuff in place by machine, but if you want an invisible finish for your could,  hand stitch the folded edge on the inside with a blind-stitch or a slip-stitch.

11. Make a buttonhole on the upper side of the cuff and sew a button on the underside of the cuff. Repeat for the other sleeve.

Jacket:

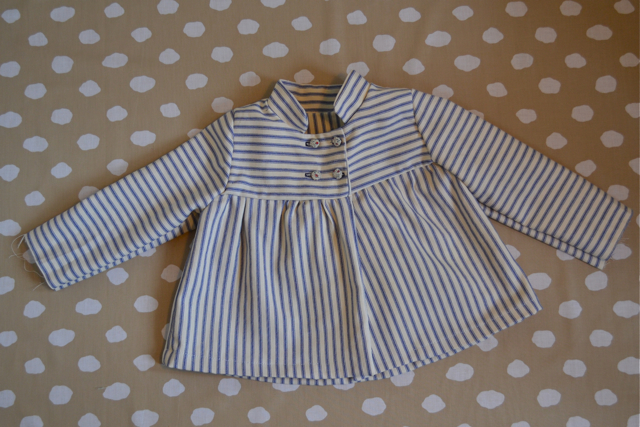
1. Sew your jacket bearing the same alterations in mind as with the shirt.

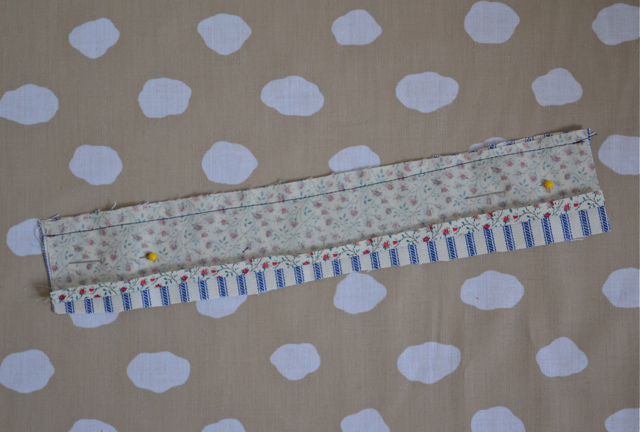
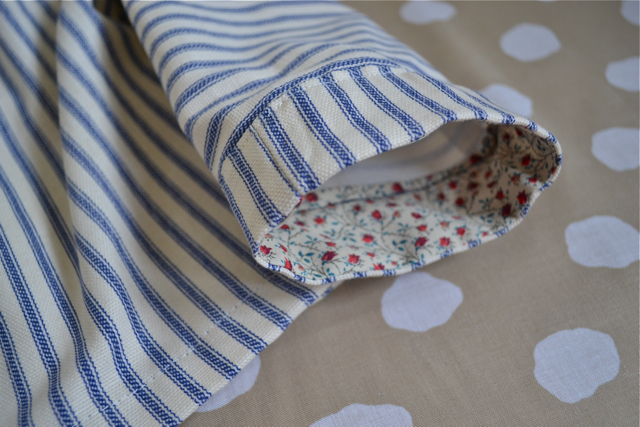
2. Now on to the band cuff. Cut the cuff in the desired size, you’ll have two pieces of different fabric per cuff. Since the outside fabric is already thick I didn’t use fusible interfacing, depending on your fabric you might want to apply interfacing to the upper cuff. Pin the two pieces together, right sides facing, and turn under a seam allowance on the under cuff and press. Stitch the lower edge together. Trim and press open the cuff. 


3. Then sew the short side ends together, trim and press again. 

4. If you want to gather the sleeve before sewing on the cuff, do so now. Then sew the sleeve to the upper cuff, right sides facing. Trim and grade the seam. 

5. Press the seam allowance towards the cuff. Turn the cuff inside along the foldline, wrong sides facing. On the inside of the sleeve sew the under cuff in place either by machine or handstitch.

6. Repeat for the other sleeve and that’s it. 

Pants:

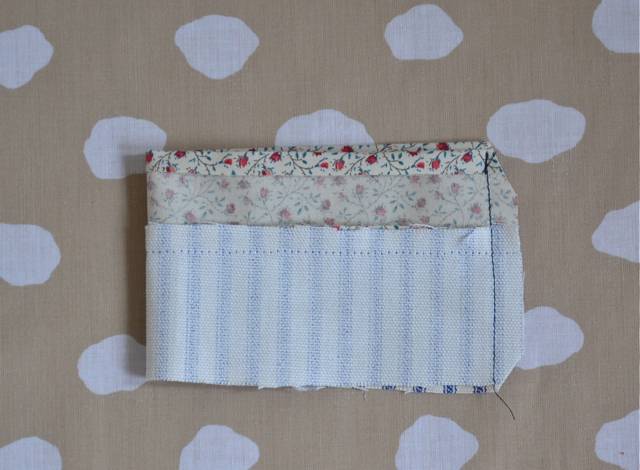
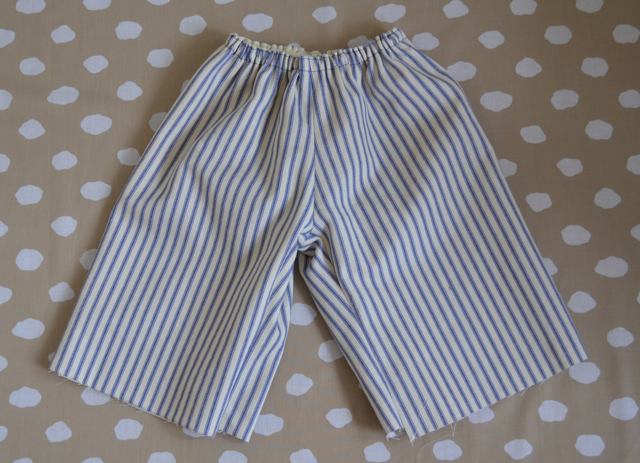
1. This cuff is sewn very similar to the shirt cuff. The main construction difference is that this is a lapped cuff which is used for bound or faced openings. I didn’t use any of these openings since I lined the pants and had my raw seams of the opening sandwiched between the lining and the main fabric. With a lapped cuff you’ll have to sew the cuff onto the knee sleeve with an overlap where the button will be. Sew your pants bearing the same alterations in mind as with the shirt

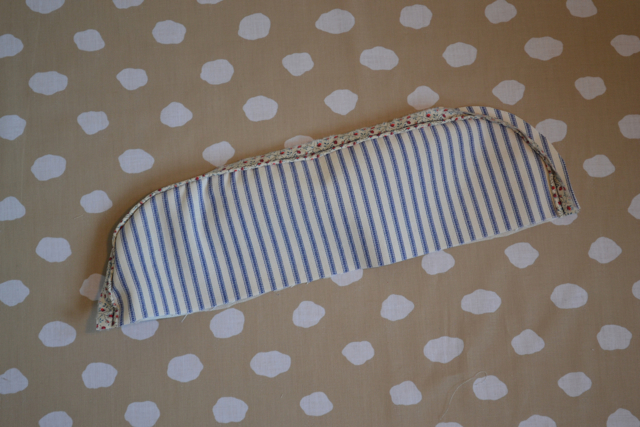
2. Now to the cuff. Start by sewing a line of piping (with your zipper foot) long enough for two sleeve cuffs. Then cut the cuffs in the desired size (i simply used a cereal bowl to trace the round edges). You’ll need four pieces altogether, I used the same fabric inside as outside in order not to distract from the piping. Pin the piping to the right side of one sleeve cuff. Stitch close to the stitching line on the piping, sewing with your zipper foot.

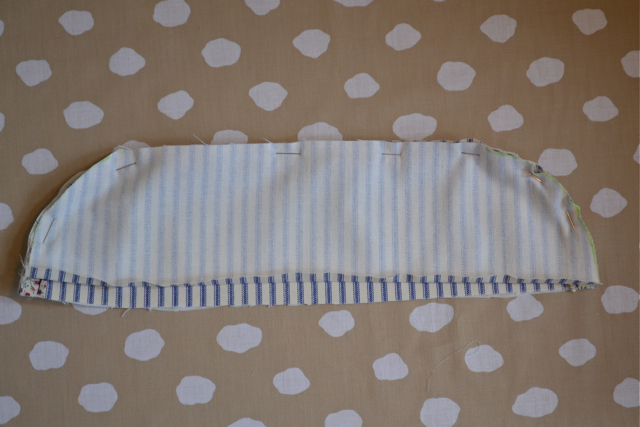
3. Turn under a seam allowance on the under cuff and press. Place the under cuff over the piping, right sides facing an sew the outer line of the cuff close to the previous stitch and the piping again with your zipper foot. Trim, turn and press the cuff.

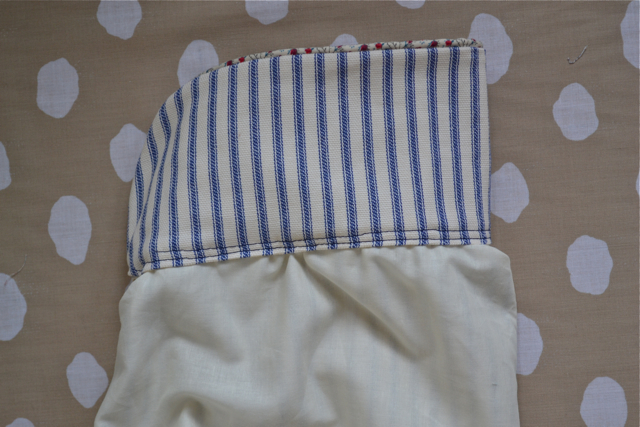
4. Now attach the cuff to the knee sleeve as you did with the shirt but leave a seam allowance on one side and an overlap (long enough for your button) on the other side. Sew the cuff to the knee sleeve as you did with the shirt. Fold and press the cuff to itself, right side to right side, so the folded side of the cuff comes to the knee-sleeve-to-cuff seamline. Sew the shirt end in line with the opening and trim. Sew the overlap end along from the knee-sleeve to-cuff-seamline and then down to the cuff. Clip the corners and press the seams open. Push to the right side and finish the edge of the under cuff either by hand or machine.

5. Make a buttonhole on the upper side of the cuff and sew a button on the underside of the cuff. Repeat for the other knee sleeve.

And ready is a cuffy outfit.
kcwc spring 2011: day two

rockin the fancy pants

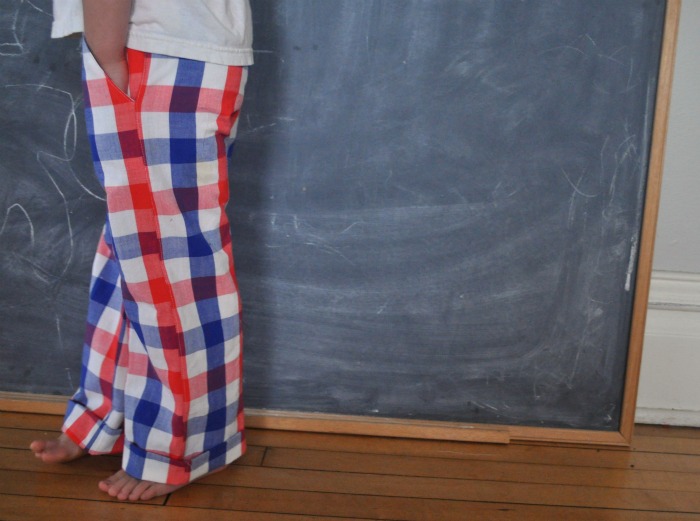
The lovely ladies from my craft night came over last night for some beers and a little sewing (the two go together right?). If it hadn’t been for them I would have given up after the first hour of trying to rethread my serger. Seriously. Who designed that damn thing? But they saved the day! And I was able to turn a stained tablecloth into some rockin pants.

plaid pants side view

I used the same pattern that I did for these pants and these shorts. Except I skipped the back pockets and added cuffs. You are going to see a lot of this pattern this week, because my son likes it and my daughter too. It’s from Happy Homemade Vol. 2, which I can’t recommend enough (if you are down with making patterns written in Japanese). I’ve made a ton of clothes out of it and they’ve all turned out well and been worn a lot.

day two of kcwc from the flickr group

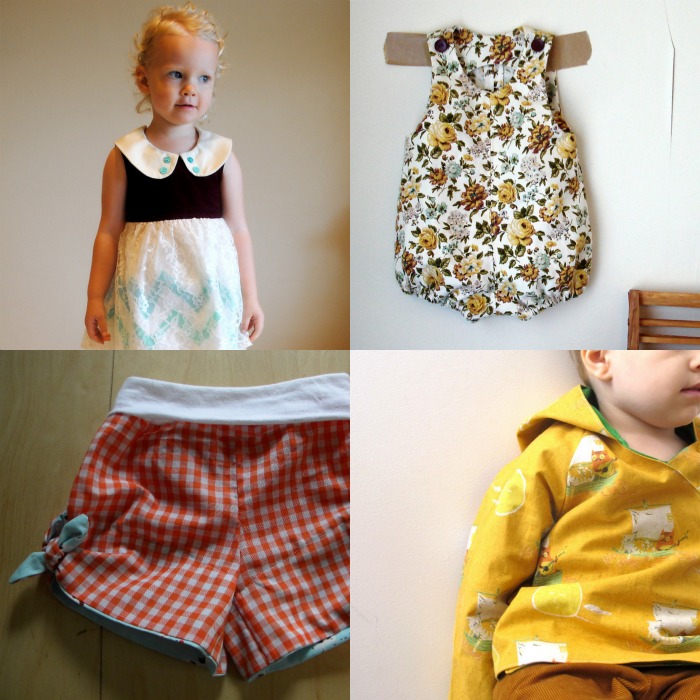
1. lace dress refashion 2. 008 3. 006 4. …went sailing by ‘wrap’ top

And look at what you guys have made! Adorbs. Obviously I’m partial to my knot shorts pattern, but you have to admit they are pretty darn cute in gingham. There is so much good stuff in the flickr group already and day two isn’t even over yet! You guys rock.

kcwc: day three

Sorry, little behind schedule today because I went out with my wonderful husband to celebrate our anniversary last night, but I’m up an caffeinated now, and the winners of the big butt baby pants and the toddler back pack patterns have been announced!

Sometimes you don’t need anything fancy you just need a plain old pair of pants. These are made with some nice, heavy wide wale corduroy and I used the same pattern as these shorts I made, only longer. Of course they are too long and too big all over really, but the boy grows like a weed, so they might fit at the end of the winter. Still, he loves them (hence all the wrinkles) and now says gray is his favorite color–wonder who he got that from?

For today’s giveaway Liesl from Oliver + S has kindly offered their new Music Box Jumper pattern! I think everyone who sews children’s clothes is crazy for Oliver + S patterns. And how could you not be? They are beautifully designed, well written, and come with their own paper doll!  The purl bee recently showed off a version of the Music Box Jumper in corduroy (liberty corduroy!) and it couldn’t be more perfect.

To enter the giveaway today, I’d love it if you tell us something about an Oliver + S project you’ve worked on or a story you have about working with patterns or even what has caught your eye in the flickr group so far. Good Luck!

****************************************************

The winner IS

#42: UK lass in US

Congratulations!

*****************************************************

kcwc: day two

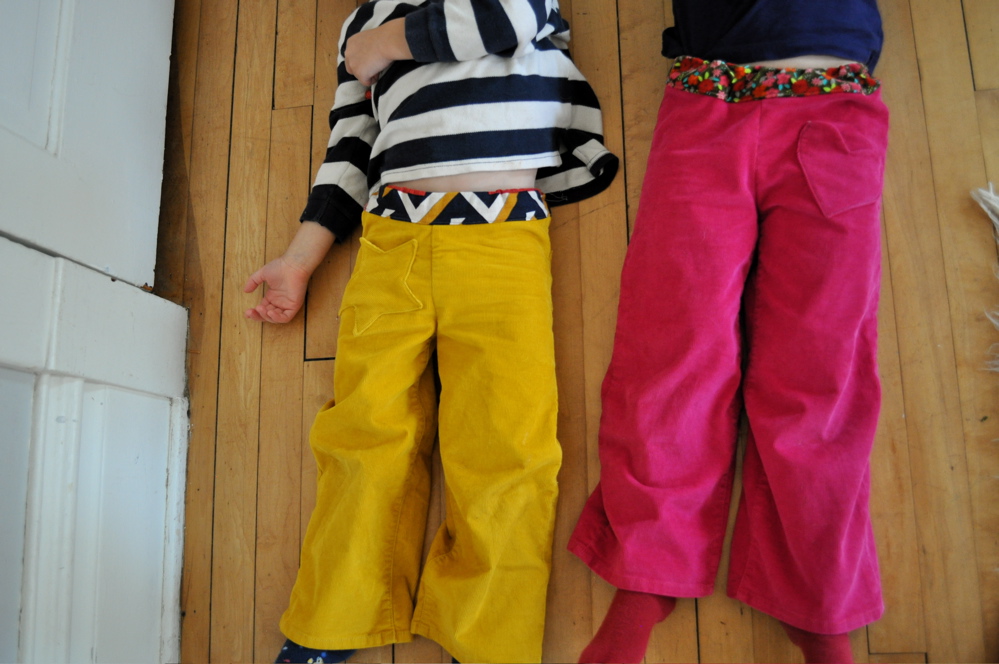
I got these two pairs of PINK! and YELLOW! cords at the gap this summer for 3 bucks each and knew right away I wanted to turn them into pants for my kids. Last year I made pants for them out of my husband’s old jeans (sort of like this) but the rise was too low and they never wore them–my son called them, without any malice, his “falling down pants.”

I wanted to get the fit right this time, but the stinkers were sleeping when I made these so I got all fancy with the pockets while I waited. There are two patch pockets on the back of each pair and a little pocket in front–a star for my son and a heart for my daughter.  When they tried them on they both complained that the pocket was too small. Wouldn’t you be excited to have a star pocket on your pants? Whatever. They fit.
I used a pretty bit of printed corduroy for the elastic casing on the pink ones and this crazy awesome vintage scrap I had for the yellow pair. This is a super easy way to make use of those jeans you never wear, but can’t get rid of for some weird reason. Cute recycling. My friend Mary Jo over at Five Green Acres put a little upcycling twist to kids clothes week; check it out if you are making big clothes into small clothes this week.

Made by Rae Giveaway!

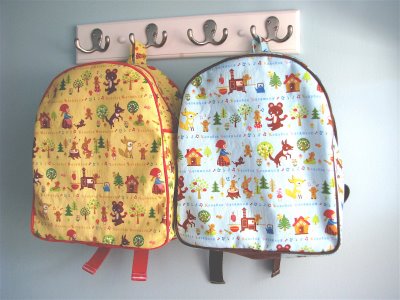
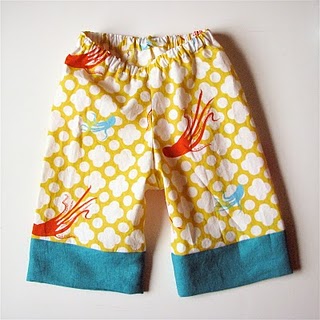
Today’s giveaway is from the fabulous Rae from Made by Rae. She is hilarious and down to earth and a damn fine seamstress. She kindly offered up two patterns for kids clothes week: the big butt baby pants and the toddler backpack. Both patterns are PDFs, so you could even add them to your list for this week (ha!). Just tell me which one you would rather have in the comments and I’ll choose two winners! The toddler backpack is full of nice details: pockets and piping and padded straps and little loops for hanging. And the big butt baby pants, while also being extremely fun to say, are versatile and useful and super cute. Decisions, decisions.

****************************************************

The winners are

big butt baby pants: #10 Shannon

toddler backpack: #55 Stephanie from neuroses galore

Congratulations!

*****************************************************

kcwc fall clothes inspiration and tutorials

I’m going to post a round up each day this week of inspiring handmade clothes and tutorials for fall and winter things too. The schedule should go something like this:

  • monday: fall and winter clothes
  • tuesday: coats, hoodies, sweaters
  • wednesday: warm things for baby
  • thursday: hats, mittens, scarves
  • friday: halloween costumes

If you have a tutorial that you particularly love and it fits (pretty much) into one of the categories above you can email me (elsiemarleyblog@gmail.com) and I can try to fit it in the post or you can save it and put it in the comments on the day of the post-subject it fits under. Get it? I’m trying to keep it so we can all use these inspiration and tutorial posts as reference next week when it’s so late we have to choose between thinking and sewing. So tell us all the awesome clothes tutorials you know in the comments and email me the rest. And if you haven’t signed up yet, what are you waiting for?

beautiful handmade fall and winter clothes


1. Untitled, 2. birthday party dress, 3. flannel pants, 4. SOLD Funky Fall Green Repurposed Wool Sweater 12 months, 5. pants pants pants pants, 6. check tunic dress, 7. Puppy pockets, 8. Green Fleece top for my daughter, 9. Snow and Holly bloomers

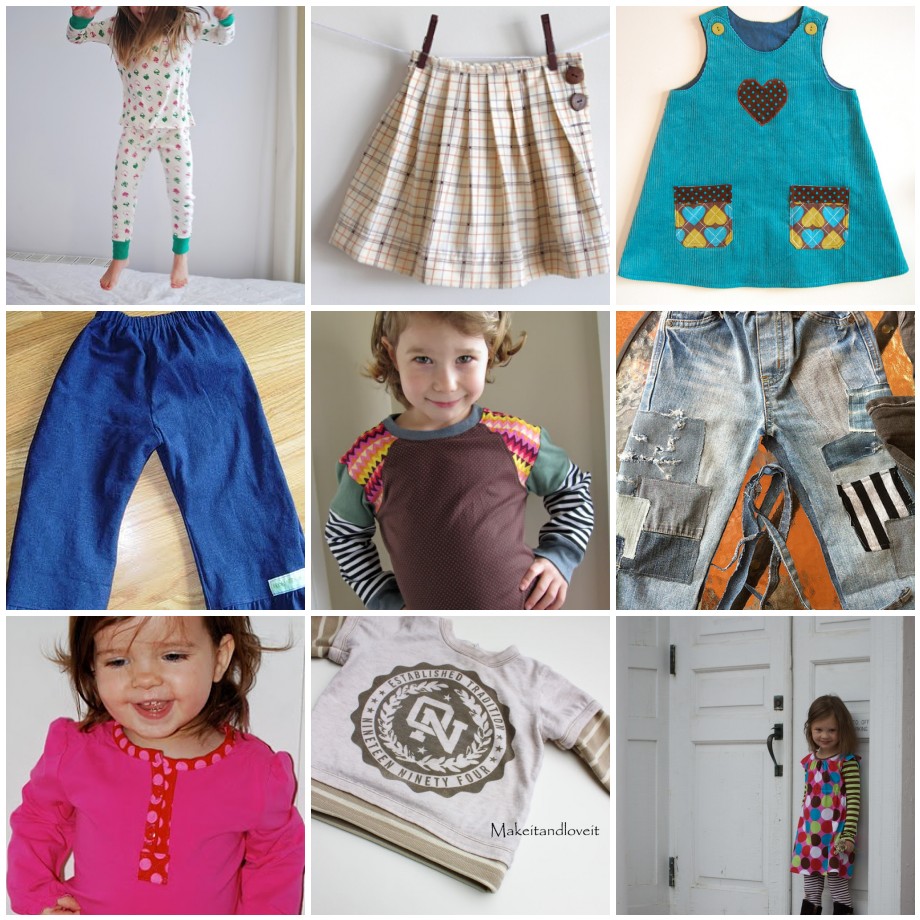
fantastic tutorials for fall and winter clothes


ringer shirt pjs (made with her own tutorial), pleated skirt, winter jumper, fleece lined pants, pieced shirt, patch jeans, henley shirt, short sleeve to long sleeve, go to dress