Posts Tagged ‘diy’

baby shower

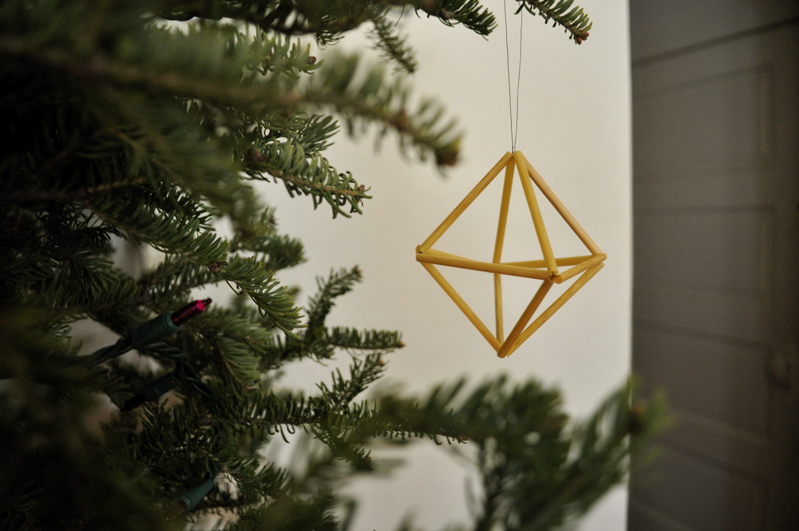
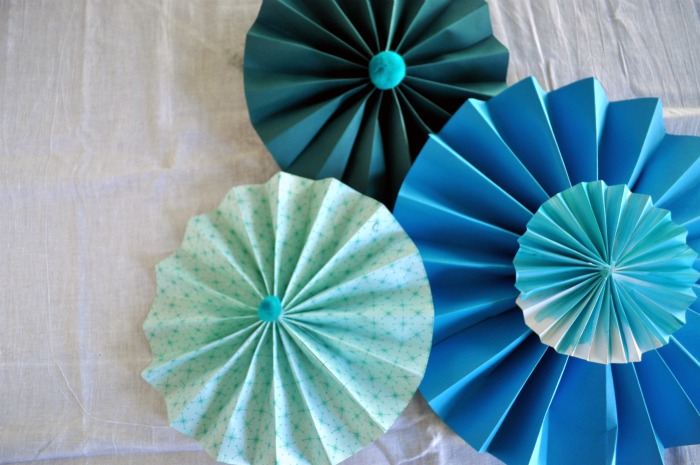
a few weeks back my friends and I threw a baby shower for our dear friend who was about to pop. She has since popped (!) but I thought I’d share a few of the things I made for the party. The floofs [above], as my daughter called them, were by far my favorite thing to make. There are many tutorials floating around for them–and many names–but I found this method to be the easiest.

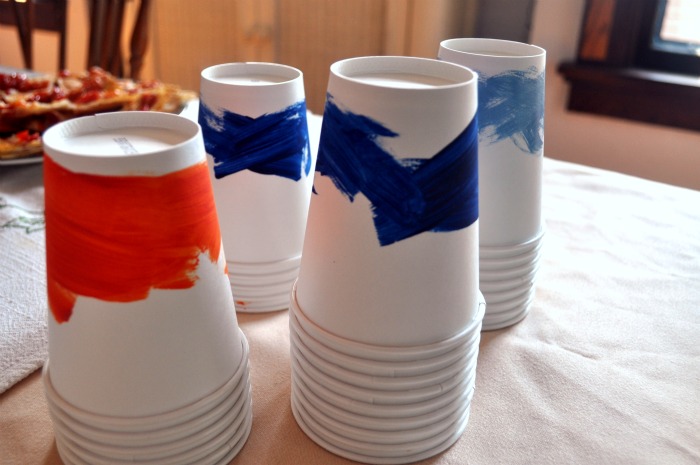
You might recognize these painted cups from a design sponge tutorial a while back. I did exactly what they told me to do and pretty much copied their color scheme to boot.

While I had the paint brushes out, I slapped a bit of paint on some cardstock. When the paint was dry I cut circles out of the painted paper. Then invited a friend of mine over for wine and projects, so she could write (with her beautiful handwriting) all the potential baby names our friend had come up with.  We glued them together with a bamboo skewer inside and called them cupcake toppers. I thought they turned out nicely–baby shower-y, but not goofy.  And don’t worry the baby is not named Moellendorf.

I made a few desserts too. They both were less than stellar because of the oppressive heat and humidity, but the lime curd cupcakes up there were very tasty–even if they did look a little worse for wear.  All in all, it was a very nice party. No horrible torture-the-pregnant-lady baby shower games, just a table full of delicious food and a house full of lovely ladies. Tomorrow maybe I’ll show you what I made for the baby..
geometric straw ornament tutorial

geometric straw ornament

a lovely geometric straw ornament

This is a traditional eastern european ornament and garland. The shape is simple, but a little tricky the first time you make it. After you get the hang of it many three dimensional geometric shapes are possible. I think it makes for a nice modern, but still natural christmas ornament. Like the other tutorial I used straw for, this one can of course can be made with plastic or paper straws, but if you would like to use natural straws, I found mine the at the imagination childhood online shop.

materials for geometric straw ornament

materials

  • natural straw
  • button thread (or other strong thread)
  • yarn needle

directions

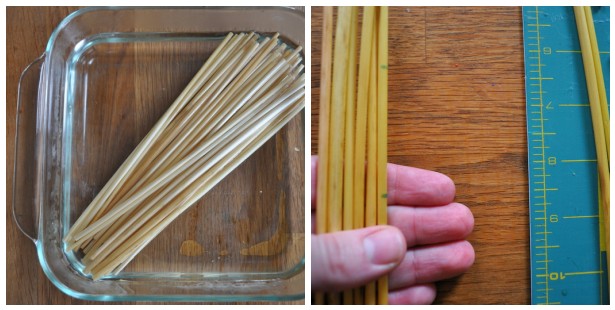
First you need to soak the straws and cut them into 2inch pieces. I explained this in detail in my tutorial for a straw and pompom garland.

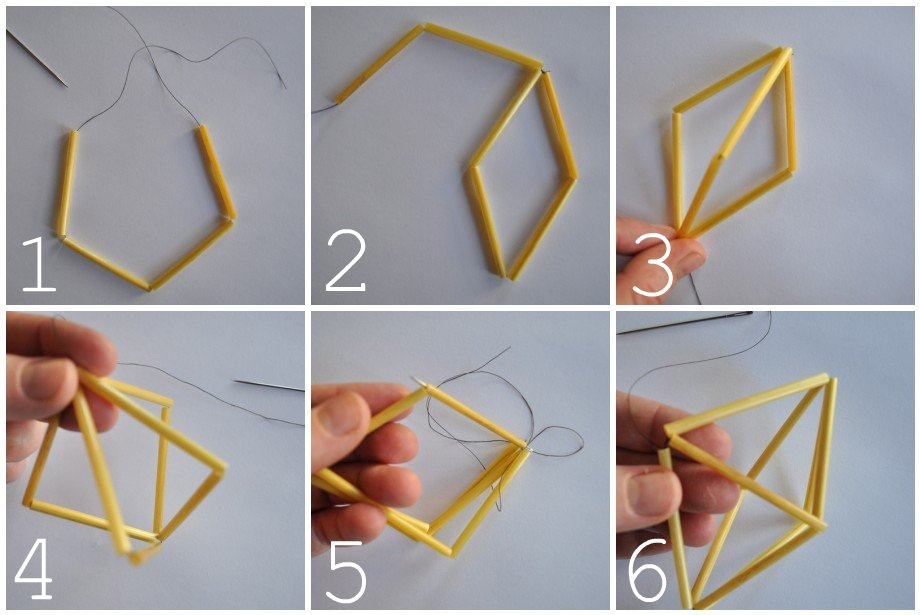
1.Take a piece of thread about twice the length of your arm and thread the yarn needle–no need to knot it. String four straw pieces almost to the end of your thread. Pull the threads until the straws meet, but don’t pull too hard or you will split the straws. Then tie a square knot (that’s the plain old kind).  You can trim the end, but don’t cut the working thread.

2. Now pull the thread through two straw pieces and

3. secure them at the opposite end.

4. Thread two more pieces and tie at the top (the opposite end you just strung them from)

5. Take your needle back through one of the straws, so it comes out in the middle.

6. String one straw at a time securing it where the next straws meet. Do this four times and tie a knot.

Trim all your threads and decide which way you would like it to hang. Loop your thread at the top point and tie it together. Now hang up that nice looking ornament you just made.

geometric straw garland on a picture

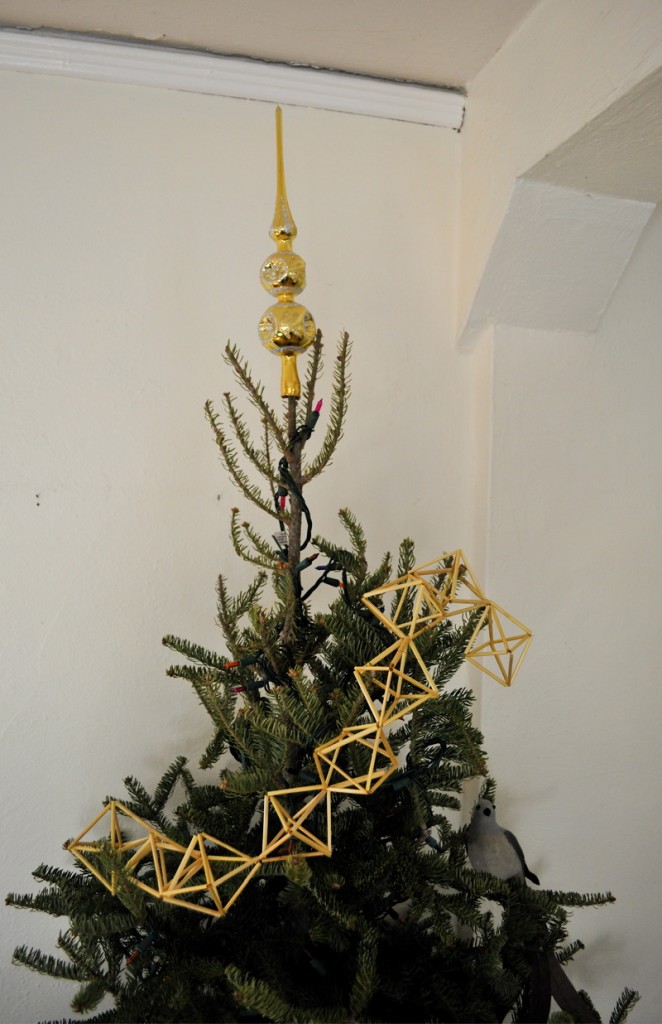
You can keep going and make a double ornament, or keep going and going and make a whole garland! If you do, I would suggest making them one at a time and then tying them all together. Making these with a long piece of thread doesn’t really work: it gets tangled and it’s bothersome.

geometric straw garland on the tree

a christmas present for my lovely readers: a week of handmade ornament tutorials!

I will be accepting advertisers on Elsie Marley starting January 2011. If you would like to reserve a spot please email me and we can discuss the specifics! Thanks! elsiemarleyblog@gmail.com

paper christmas tree ornament tutorial

paper christmas ornaments

a paper christmas tree ornament

This as simple as it gets. A few scraps of paper, one seam and in minutes you’ve make a pretty, handmade ornament. I used paint chips (in lovely martha stewart colors) from the hardware store because I had them on hand, but cardstock or thin cardboard or old christmas cards would all work well.

an ornament from paint chips

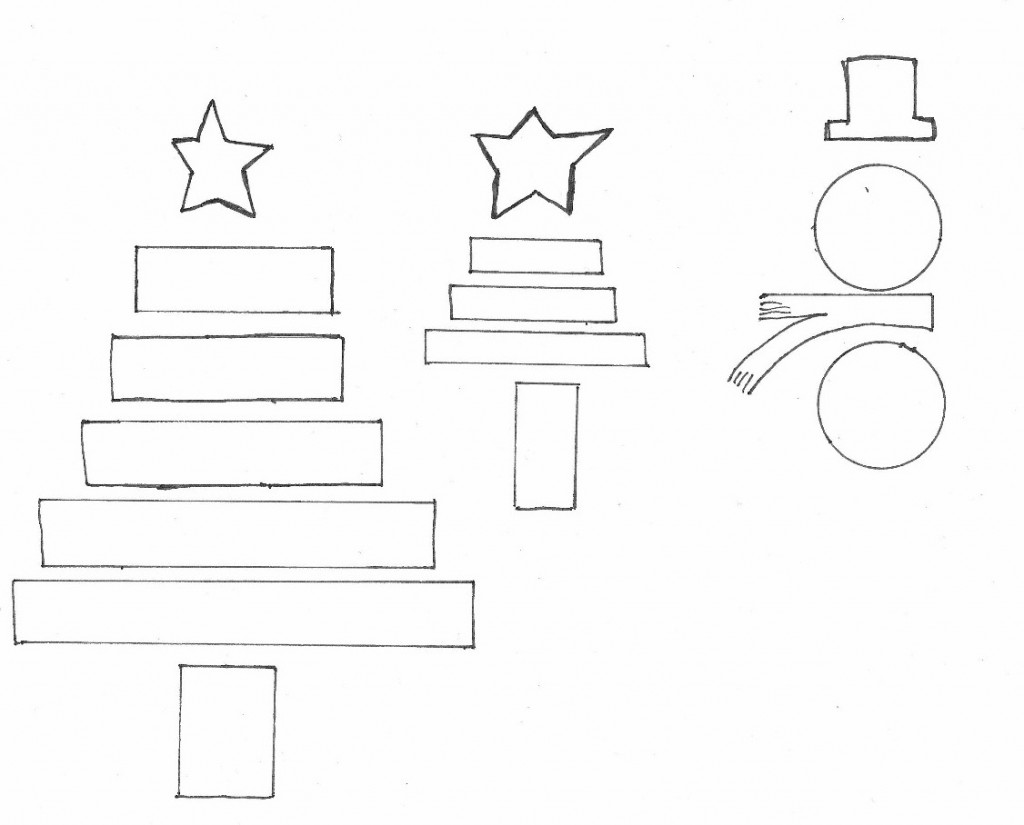
Cut out one star and three to five strips of paper.  If you’d like to use the same measurements I used, you can download the pattern pictured below. If you would rather do it freehand, cut progressively longer strips for the tree, as wide as you like, and cut a good size trunk.

paper tree pattern

You are going to sew a seam down the middle of everything on your sewing machine. Sewing on paper is really not that much different than sewing on fabric, except that you use a slightly longer stitch and it’s ok to use a dull needle. If you are anything like me, there is one in your machine right now! Make a bunch of paper tree ornaments with that perfectly dull specimen and then do yourself a favor: take it out! And get a nice, new sharp one in there for the rest of your christmas sewing.

First make sure you have about three inches of slack from the bobbin and past the needle before you begin sewing. Then place the star under the presser foot of your machine take one stitch forward and then one stitch back (a little sewing dance!) to secure the thread and then sew down the middle of the star. Before you get to the bottom nudge the shortest strip of paper under the presser foot and sew down the middle of it.  And so on, with the rest of the strips and the trunk.

sewing paper trees

When you get to the bottom of the trunk, sew back and forth a few times to secure the thread again. Tie the ends on top of the ornament together, so it makes a loop for hanging. Snip the thread ends on the bottom of the trunk and you’re done!

christmas tree ornament made out of paint chips

variations

I included a pattern for a snowman in the PDF pattern as well, but a million other things are possible: candy canes, bells, santas, pretty much anything you can think of to cut out and sew together!

snowman ornament made from paint chips

a christmas present for my lovely readers: a week of handmade ornament tutorials!

I will be accepting advertisers  on Elsie Marley starting January 2011. If you would like to reserve a spot please email me and we can discuss the specifics! Thanks! elsiemarleyblog@gmail.com

how to cross stitch on a pumpkin

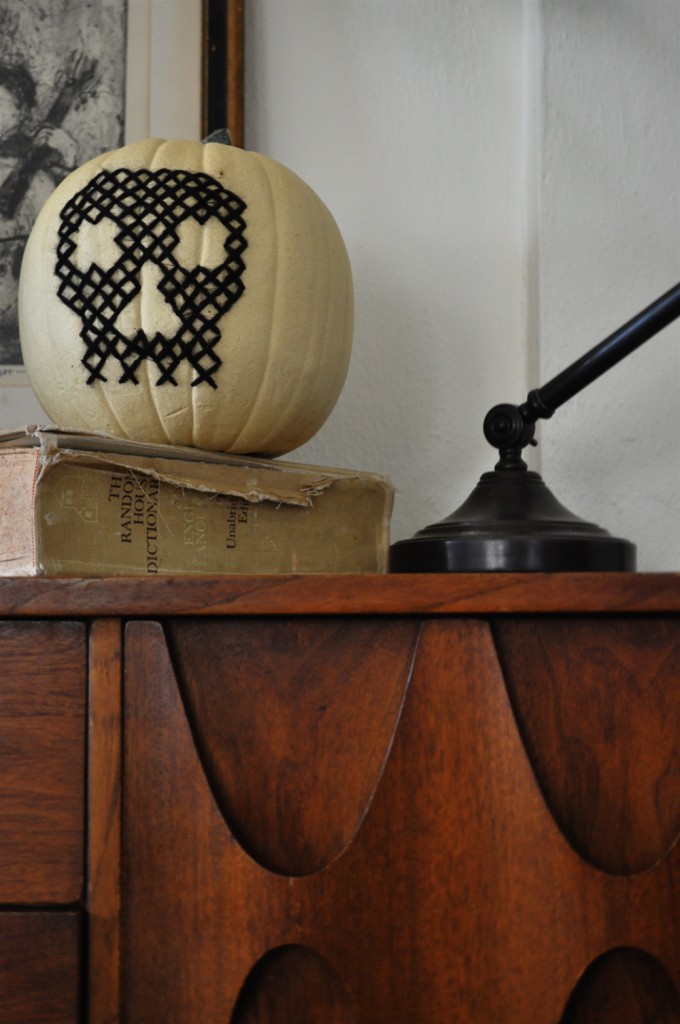
This idea came about when Abbey from Aesthetic Outburst threw a fabulous birthday party with a “hand-stitched/granny chic theme” and as one of the decorations she painted a cross stitch design on a pumpkin.  The whole party was beautiful, but this idea was extra awesome and I thought maybe I could cross stitch for real on a fake pumpkin. The project turned out even better than I hoped and so I’m sharing it with you. I know there are only 5 days until Halloween, but this is a quick-ish project and the pumpkins will last forever.

How to Cross Stitch on a Pumpkin:

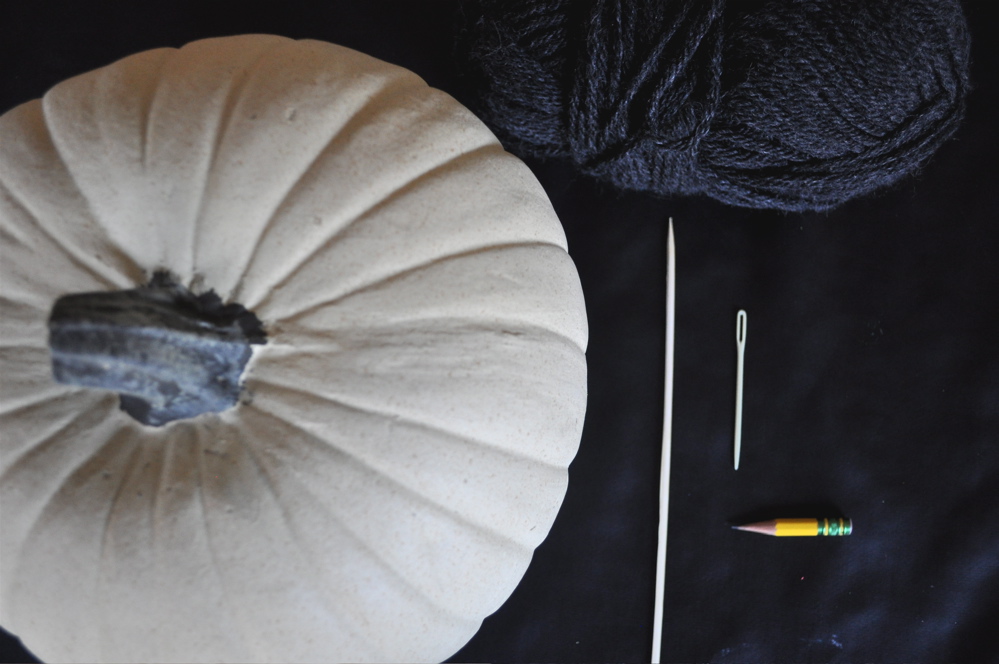
Materials

  • a fake pumpkin
  • thick yarn
  • a bamboo skewer (the ones you use for kebabs) or an ice pick or something similar
  • a yarn needle
  • a pencil

Directions:

1.) First you need to choose a design. I found some great, simple Halloween cross stitch patterns here, but feel free to design your own. It’s easier than you think, I made a bat and a boo! by playing around with Xs in my sketch book (go ahead and copy mine if you like). Just remember, simple is better for this project and try not to put any of the design near the hole on the bottom of the pumpkin because it’s very hard to stitch there.

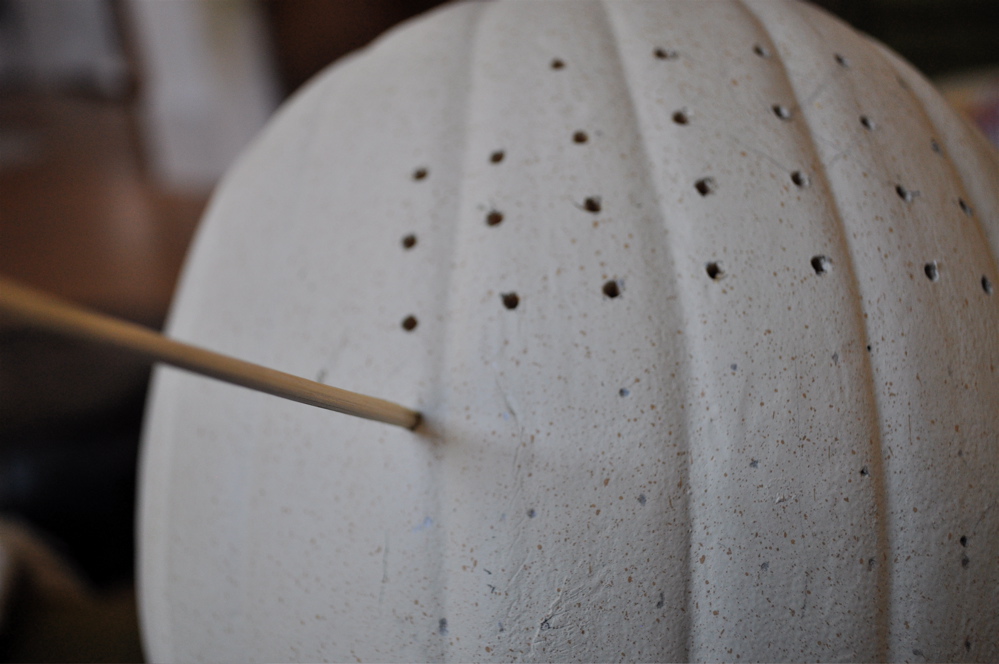
2.) Next, transfer the design to the pumpkin. To do this, I looked at the pattern and then with a pencil I made very light dots for where the ends of the Xs go (see photo above). I thought about coming up with some complicated way to get your pattern perfectly onto the pumpkin, but really I love the look of free hand cross stitch and I don’t think it needs to be perfect.  If you want, you can lightly draw all the Xs on the pumpkin because the yarn will cover them up anyway.

3.) Now you need to poke all those holes. Take the bamboo skewer and poke straight down into the pumpkin.

4.) Ok, time to cross stitch. All I know about cross stitch I learned five minutes before I started this project! Thread your yarn needle with a piece of yarn no longer than your arm, no need to tie a knot. Stick you hand in the pumpkin (if you hand doesn’t fit or it’s a squeeze, do yourself a favor and make the hole a little bigger) and insert your needle into one of the holes you’ve made.  It can be difficult to find the right hole. To help, take your skewer in your other hand (the one not holding the needle in the pumpkin) and stick it in the correct hole, then by feeling for the skewer on the inside you can find it and draw your needle through. I started sewing at the bottom of my design and Xed my way around until I was done. It’s fastest to sew with both hands: one staying in the pumpkin and one out.

And that’s it. I think this project could go so many ways. A ghost done on a black pumpkin with some super fuzzy white mohair would look super cool. You don’t need to stick with cross stitch–any simple embroidered design would work. Go crazy with it and if you do be sure to add it to the elsie marley flickr group so we can all see! Happy Halloween!

a rainbow birthday party: part one

Almost every party we’ve been to recently has had a pinata, so of course my daughter asked (and asked and asked) to have one at her birthday party. But those pinatas are impenetrable! After about 10 rounds of the kids taking turns whacking the thing (and after one burly dad tries, and fails) someone has to get the scissors or and ax or some sharp object and pry the damn thing open, by which time the kids have lost their minds waiting for the candy. So I thought I’d make my own, which took a lot more time than I bargained for, but a lot less tissue paper than I imagined. And after everyone got three turns, one kid smacked it to pieces.

With all the leftover tissue paper I made some martha poofs for above the picnic table. I forgot how easy these are and how pretty. My daughter gasped when I she saw them!

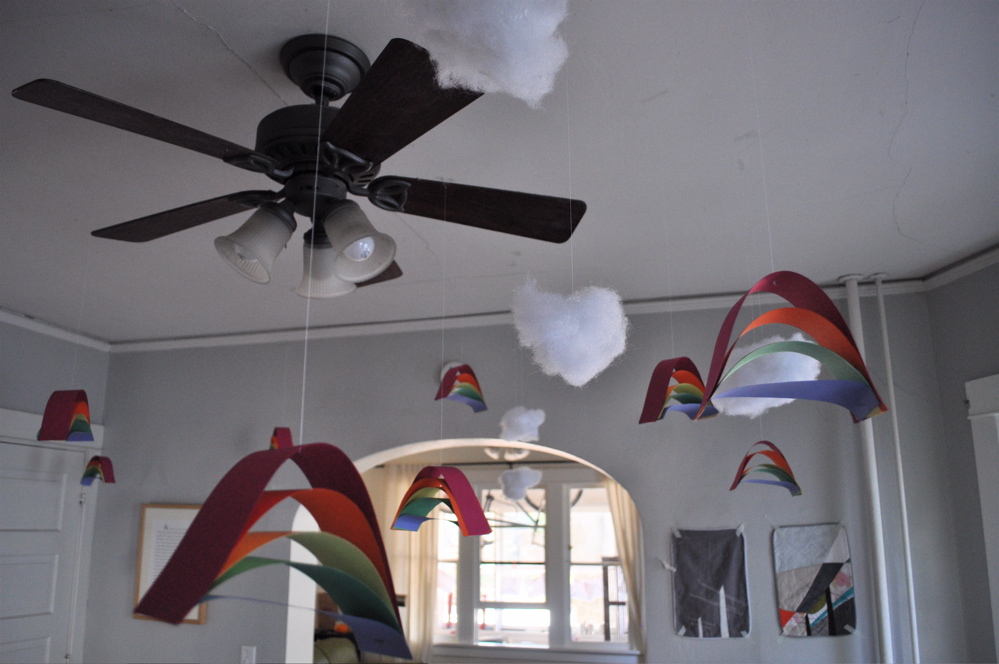
Inside, we hung rainbows and clouds from the ceiling. We were going to make raindrops too, but somehow forgot. Both projects were very simple and clever and the kids helped with both. The rainbows are made by cutting paper into progressively shorter strips and then stapling them together at the ends. I found the directions for the paper rainbows via the crafty crow.

The clouds are so awesome I can’t get over it. They are made by winding a piece of wire into a corkscrew shape and then twisting into a floof of polyfil. Ingenious. You can find the directions to make your own clouds on ohdeeoh.  These will definitely stick around for a while, maybe even become the long overdue mobile above the baby’s bed.

Enough for now, I’ll be back tomorrow with rainbow food and rainbow favors!

rainbow birthday party: part two