Posts Tagged ‘kcwc’

kcwc fall 2012: day three

kids clothes week challenge day 3

1. kcwc day3  2. a butterick dress experiment 3. flashback skinny tee 4. kcwc4

The flickr pool is bursting with beautiful hand sewn clothes!  How is your sewing going? Humming along? Or did you hit a snag? Are you ready to throw those pants (top, skirt, sewing machine) across the room?

* * * * * * * * * * * * * * * * * * * * * * * * * * * * * * * * * * * * * * * * * * * * *

dancing floral leggings and tunic

This tunic has been on my to do list for years…years! How is it that my sewing list is that long? Probably because things like ridiculously flowery leggings jump in line to get sewn first.

floral leggings

the leggings

the pattern: drafted a pattern off some good fitting leggings

the fabric: a maxi skirt I bought on sale at Target

the sewing: wham bam!

tunic back

the tunic

the pattern: I bought this pattern at a thrift store when my daughter was still a toddler. Granted I barely knew how to read a pattern, much less resize one, but the topstitching and the little square pocket were too perfect (and it was 10 cents). Over the years the pattern has come out and written down as next on the list, but it always found its way back into the drawer. Now that my daughter is a size 6, I figured I better sew this sucker up once and for all.

simplicity 7241

the fabric: some really lovely wool blend that I was saving for a skirt for myself…for two years. There is still enough left for a skirt (I think), but now the fabric isn’t giving me the evil eye.

the sewing: The sewing went pretty well. It is a very basic pattern, but basic in 1975 is pretty advanced these days. I simlified the way they wanted me to put in the zipper–it doesn’t look perfect, but I didn’t rip it out ten times either. The direction for the pocket were in some alien language, so I totally winged it and it worked out just fine.  I’ll be honest, I’m pretty crazy for how this whole outfit turned out!

tunic in the woods

kcwc fall 2012: day two

kcwc: day two

1. faux fur vest 2. kcwc dress  3. stripe leggings 4. gingham shirt

Welcome to day two of the Kids Clothes Week Challenge! I hope you found an hour (or more) yesterday. The sewing momentum is starting to build, I can feel it. Have you seen the flickr pool yet? Some amazing handmade clothes are popping up there (and even some tutorials)!

To keep the momentum going into next week–and beyond–Liesl, of Oliver + S fame, has offered you, my lovely readers and kcwc sewers, 20% off all their paper patterns! The offer ends right after kcwc ends (midnight ET on October 15), so if there is some pattern you’ve been eyeing, now’s the time to snatch it up! The coupon code is KCWC20–just type it in when you check out!

colorblocked striped top and gingham pants

Okay, what did I sew? An upcycled shirt and some basic lined pants for my five year old boy. I really didn’t intend for these two things to be worn together when I sewed them, but my son had other plans. Let’s start with the shirt…

striped top with multi-colored ribbing

pattern: Flashback Skinny Tee by Made by Rae

fabric: I sized down an old shirt of mine that never fit quite right.

sewing: The t-shirt material is the super thin jersey. I love wearing it (and so does my son) but I get nervous sewing with it. There were a few incidents where my sewing machine  decided to eat the fabric rather than sew it, but it worked out in the end. I loved choosing all the different colored ribbing to finish the shirt. Boy’s clothes you see in stores can be so serious (gray, blue, gray, blue), so it’s nice to make something silly and happy–like little boys!

lined pants

pattern: My go-to pants pattern from Happy Homemade vol. 2. I’ve made it so often I just drafted a combination of the boy’s shorts pattern (i) with the girl’s pants pattern (o) for each size.

fabric: Big gingham on the outside and olive jersey on the inside!

sewing: I can sew this pattern in my sleep, which is what must of what happened because I ending up with two left legs when I sewed the lining. I didn’t mark the right side of the jersey fabric and it is hard to tell right from wrong on solid jersey. Whatever, no one is going to see it, right? Trying to get the lining to sit right in the pants was super fiddily, but now that they are sewn up you can’t tell the pants have two left legs (I hope).

woohoo!

He can’t at least!


kcwc fall 2012: day one

kcwc fall 2012 day one!

1. heart leggings  2. new shirt for D  3. Lala’s fall coat 4. corduroy music class skirt

I think it is only right to start with your creations, not mine. You are the ones sewing into the wee hours of the night or in the morning–all 535 of you!  Different time zones have given some of you a head start. Others (like me) started early for one reason or another. So don’t be discouraged by the finished garments in the flickr pool already. As kcwc begins, I do want to say one thing:

Have patience with yourself!

This challenge is about putting in a little time everyday doing what we love (but may have forgotten that we love it). If you sew two right legs together, or have to unpick a giant seam, or can’t understand the directions at all, don’t freak out and go for the ice cream. Put that project aside and pick up one you are more comfortable with or one you are super excited about. Then maybe revisit the other project the next day, or ask a question on flickr (the kcwc discussion is here). We are all here to help each other and motivate each other! Okay, let’s go!

 * * * * * * * * * * * * * * * * * * * * * * * * * * * * * * * * * * * * * * * * *

In the spring I filled out a simple form for each of my projects and it went so well I’m going to do it again. Feel free to do the same as it makes quick work of blogging–leaving more time for sewing!

apron top back

the pattern: The pattern is the apron top from Carefree Clothes for Girls. It is simple, but with many details that make it just right for my little bit sweet, little bit tough, (still) little girl. Looking back in the blog, I’ve sewn up many pattern from the book for her: a princess dress, a play dress, and a winter coat.

apron top from carefree clothes for girls

the fabric: The main fabric I used was drop cloth from the hardware store. The suggested fabric was sail cloth and I though drop cloth was a good stand in. The bird fabric on the pocket was leftover from another simple top I made.

apron top and sunki leggings

the sewing: The sewing was actually more involved than it might seem. The apron has so many bits to hem–not my favorite thing in the world–so that took forever, but there were other bits that were fun. The pattern called for rivets in the pocket corners and a little scrap of leather sewn onto the front. My fabric store had rather crummy looking rivets, so I used one half of a snap instead. While I was there I found some good looking jean buttons and I used one for the back closure. Have you ever used jean buttons before? They are hammered into the fabric–super cool.

sunki leggings in the woods

Oops, I almost forgot I made the leggings too! The pattern is the Sunki leggings by Figgy’s. The fabric was some orange interlock from my stash. And the sewing was so easy and fast that I may never buy leggings again!

kcwc guest post: gail from probably actually

gail from probably actually

I am so excited to have Gail from Probably Actually on the blog today! Gail is an incredible sewer. She has made a closet full of clothes for her daughter and those clothes are impeccably made.  Now that she has a little boy on the way (congratulations, Gail!) we are in store for some classy boy duds! Instead of changing up the Kid Pants pattern, Gail embellished her pants with adorable-ness.  Check it out!

* * * * * * * * * * * * * * * * * * * * * * * * * * * * * * * * * * * * * * * * * * * * * * * * *

Hello! I’m Gail from Probably Actually and I’m crazy excited to be part the pre-KCWC line up! There isn’t much I love more than making kids clothes, and it only gets better during KCWC. As you may have experienced yourself, lugging a sewing machine and serger around town to sew with friends is pretty impractical, so sewing can sometimes feel a bit solitary and anti-social. But for one week in the fall and another in the spring, Meg transforms it into just the opposite with KCWC. Suddenly we’re all on the same page, scheming about kids clothes, sewing together, and sharing our projects in the ever-inspirational Elsie Marley flickr pool. Get ready, it’s so much fun!

Anyway, today I’m here to help kick off this fall’s KCWC and show you how I jazzed up a pair of Dana’s basic Kid Pants!

While there are certainly endless possibilities for changing things up with this pattern, it also yields a great pair of pants without any adjustments at all. The pants are so simple to sew, and I love the flat front option and the wide trouser legs. I didn’t end up making any changes to the pattern itself – I used the size 2/3 downloadable pattern pieces, which worked well for my 3.5 year old (the pattern is made for kids approximately 2 to 3.5 years). There’s plenty of length built into the pattern to make nice wide hems, even when you’re at the farthest end of the pattern range like we were.

I did add a few things: Gathered pockets to the back, which I borrowed from the Oliver + S Jump Rope dress pattern (view B). Dana has a great tutorial for gathered pockets as well, if you’re looking.

And a couple of hedgehogs to the front – one at the hem,

and a mini version wrapping around the side:

Maybe you recognize the hedgehog if you’re a Mini Boden fan – it was inspired by a sweater I saw on their website awhile back. I loved it immediately, and if I were the type who bought $54 sweaters for my three-year-old, I probably would’ve skipped these pants and ordered the original. But yeah, I made my own instead.

Which wasn’t hard to do at all. I sketched the little critter out, then made eight pattern pieces.

Next, I traced each piece backwards onto Steam-a-Seam double stick fusible web, then laid those onto the wrong side of fabric scraps, cut them out, and pieced everything back together. I finished it off with a french knot for the eye. And voilà – a hedgehog was born!

Sewing around all those little pieces was a bit tedious, and might have been easier to do before the pants were fully constructed rather than after, but I didn’t have that kind of foresight at the time and it still worked out just fine. I just used a very small stitch and picked up the presser foot a lot to shift the fabric as I sewed.

That’s it! Just your basic corduroy pants adorned with woodland creatures. Thanks so, so much for having me, Meg! I can’t wait for KCWC to get rolling next week!!

* * * * * * * * * * * * * * * * * * * * * * * * * * * * * * * * * * * * * * * * * * * * * * * * *

 Thanks, Gail!

kcwc guest post: sophie from cirque du bebe

sophie from cirque du bebe

I’m guessing you already know Sophie from Cirque du Bebe. The clothes she sews for her kids are so stylish and unique they are unforgettable. I mean look at that telephone blazer! Sophie took the Kid Pants pattern and turned it into the comfiest pants in town. She was kind enough to write up a tutorial too!  Lucky you (and me)!

* * * * * * * * * * * * * * * * * * * * * * * * * * * * * * * * * * * * * * * * * * * * * *


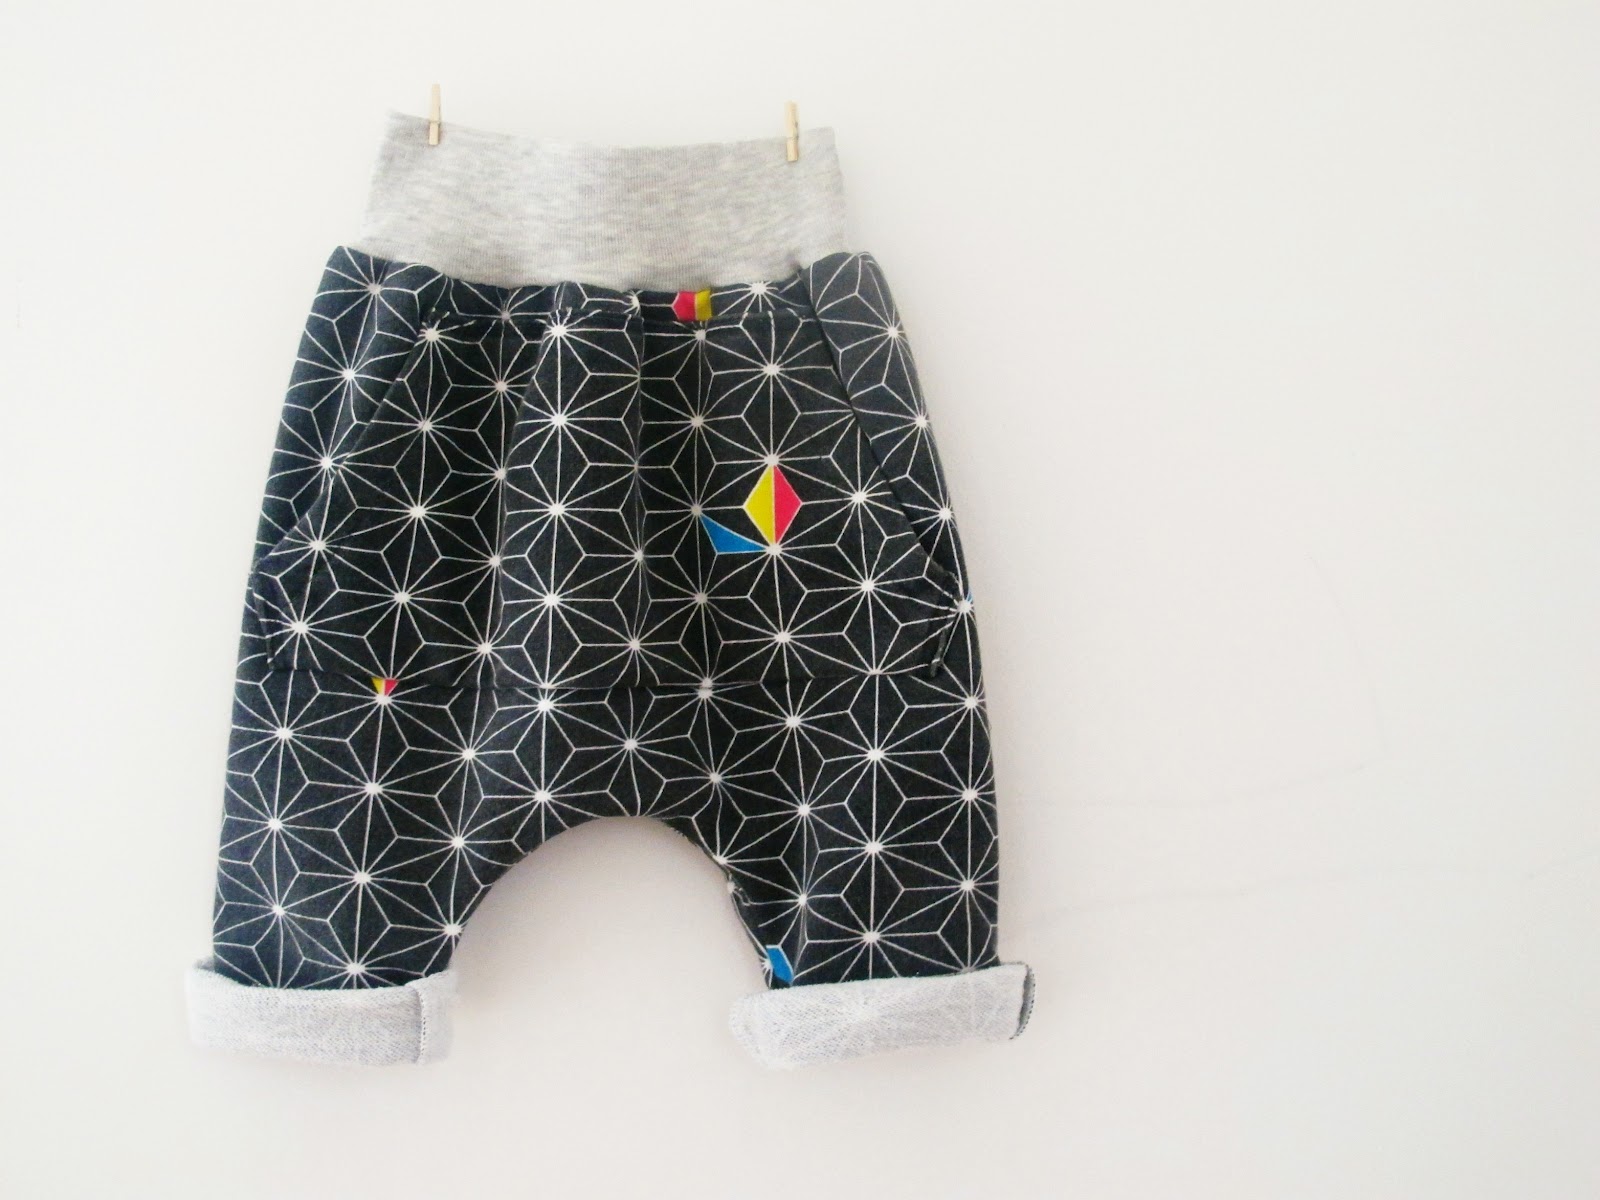
Can you believe the next Kids Clothing Week Challenge is just around the corner? It feels like just yesterday I was face first on the sewing nook floor, making pattern angels in the debris and murmuring ‘Just keep sewing…just keep sewing’ to myself. I’m a tad excited to be taking part in the Pre-KCWC celebrations with a cozy, lazy, fall-worthy take on Dana’s toddler / kids pants tutorial. Which happens to have a special place in my stitchy heart as the tutorial behind my first ever (successful) attempt at pants for my then-two-year-old, now four-year-old boy. You’re just going to have to take my word for it that these low ‘n lazy lounge pants you see here started with a) Dana’s pants pattern. And b) a thrift store sweatshirt. If you like low crotches and you cannot lie… this one’s for you!


You’ll need…

  • Ribbing for a wide comfy waistband
  • Elastic wide enough to fill out your waistband (the elastic I’ve used here is 2″ wide)
  • Knit fabric / something fancy to up-cycle like an unloved men’s hoody.
  • Scissors, co-ordinating thread, hand-sewing needle, tracing paper or similar, marker, safety pin.

Did the thrower-outer not see the potential before him?

1) Follow the steps in Dana’s tutorial to produce your own front and back pants pattern pieces.


2) Lay your fabric on the fold and place one of the leg pattern pieces on top so that the point of the crotch sits just over the folded edge of the fabric. To make our low n’ lazy curved crotch, take the marker and draw a curve from the tip of the crotch down the inside of the leg, finishing about an inch inside the edge. Repeat for the other pattern piece.


3) To cut the piece out, start at the bottom, cut to the end of the new line but stop there. Cut the rest of the piece out except for the section above the crotch tip because we want that bit to stay on the fold. Repeat for the other piece. You’ll end up with a front and a back piece that resemble the shape below.


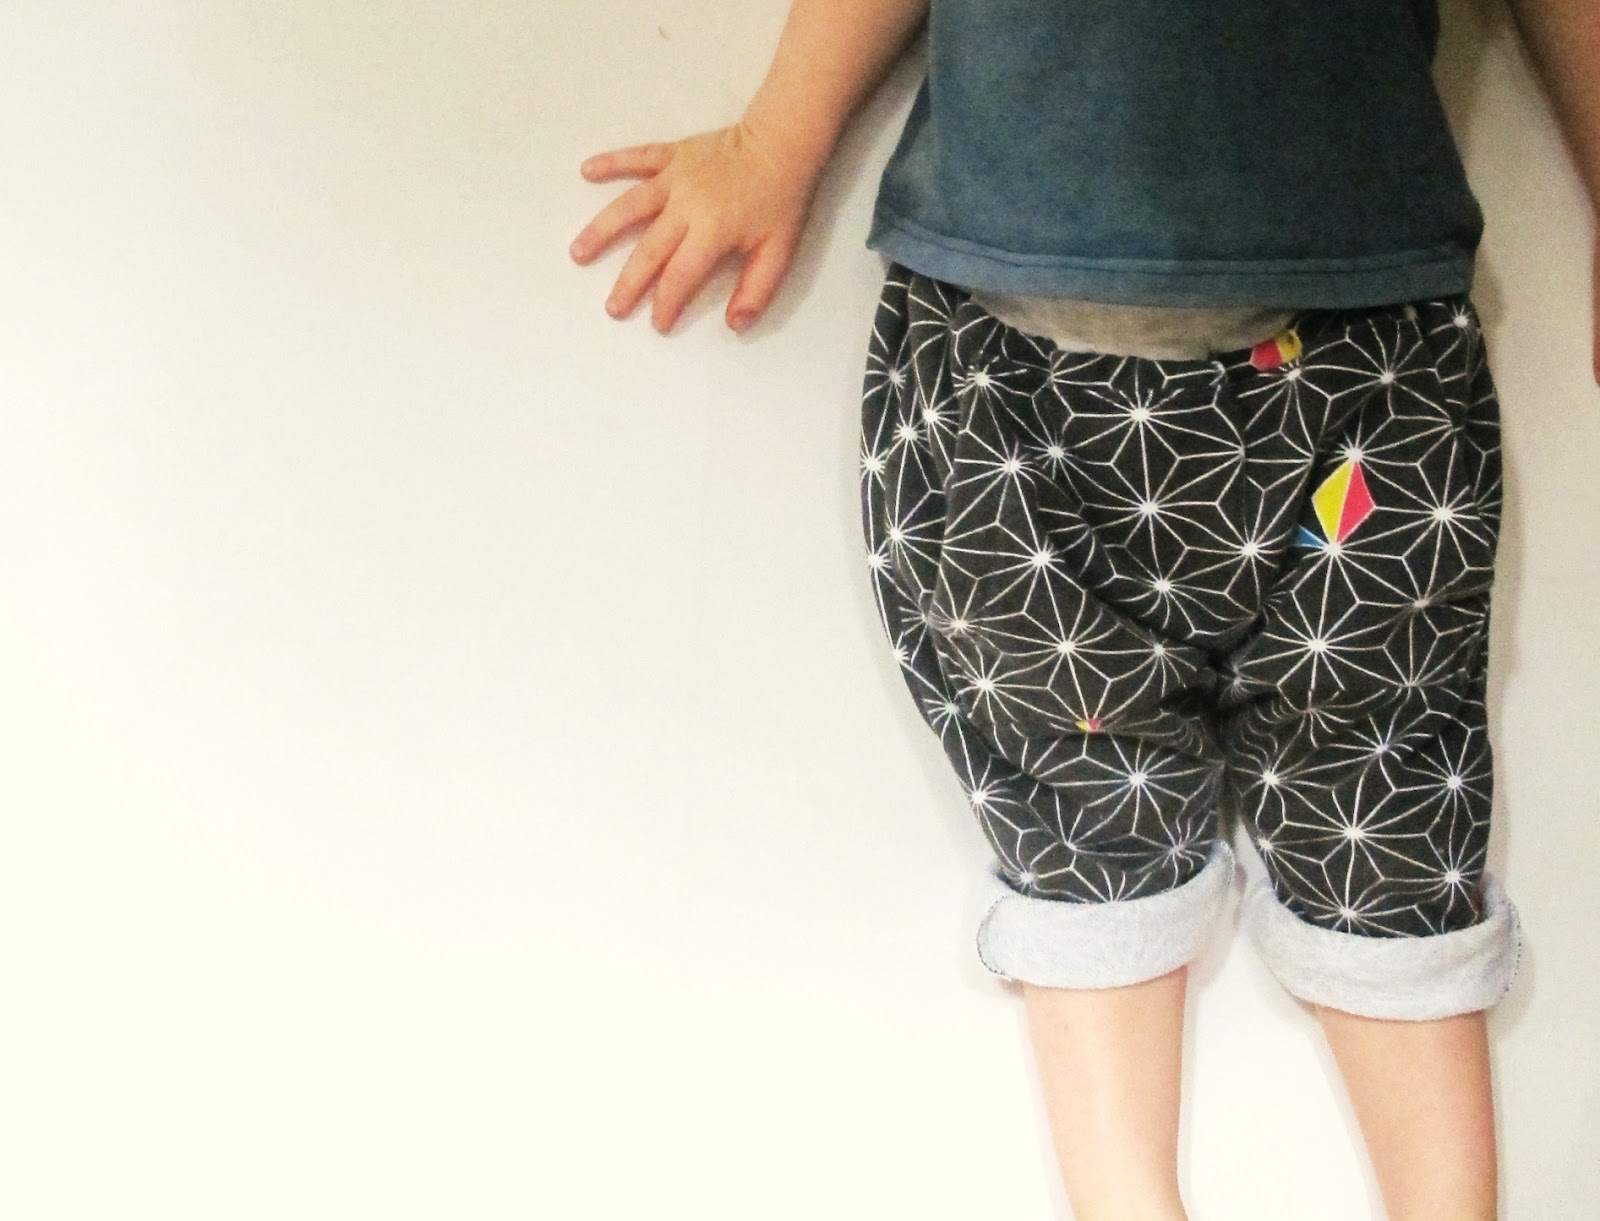
4) With right sides facing sew front and back pieces together at the side seams and the crotch seam with a 3/8 ” seam allowance. Finish the edges or leave them raw. The advantage of dissecting something like a hoody is you can pinch cute features like this pocket, which I’ve attached to the front here. Useful for storing things like cars, raisins etc.


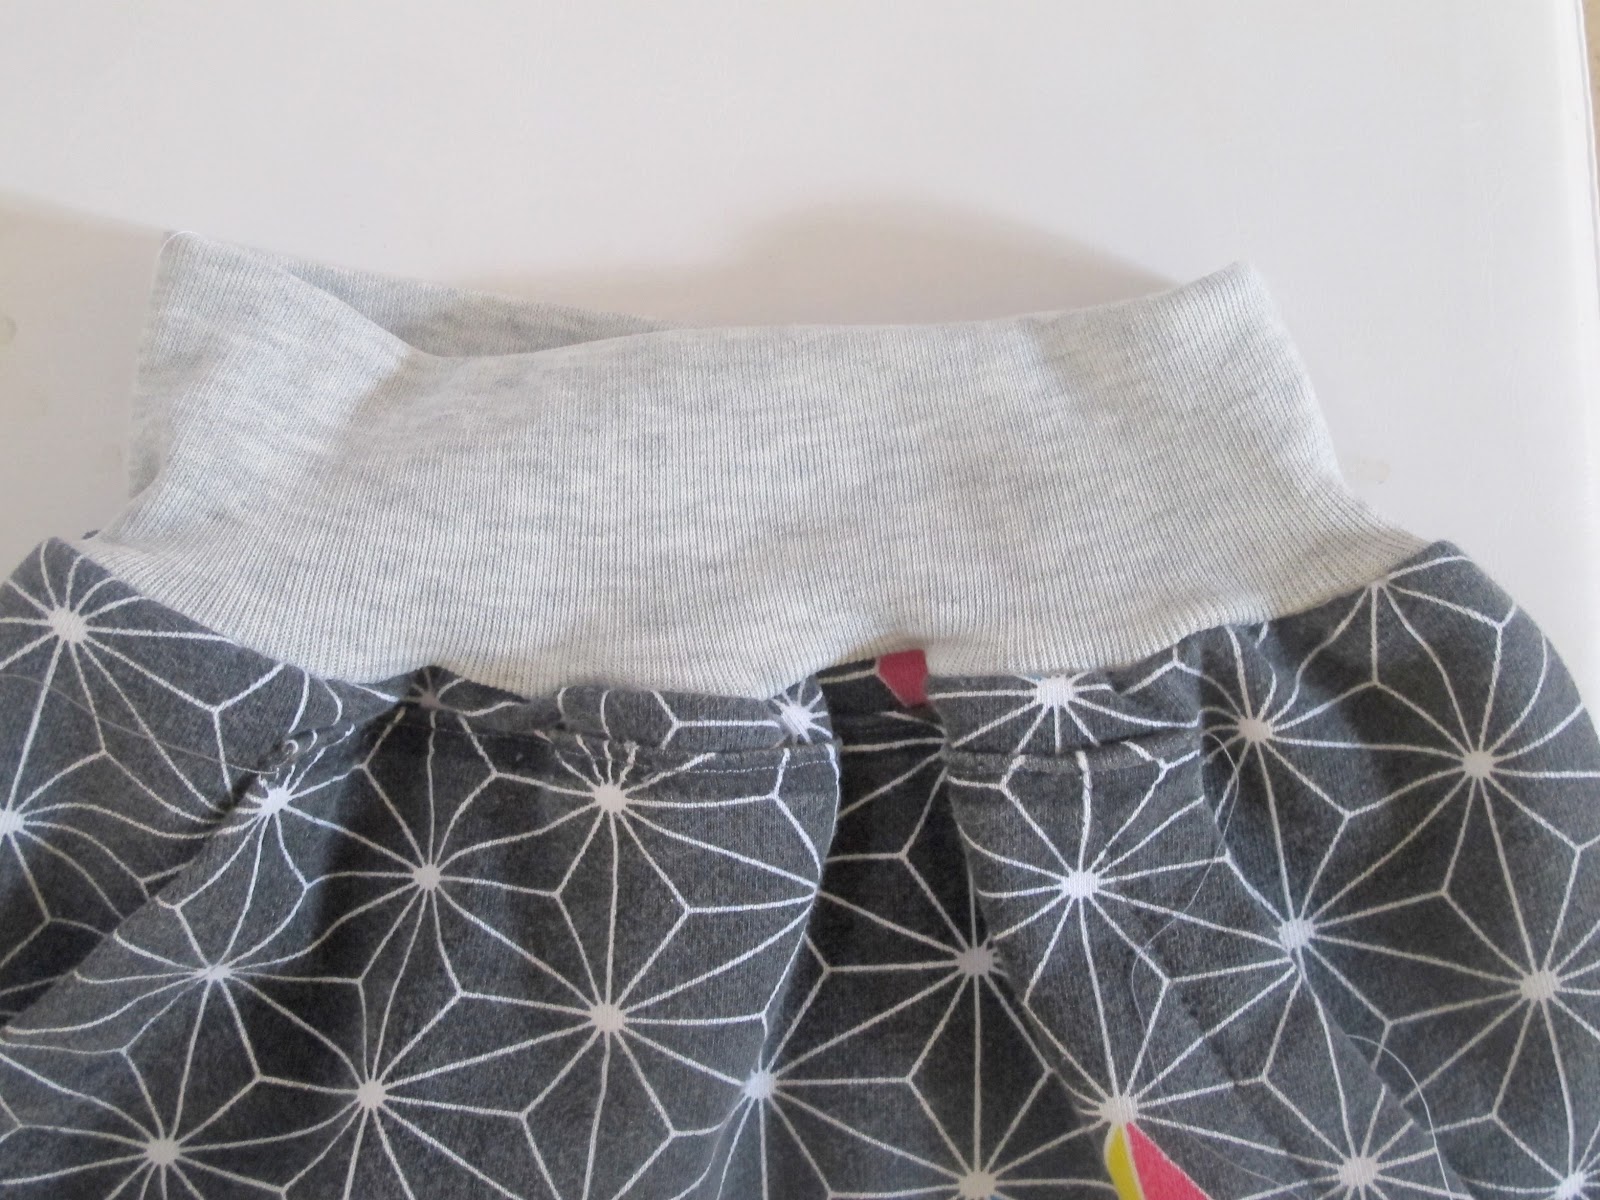
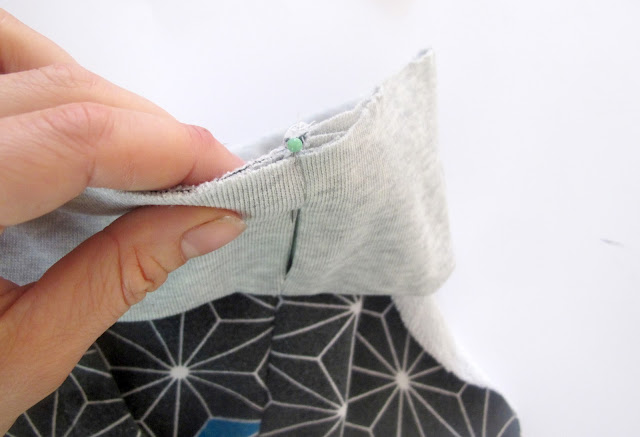
5) To get the dimensions for the ribbing piece, the height here is determined by how wide you’d like your waistband x 2 plus a seam allowance for top and bottom. The length of the ribbing will be the size of your kiddos waist minus 4 “. Once you’ve cut out the piece, fold in half with right sides together like so. Sew together with a 3/8 ” seam allowance leaving a gap of about 1″ in the middle of the top half. Bit of a mouthful.


6) Turn the right way out, fold in half. Does it look like this?


7) Using a fabric marker or a pin, mark the centre point of the ribbing on the opposite side to the ‘gap’.


8) To attach waistband to pants we’re going to line up the raw edge of the ribbing piece with the raw edge of the top of the pants. But most importantly make sure the ‘gap’ is facing the outside and lines up with one of the side seams. Pin this point in place.


9) Find the center point you marked earlier and pin it to the opposite side seam. Once these two points are pinned, it makes it easier to spread the rest out.


10) Pin your layers together feeding the ribbing around the whole perimeter of the pants and stitch with a 3/8 ” seam allowance. Finish the edge or leave it raw.


11) Turn out the right way and press the seam downwards. Starting to take shape!

12) Cut elastic to the length that will be comfy for your child and hook a safety pin through one end. Feed it through the ribbing making sure the other end doesn’t slip through.


13) Secure the ends of the elastic together, using zigzag and going back and forth several times. Stuff it back inside the casing and hand-stitch the opening shut neatly. Lastly, hem your pant legs, or you could even add cuffs. And you’re done!


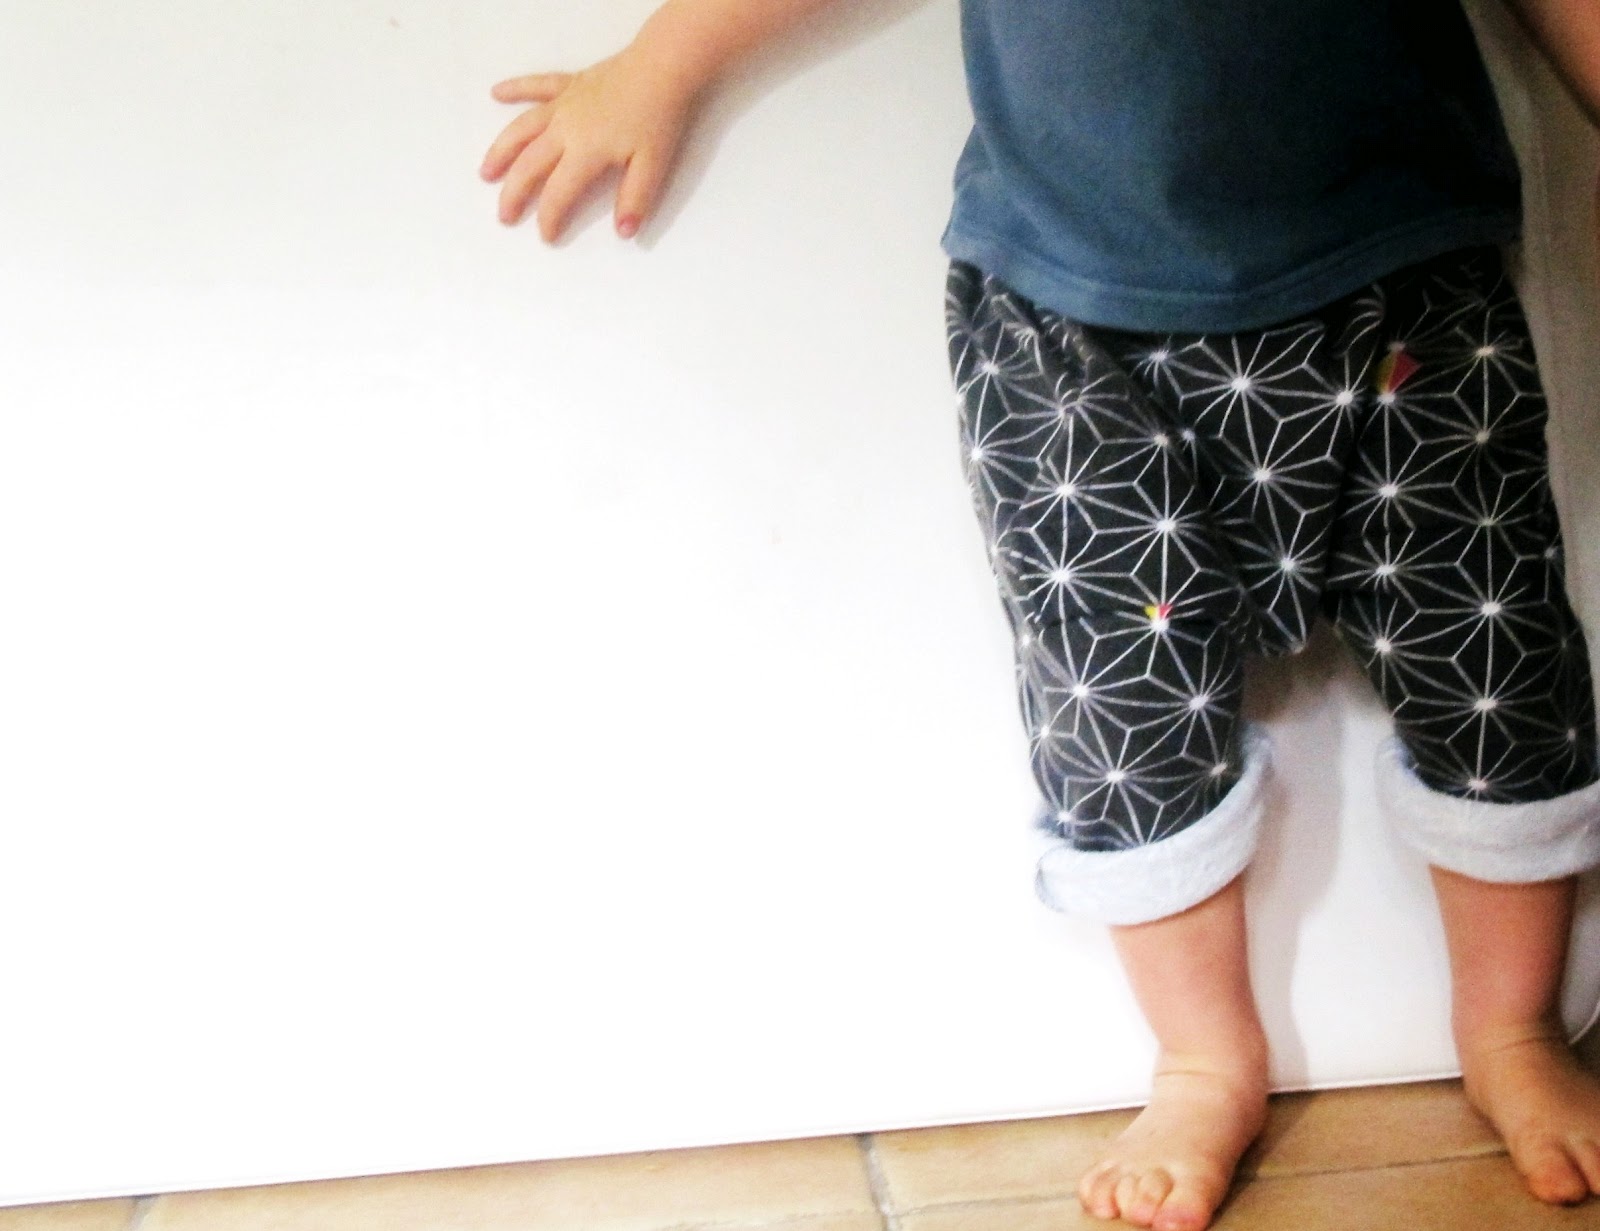
We’re approaching spring here and while it’s still cool enough in the mornings for knit fabric loungies, they get rolled up into cuffs during the day, which look pretty cute on their own.

* * * * * * * * * * * * * * * * * * * * * * * * * * * * * * * * * * * * * * * * * * * * * *

Thank you so much Sophie!