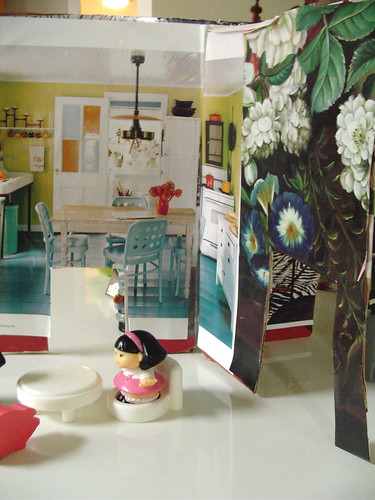
Here it is the second installment of Making Mondays: a cardboard dollhouse. Sounds simple enough, butI think the project was a little over my daughter’s head–she is only 2 after all. I was inspired by the Constantine dollhouse (pictured below). It’s a lovely and simple idea, but unfortunately there isn’t a spare $145 lying around these days. So we made our own.

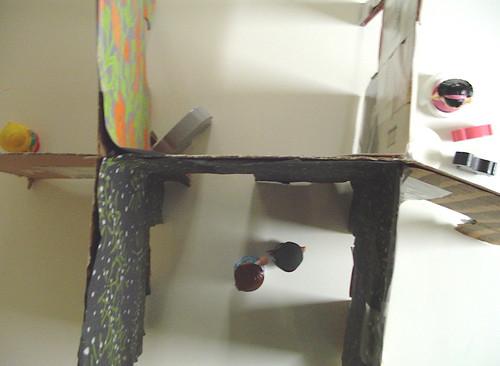
We started with a box, cut it apart, and used one long side and the two shorter sides. I cut a slit in each of the short sides almost up to the top and slid them on top of the longer piece of cardboard, so they were perpendicular to it. Then I tried to make the walls a little sturdier by taping the corners and my daughter pulled the rest of the tape off the roll. To decorate, we looked through magazines and cut out pictures of kitchens and bathrooms and couches and chairs, and she picked some pretty paper for the walls as well. I thought this would be the best part, but really she had no patience for it, thankfully the glue stick made up for that. And with that glue stick we slapped it all on, cut some doors and the dollhouse was done.
I think this is a good project for kids that are a little older–hell, I might just make another one myself. There are a couple things I would do differently the second time around. I think it would be nice if the house came apart and could be stored flat. This would make decorating both a little easier (you can lay everything flat on a table and work on it) and more difficult (you have to remember what walls go to what room). Also, in order for the house to be stable the shorter walls must be taller than the long wall they fit over (I didn’t do this and our house is very wobbly). And though I think it’s fun to find pictures of things in magazines to decorate the house, it would be nice if the walls were felt. You could cut couches and chairs out of felt as well and stick it to the walls–then you always would have the option of redecorating!
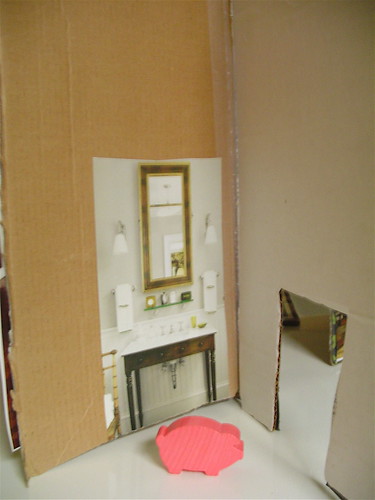
To see all the rooms, you can go to my flickr page. Even though my daughter was frustrated with the amount of time it took to make, in the end, of course, she loved it. And now she calls it her castle (where did she learn that word?). If there is interest I would be happy to make up a pattern (obviously with the improvements I mentioned) and have it be available to download and print.

One more thing: if it wasn’t obvious,this is my little post for Blog Action Day. Reuse your old boxes and magazines by turning them into dollhouses and Recycle them when that dollhouse falls apart.
Posted in tutorials. 26 Comments »
There are a couple images that have really caught my eye recently that I wanted to share with you, dear readers.


The first two are from the blog Debi Van Zyl. The mobile I think is just fanastic. I have always loved those strange little seed pods and I think this is a beautiful way to use them. And I can’t stop thinking about the polaroid pictures she took and what great little art quilts they would make. I never thought I’d be one to make an art quilt, but it’s next on my list (right after all that other stuff).
It was this block [edit: the picture was removed by the artist, sorry] that got me thinking about art quilts to begin with. It’s from the blog Dear Meagan, and she has recently made another block just as beautiful as the first. The soft toy is hers as well. I think this is a great idea and a nice way to remember how little your little one once was and the adorable outfits they won’t let you put on them anymore.

Posted in inspiration. 4 Comments »

I found this beautiful piece of embroidery at my local thrift store the other day. He is almost entirely done using the stem stitch, with a couple of french knots here and there. And his little beady eyes are, well, little beads. He’s not quite finished, but I’m happy to fill in the rest. I have a question for all you seasoned embroiderers out there. I think someone must have just sketched directly onto the canvas and then embroidered over it, but there is some color (fabric paint? watercolor?) you can see on his jacket and on the ends of the feathers. Is that meant to stand on it’s own or be “colored in” with stitches? I’ve never worked with transfers or patterns so I’m not familiar with the rules. He’s a little dirty: anyone have any laundering advice for something like this? He was meant to be a rather large pillow, but I might try to stretch it over a frame and hang it in the kid’s room.
Posted in thrift. 3 Comments »

These little babies are for the embroidered button swap that Ms. Greetingarts is hosting. This was my first idea and I’m very happy with how they turned out. I’m fairly new to the whole embroidery thing and I wanted to try something that was a little more detailed–something closer to drawing. I used the backstitch for the hands and the split stitch for the chopsticks. It sure as hell wasn’t easy. I pulled out a lot of stitches, but by the time I got to the fourth button I was on a roll. For the smaller buttons, which are a little under an inch across, I traced the design and for the bigger ones, which are just over an inch, I simply looked at the picture and embroidered freehand. This second method really worked well for me, though by the time I got to the last button (in last row on the left) I got cocky and thought I didn’t even have to look at the picture–bad idea. It’s pretty wonky, but oh well; I was hoping the little egg I embroidered would make up for it, but then it didn’t really turn out looking like an egg–more like a strange yellow piece of food, so I just put my needle down at that point. There are a couple of more picture of the buttons on my flickr account, if you’d like to see. This will be my first swap and I am ridiculously excited. We were only supposed to make 5, but that would mean making an incomplete set. Then you wouldn’t know how to use your chopsticks and we can’t have that.
Posted in craft, swaps. 11 Comments »

Inspired by good + happy day’s week of organized activities, I declared Monday “making day.” I’m afraid it stops there though–I just don’t have the follow through for everyday to have a planned activity. But I always wanted to be that mom that lets her kids go crazy with art, screw the mess. But then I became a mom. And it involves a lot of mess: dirty dishes, dirty laundry, dirty diapers, dirty hands, dirty faces. So much of everyday is cleaning babies and things that it’s hard to start something that you know will make yet another mess. My daughter just turned 2 and she needs some more art making in her life and I need to say screw the mess a little more. So this morning we made potato prints: she watched as I cut the shapes out of the potatoes (“star! star!”), dipped them in the paints, and kind of got the hang of stamping, but somehow painting the potatoes was more fun, as was painting her arm and her hands and her belly, but really it wasn’t more than soap and water couldn’t handle. And there you go. Art.
If you’d like to join in Making Mondays (or any day really) do! Comment and tell me what you and your littles make together. Or make a date for next Monday.

Posted in kid art. 7 Comments »


