Posts Tagged ‘valentine’s day’

popcorn valentines

blog photos, feb1

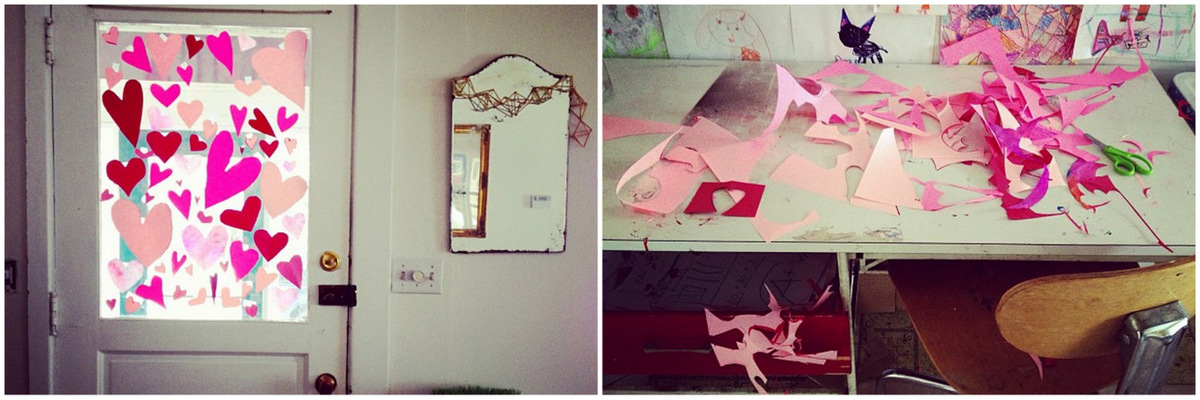
We’ve been making this and that for valentine’s day this week: some hearts, some secret grandparent gifts, and some popcorn.

party popcorn!

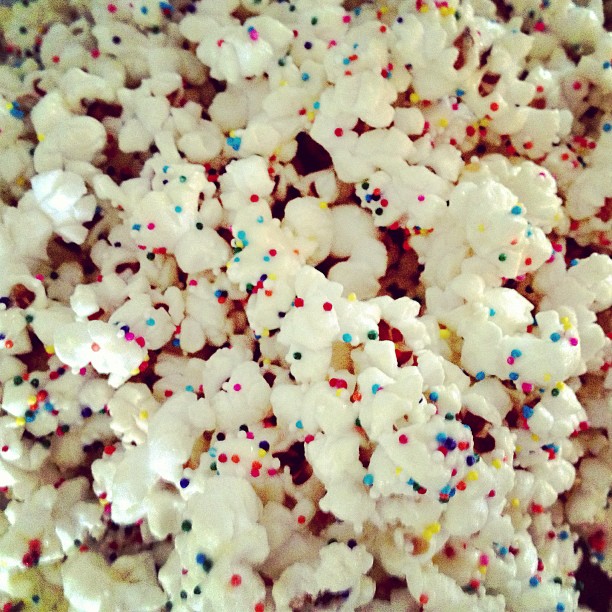
This popcorn falls under the category, “ridiculous things pinterest makes me do.” Also in the category are watermelon stars and temporary tattoos on bananas. Party popcorn–awesome name by the way–is melted white chocolate poured over popcorn and then covered in sprinkles. I added a little crunchy salt too, because it’s aways delicious.

party popcorn valentines

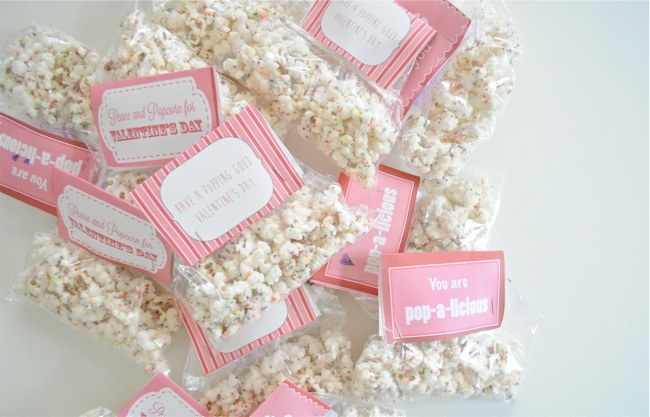
My children were so unbelievably excited about making this and said many times, “this is the best thing you have ever made, ever.” I’m not a fan of popcorn or white chocolate, so I’m not the best judge, but I believe them. You can’t really go wrong when you pouring chocolate on something.  I found a few–printable!–pop-corny puns thanks again to pinterest.  A few staples later, Bob’s your uncle, and you’ve got 18 valentines ready to go!

pirate valentine tutorial

Did you already do your valentines? Or are you a last minute scrambler? I’ve got a tutorial for a super quick Me Hearty Eye Patch, if you are still searching for ideas. There are so many good ones out there. Got any favorites?


me hearty eye patch tutorial

"I only have eye for you" pirate valentine

me hearty eye patch tutorial

I was going to make super hero heart masks for all the kids in my daughter’s class (like this fantastic one), but they were fussy and each one was taking way too long. My daughter and I came up with the eye patch idea together. An hour later I had whipped up 17 of them. Super fast, super easy, good for girls and boys (and grown ups too), and not full of sugar. Eye patches arrrrgh the best!

materials:

  • felt, 2 3in squares per patch
  • 1/8in wide elastic, 16-18in piece per patch
  • straight edge

heart eye patch tutorial

1. Cut two 3in squares of felt for each eye patch you are making. Then cut a heart from one out of each two squares: if you are making 5 eye patches, you started with 10 squares and now will have 5 hearts and 5 squares.

heart eye patch tutorial

2. Take a heart and place a straight edge (I used an envelope) across the middle. Then tilt the edge 1/4 inch up on one side and 1/4 inch down on the other. Make a tiny mark on each edge. This is where the elastic will be attached to the patch. Really you only need to mark 2 or 3hearts. After that you can just eyeball it (ha!). No really.

heart eye patch tutorial

3. Place the marked heart on top of a felt square. Cut a piece of elastic so it’s 16-18 inches, smaller for smaller people bigger for bigger people.  Sew 1/8 inch from the edge all around the heart, inserting the elastic where indicated.

heart eye patch tutorial

4. Trim away excess felt, holding the elastic as you cut (so it doesn’t get cut, silly).

heart eye patch tutorial

5. That’s it! No go make 20 more because Valentine’s day is tomorrow! Here are a few awful pirate puns you can use:

Will you be my matey?

You arrrrgh my Valentine!

I want to capture you, Valentine!

Yarrrr the best!

I treasure you!

I’d walk the plank for you!

Ahoy, me hearrrrty

pirate valentine

from the north country: noodlehead

Hi there! It’s me, Anna from noodlehead.  If you have some time to kill today, feel free to stop by and say hi or check out my tutorials and patterns.  I also want to say a huge thanks to Meg for having me over.  I’ve been a long time admirer of Elsie Marley and am super honored that Meg asked me to stop by with a fun little project!

It’s a sweet and simple project you can create in time for valentines day.  This would even be a great project for a beginner or for a child who’s fairly comfortable using a sewing machine.

I thought of these pillows one day after I saw some of my vintage hankies.  Their colors were perfect for valentines day and I thought they would add a little bit of character to an empty chair or sofa.  My mom had given me a few of the hankies and I had collected a few from local estate sales.  If you’re not sure where to get vintage hankies, I suggest looking at estate sales, etsy, or ebay.  They’re usually in pretty good condition and will be durable enough to add to a pillow  After all, they were originally intended for nose blowing!
Now I’m sure there are some enthusiasts who would never do this to a prized vintage item, but for me I’d rather have them out on display where we can enjoy them more, instead of stashed in a drawer somewhere.
Let’s get started!

Materials:

  • 1/2 yard linen or base fabric for making the pillow cover
  • 1 vintage hankie (wash, iron, starch)
  • 1/2 yard heat n bond lite (available at Joanns, even pre-packaged at walmart)
  • thread, sewing machine, pins, etc.
I’ll give measurements for both a 16″ pillow form, but of course feel free to adjust these as needed for your particular hankie/pillow form.

Cutting the pieces:

  • top: 16″ x 16″
  • for envelope back: cut one piece 16″ tall by 14″ wide, and another 16″ tall by 11″ wide
Attaching hankie:
Apply heat n bond lite to the hankie using manufacturers directions.  Fuse hankie to pillow cover top, centering hankie.
The next step can be potentially tricky, but you’ll need to sew the hankie down to the pillow cover top as close to the hankie’s edge as possible.
Depending on how your particular hankie is shaped/hemmed, you might have to take it really slow and lift the presser foot and turn as you go.  You could alternately used heat n bond ultra (which requires no sewing to ensure the quality of the bond), however it will make the pillow more stiff, so I’ll just leave that up to you!
Finishing the pillow:
Next you’ll want to hem the edges of the envelope back opening.  Take one piece of envelope back and press the long side over by 1/2″ towards the WRONG side of the fabric and again by another 1/2″.
Sew close to folded edge.  Do this for both envelope back pieces.
Then place the pillow cover top facing RIGHT side up, on top of that layer the larger back piece RIGHT side down on top, aligning raw edges.  Then place the smaller envelope back piece over that, also RIGHT side down.  Pin.  Sew around entire perimeter using a 1/2″ seam allowance.
Serge or use a zig zag stitch around edges to finish them off so they don’t fray in the wash, clip corners.  Press.  Insert pillow form and enjoy!

valentine making party

On Friday all my kids’ friends came over for a valentines making party–yes all! have you ever had a party where every person you invited could come and then think holy crap! everyone is coming?  At the last minute a few kids couldn’t make it, so it wasn’t quite as chaotic as I thought it would be, but we are still picking glitter out of our hair (four days later).  The kids are still pretty young, so there weren’t any projects proper, it was a how many different things can you glue to one card sort of deal. My son’s inner glitter lover came out and he used up most of what we had.  Actually after the party was over my kids worked on their valentines almost until dinner time. They would get up from the table every once and a while and help themselves to the leftovers at the buffet. It was a rare day in motherhood where I was aloud to sit back, cuddle with the baby, and crochet as I please.

I got kinda themey with the food. It was supposed to be all heart shaped and red, but ended up rather brown and carby.  I made tomato focaccia from my bakery days and it was pretty good, at least the two dogs who finished it off thought so. These financiers were a total bust: they didn’t taste very good–and financiers are usually super delicious–and the heart effect was fussy as hell and didn’t work in the end.  Everything else was pretty run of the mill: heart shaped pb&js, red vegetables, trail mix. Martha’s raisin heart pockets were my favorite and I squirreled a few away to have with tea later.  I know valentines day is all about chocolateness, but these were nice and wintery, not too sweet and perfect with tea. I used golden raisins in the filling, but I think dried apricots with a little cardamom would be even better.  So go set up a little buffet for your kiddo’s lunch and open the glitter and savor some quiet time, or make some valentines yourself.  Next year we might skip the christmas cards all together and just send out valentines.