Posts Tagged ‘tutorial’

guest post: stuff n’ stay for creative play

Today’s tutorial comes from an amazing Australian seamstress, Sophie from Cirque du bebe. Sophie is new to sewing, though you would never believe it looking at the clothes she makes. They are always super hip and beautifully finished: like this hoodie and this outfit and this stylish number.  She can pick a bold print and make it look so effortless, so right. For example she pairs a crazy-glasses-wearing-man print with stripes, pastel blue, and safety orange and it’s awesome! So I knew whatever she was going to come up with for a tutorial was going to be good, but I didn’t know it was going to be this good…

** * * * * * * * * * * * * * * * * * * * * * * * * * * * * * * * * * * * * *
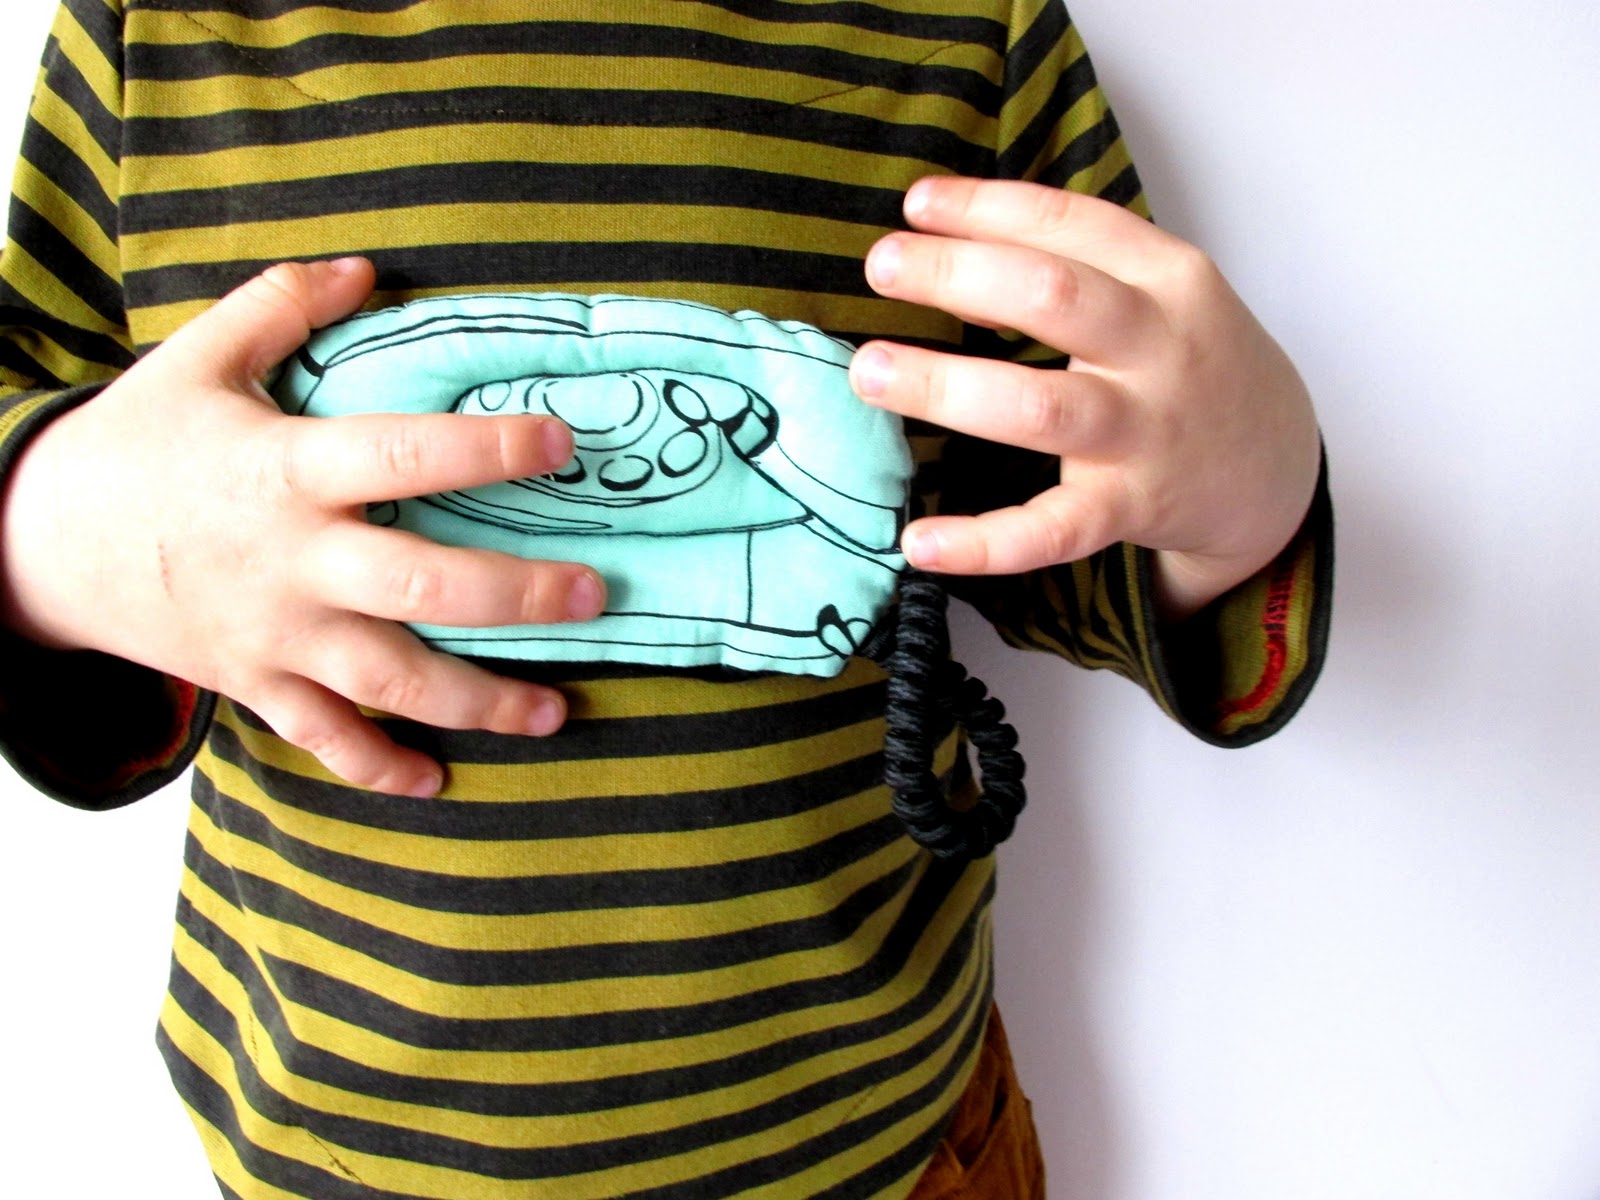
Hello, Sophie here from Cirque Du Bebe. Today we are going to take an ordinary kiddie shirt and transform it into ‘lift-the-flap’ clothing. Because, lets face it, those books are more fun! You will learn how to make a simple ‘stuffie’ (completely removable for washing) and watch your kids turn it into an interactive prop for creative play. You could even make a few and rotate them.


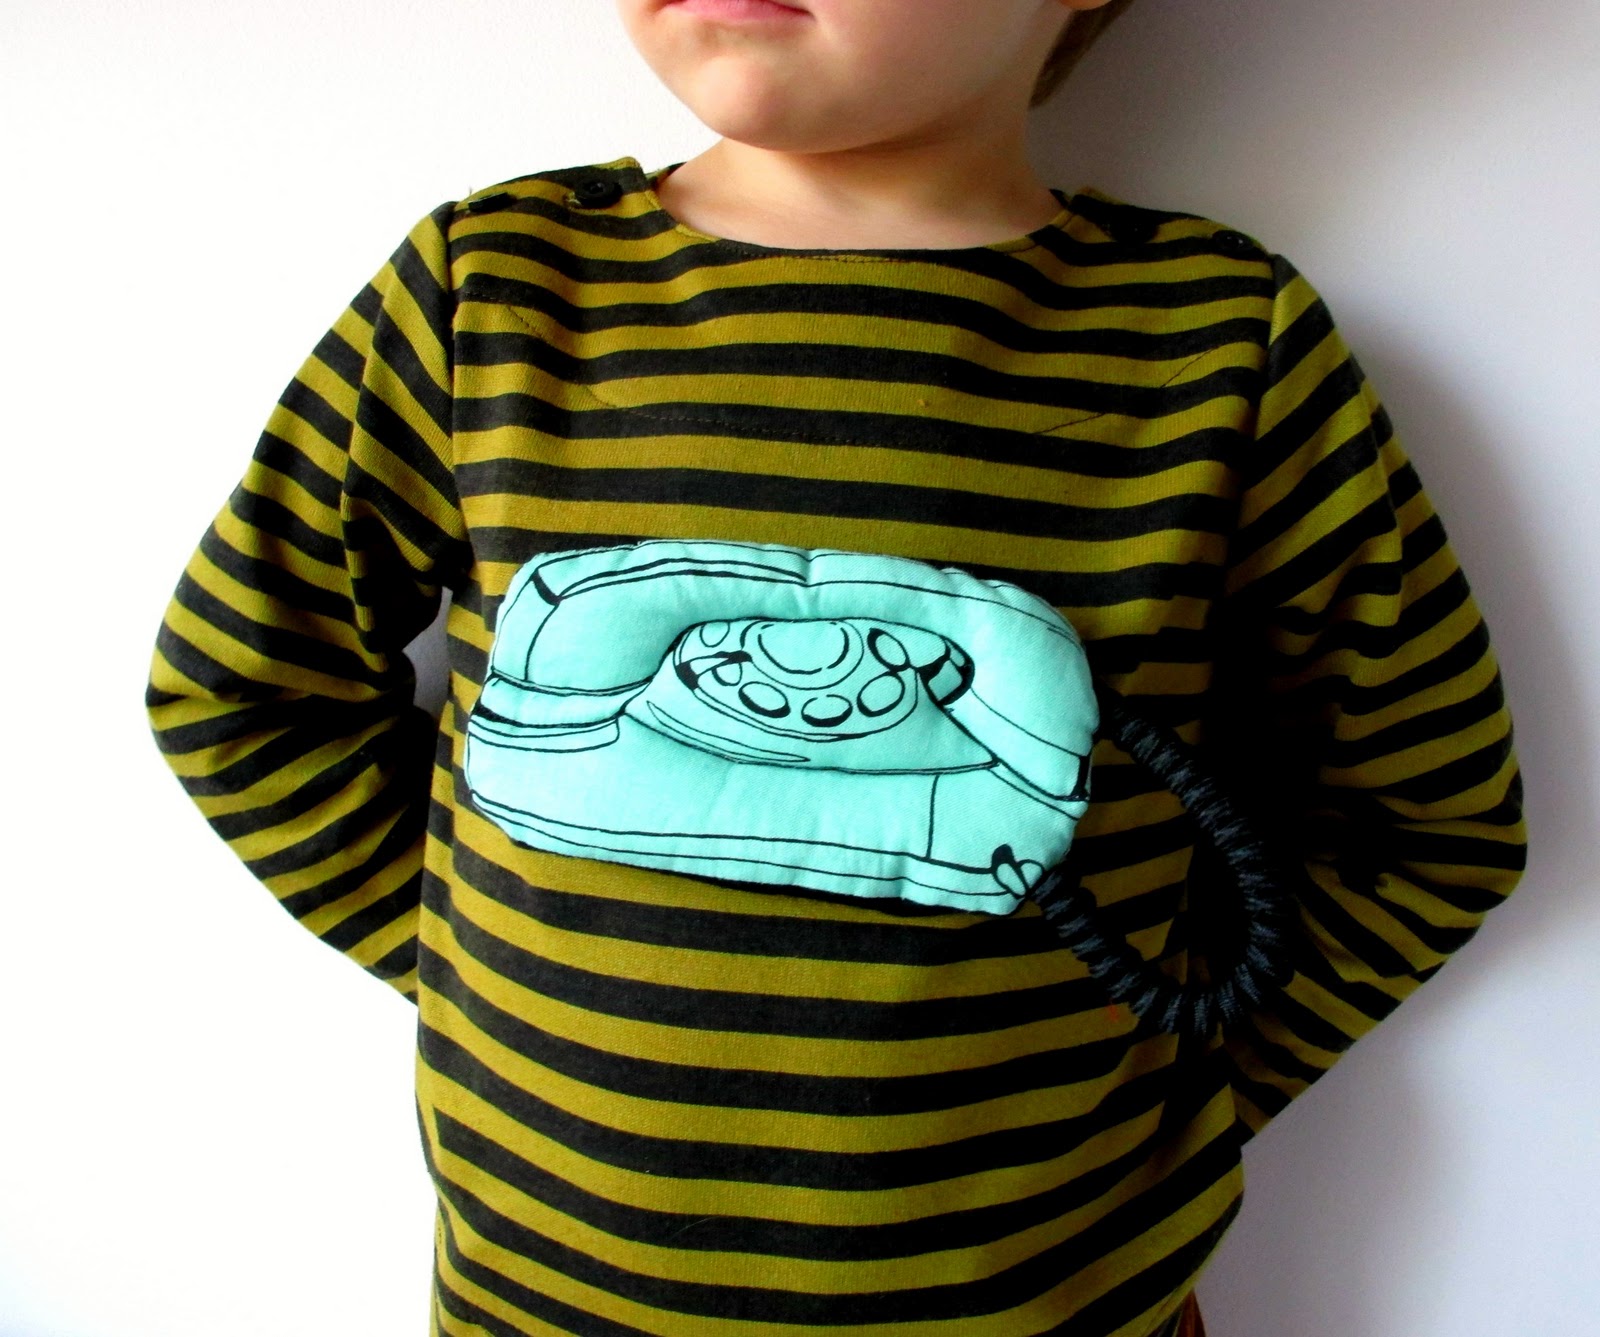
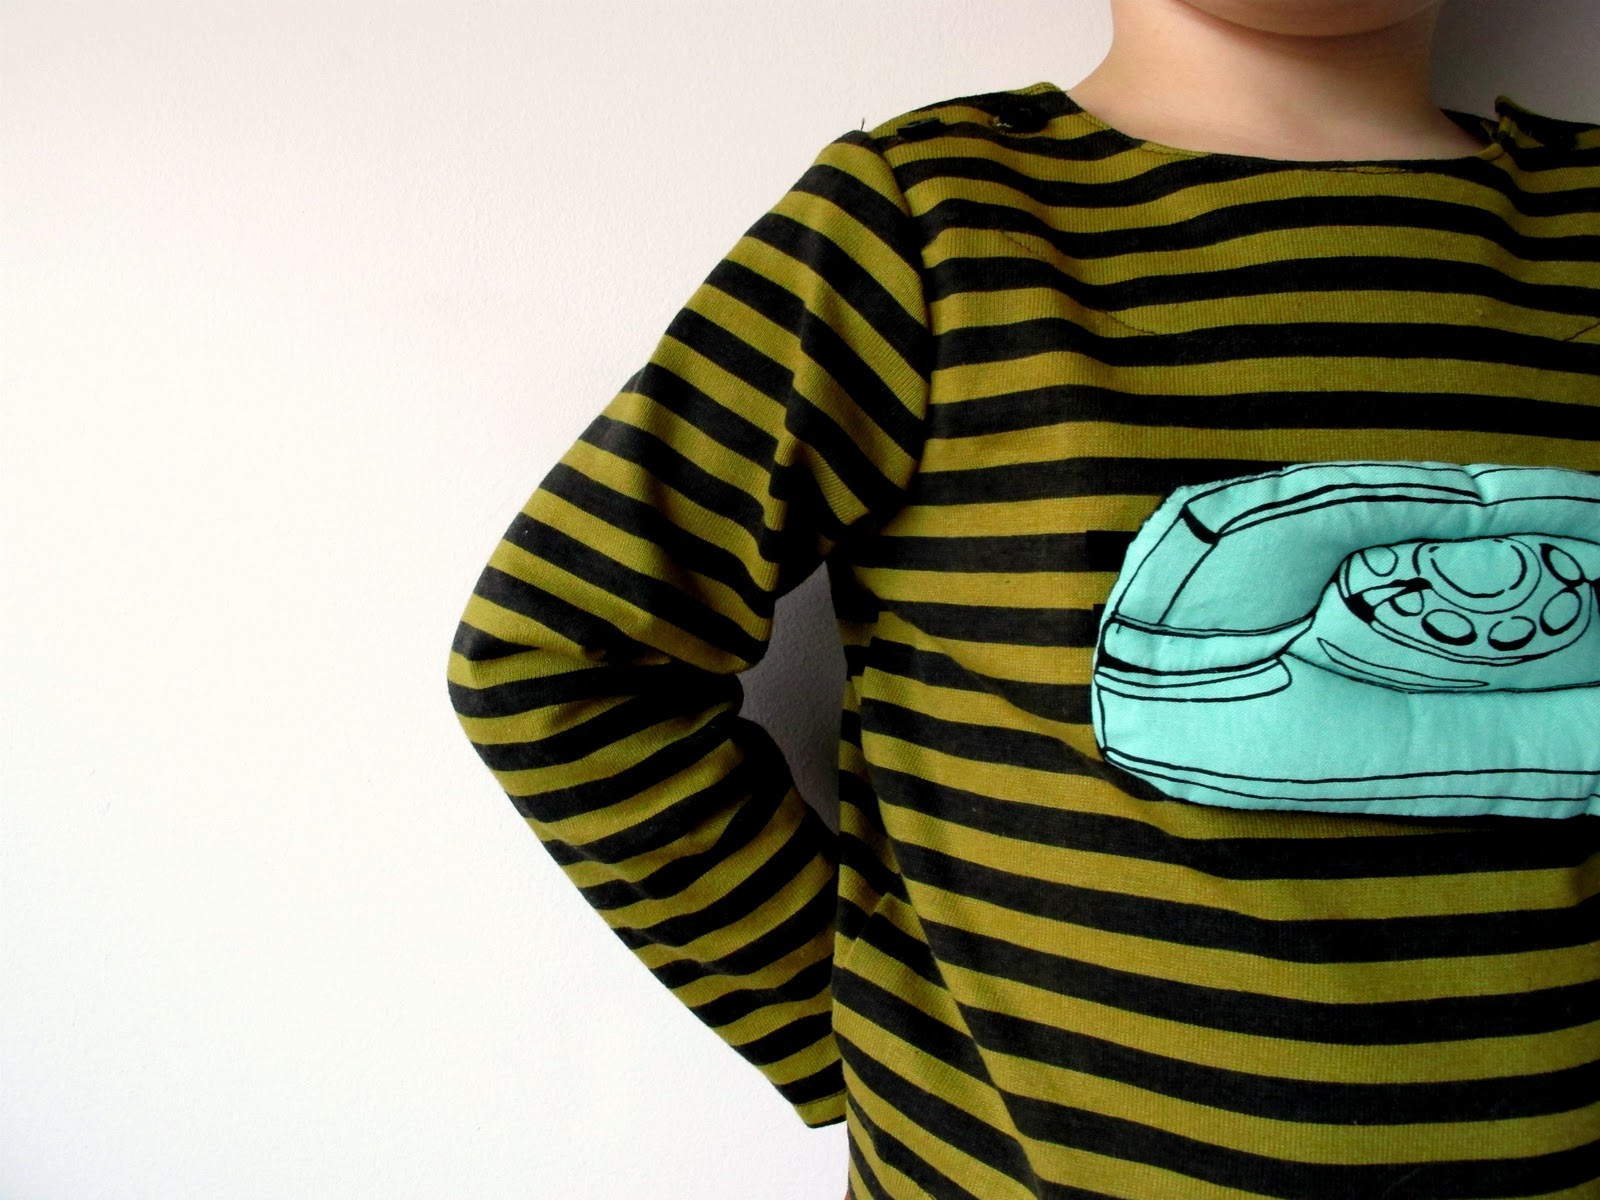
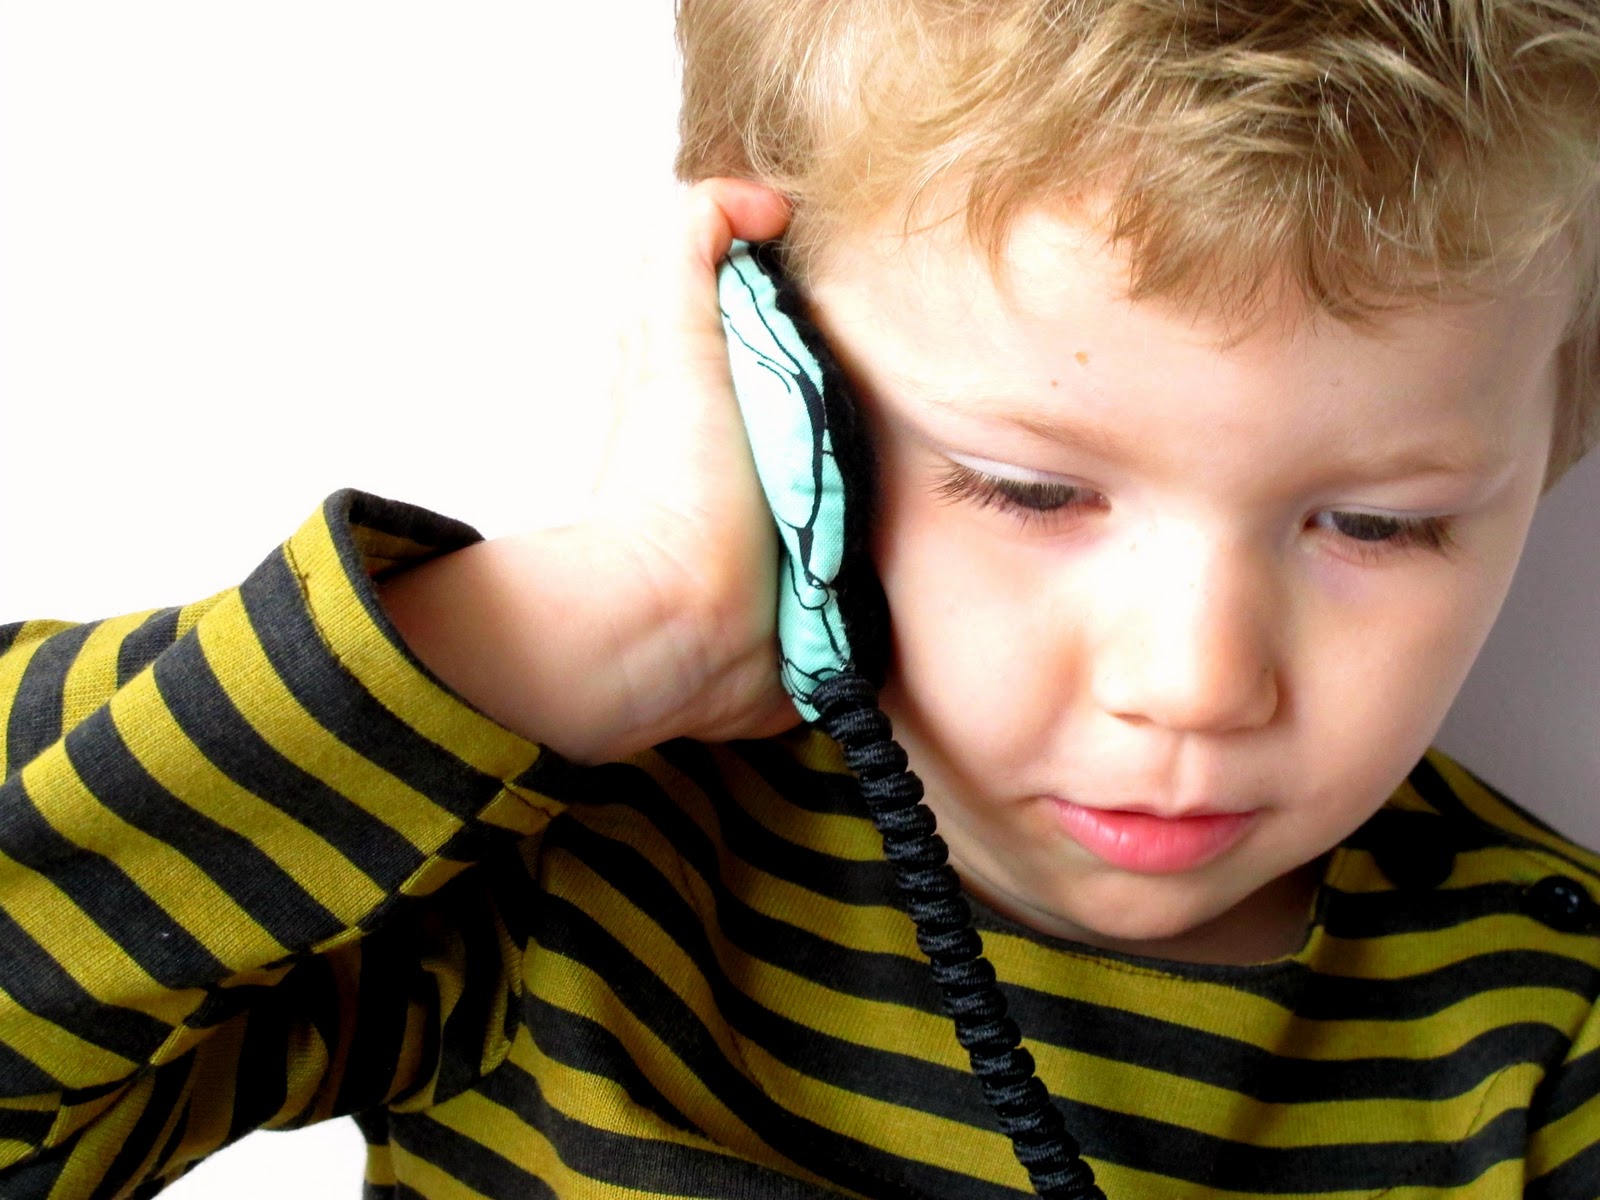
1. Get inspired. What do you think would make a fun prop? A moustache? An ice-cream? An envelope with a felt letter? Your fabric stash can be a good place to draw inspiration…do you have some stripes that scream villain or conveniently, a fabric with a ready made prop lurking in the print (see telephone). You could put something noisy inside; crinkly plastic, a bell. The cord can become part of the game too! You guys are the creatives. Go wild.

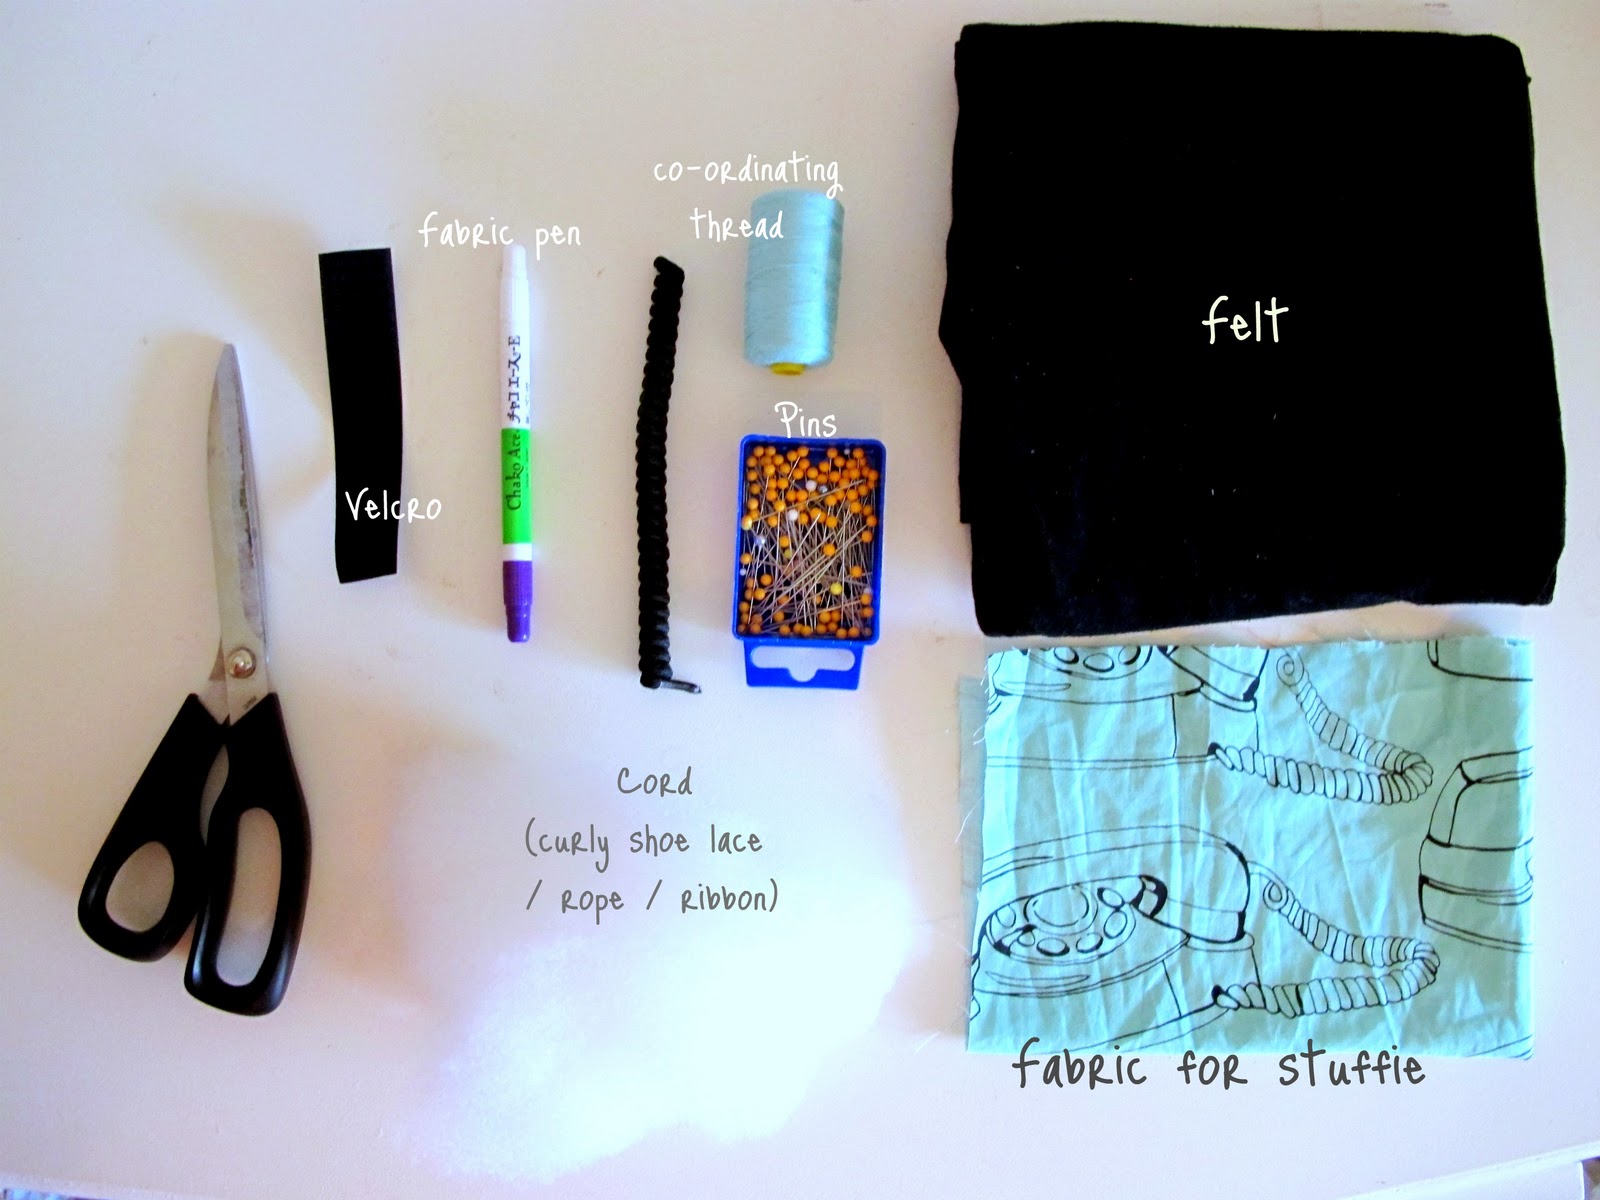
2. Gather materials, including some stuffing to fill the shape with.

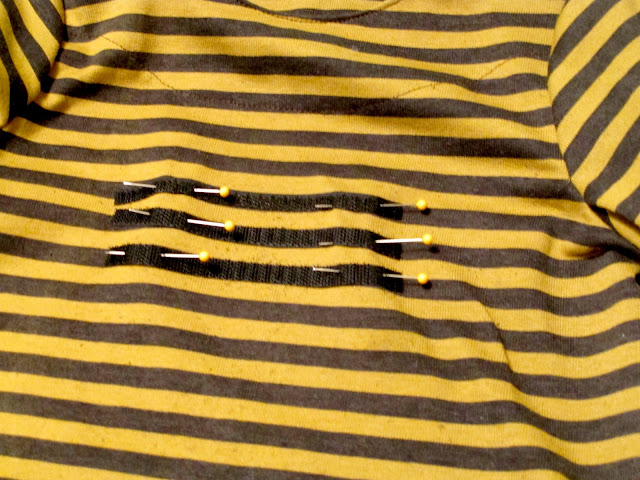
3. Cut the cord and attach velcro. The cord should be long enough to reach where the prop will be used (but not long enough to go around a neck) plus an extra inch that will be fixed inside the stuffie. Cut a narrow strip of velcro (about an inch) and secure it to one end of the cord with a zig-zag stitch, going up and back several times.

4. Draw the sewing line. This will be the perimeter of your stuffie when it is poofed up. This line should be just out from the edge of the image so you don’t lose any of it when you sew.

5. Cut the shape just outside the sewing line this time. This will become the seam allowance.

6. Flip over and re-draw your sewing line on the wrong side.

7. Cut the felt backing. Pin the fabric to your felt and cut around the shape.

8. Attach velcro to felt backing and to shirt. Sew a couple of strips of velcro to the back of the felt backing. Cover a generous area…the stuffie needs to be easy to slap on in a hurry (when you have to hang that telephone up fast). Now for the shirt. When considering where to place the complimentary velcro strips see if there is somewhere in the fabric design to disguise black or white velcro, like in stripes as above. This just makes for a slightly neater look but its not a biggie if its not possible. Pin and sew the velcro on, making sure the stuffie has plenty of area to stick to.

9. Attach cord and sew stuffie. With your fabric right side to right side (velcro facing outside), sandwich the cord between the two layers and pin in place, leaving an inch hanging outside and the rest on the inside. Shut the lid and pin around the remainder of the shape. Sew your Stuffie following the line you drew earlier, making sure the cord is still tucked inside. Leave a gap in the stitching large enough to turn stuffie back the right way.

10. Now stuff it. Stuff it real good.

11. Close the opening with small neat hand-stitching, using co-ordinating thread.

12. To add a little extra tactile goodness and give the stuffie a quilted effect, pick a couple of lines to emphasize and sew along them.

Congratulations…if you made it this far you didn’t stuff up. Sorry. Now stick that stuffie on and enjoy the entertainment.

guest post: ways to use pintucks

I’m very happy to have Sascha from Piccoli Piselli (it means little peas!) here today to tell us a bit about pintucks. Sascha is a very talented sewer who cranks out fantastic clothes for all three of her kids. She is a wiz with knits and totally hilarious to boot!

* * * * * * * * * * * * * * * * * * * * * * * * * * * * * * *

Hi there! Sascha here from Piccoli Piselli. I thought I’d show you some creative ways to use pintucks and pleats in children’s clothing.

A few years ago I made this top with freestyle pintucks on the bottom of the sleeves.

ever since then I’ve been meaning to experiment a little more with pintucks. Generally pintucks are sewn with a special pintuck presser foot and a double needle.

I’ve never gotten around to buying one that fits my machine and then I’d be limited to the fine, evenly spaced pintucks (which are beautiful and can be used in children’s wear in so many ways, especially heirloom garments).

So here’s some ideas for adding pintucks and pleats to your sewing:

I know it’s difficult to see from this photo, but I added pleats to the A-line dress as well as the pocket. For the dress I decided that re-drafting the front to accommodate the pleats would require too much math, so I stitched pleats to a piece of fabric that would roughly cover the size of the front panel of the dress.

Here’s a better picture of the pleats. What you do to create the pintucks or pleats is really pretty simple:

  • First you press down the length of the fabric where your first fold will be (wrong sides together).
  • Then choose the size you want you pintuck/pleat to be. On the dress above I made them about 3/8″ wide.
  • Stitch down the length of your fabric.
  • After stitching one row, take the fabric over to your iron and press fabric open.
  • Next you want to determine how far apart each pleat will be. Again, I’m no fan of math so I kind of just picked where it looked nice.
  • Fold your fabric again (wrong sides together) and press.
  • Continue with the stitches until you’ve created the amount of tucks you need.

Here is a photo of some smaller pintucks I made for the pocket on the dress (I ended up making another set for the pocket with wider pleats to match the dress). I used this little measuring tool during pressing which really helped. I have no idea what it’s called, but I use it a lot in sewing.

When making small pintucks it can be a little difficult to keep the fine lines parallel. I guess the smaller pintucks would be better off sewn with a pintuck presser foot, but honestly the set I made above turned out pretty nice and I didn’t end up pulling out too much of my hair.

Here’s what I call “freestyle pintucks”. I wanted to go for a more wavy look (better luck next time) but I like the different widths I created here. I stitched the tucks across the grain of the corduroy. I think this is a great way to embellish boys clothing. Kristin from Skirt As Top did a great tutorial for how to make elbow patches yesterday. Just use her tute to add the patches to the knees of the pants.

Here is another pleat variation. Again, I made the pleats on fabric and then laid my pattern piece on the fabric and cut as usual. Can you see something odd in the left photo? Yup, I forgot that corduroy has a nap like velvet. It’s not too bad in person and as you can see by the photo on the far right, Vinny is happily wearing the pants. This is the best only photo I could take of him wearing any of the clothes I created for this post. He’s gotten very camera shy these days.

I saved my favorite for last…

For this pair of pants I actually did not stitch the tucks before laying/cutting the pattern piece. What I did was add the amount I guestimated I would use in the tucks onto the side seam of one of the pant front legs. This doesn’t always work because of the way patterns are drafted. Most of the time the subtle curves of a pattern will be compromised by adding width nilly willy like I did. This definitely would not have worked for the A line dress above. Especially when you have a pattern with facings that need to fit perfectly. I’ve worked with these pants so much I was comfortable making the changes. Before stitching my pant leg closed I attached the car patch. I was too lazy to get out my fusible web so I used fabric glue instead. Mistake. It bled through and now shows permanently on the finished patch. Lesson learned. Hey, that’s what I’m here for. At least you learned today that fusible web is better than fabric glue for applique and corduroy has nap. Yourwelcomeverymuch.

Thanks for having me Meg!

guest post: tutorial for a cuffy outfit

I want to welcome Sophie from Roubidou as our first guest poster this week! I have been watching her sew tiny, beautiful clothes all through her pregnancy: quilted jackets and fuzzy vests and amazing ensembles! Even though she was very, very pregnant, she agreed to write up a tutorial for us. And wow, what a tutorial it is! A cuff is a lovely detail and now you can put it on a shirt, a jacket, a pair of pants, or all three. After you’ve finished reading the tutorial she made, go have a look at the lovely baby she just made! Congratulations Sophie!
* * * * * * * * * * * * * * * * * * * * * * * * * * * * * * * * * * * * * *

Hello dear Elsie Marley readers,

When Meg asked me to do a little tutorial for KCWC I was pleased as punch not only for an opportunity to be a guest on one of my favourite blogs but also to be part of this autumn’s sewing frolic after all (our daughter is supposed to arrive on the 10th). I sewed the outfit to introduce three slightly different types of cuffs and hope you can follow the instructions without too much effort. I’m a self-trained dilettante so the tutorial below is merely what worked for me.

Happy KCWC,

Sophie

* * * * * * * * * * * * * * * * * * * * * * * * * * * * * * * * * * * * * * *

Shirt:

1. Sew the shirt as indicated by your pattern ignoring the instructions for the sleeve finish. Look at the given seam allowance and the sleeve finish method of the pattern, calculate the length of your cuff plus seam allowance to determine how much you’ll shorten the sleeve before adding the cuff and placket. To save fabric you could do this before cutting the fabric. If you have your little client ready and willing have her/him put on the garment to tailor the sleeves according to his/her measurement.

2. Make a pattern for you placket and cut out the placket twice (you’ll want mirroring plackets unlike the ones in the photo).

3. Place the placket with its ride side onto the wrong side of the sleeve and sew a little rectangle. Slash through the placket and sleeve down centre right between the stitches and carefully clip to the corners of the rectangle.

4. Turn the placket to the right side of the fabric and press. Now it’s likely to become a bit finicky. I very much prefer sewing for kids since it is so much quicker, pieces are easier to handle and you need less fabric. But sewing this placket, especially for a size 2 shirt, I wished I was sewing an adult sized shirt. To help you through this fabric origami it might be good idea to have a ‘real’ shirt with a placket lying next to you for visual guidance.

5. Fold back the long edge of the shorter side of the placket and pin in place. Then sew the folded edge in place stopping at the top of the gap. Tie the thread ends securely on the wrong side.

6. Next, fold the other side of the placket across the shorter side and press under the long edge. Fold back so that the pressed-under edge is on the sewing line and pin in place. Now, fold under the top pointed end,and press. Sew the long folded edge and make sure the underside of the placket is not caught in the stitching. Stitch an X at the end of the placket. Finish by tying the thread ends on the wrong side.

7. Now, gather the sleeve, stitching along the sleeve line with the longest stitch available on your sewing machine. Pull on the threads to manipulate the sleeve.

8. Cut out the cuff in the desired size. I used a one-piece cuff cut from the fabric in one piece and applied fusible interfacing to the half of the cuff that will be the upper cuff. Fold the seam of the non-interfaced side and press. Next sew the cuff onto the sleeve, right side to right side and trim the seam allowance. It’s important that you have an overlap as large as your seam allowance on both sides.

9. Fold and press the cuff to itself, right side to right side, so the folded side of the cuff comes to the sleeve-to-cuff seamline. Sew the ends in line with the two openings, cut the seam allowance, and press the seams open.

10. Trim, turn and press the cuff to the right side. I sewed the folded under cuff in place by machine, but if you want an invisible finish for your could,  hand stitch the folded edge on the inside with a blind-stitch or a slip-stitch.

11. Make a buttonhole on the upper side of the cuff and sew a button on the underside of the cuff. Repeat for the other sleeve.

Jacket:

1. Sew your jacket bearing the same alterations in mind as with the shirt.

2. Now on to the band cuff. Cut the cuff in the desired size, you’ll have two pieces of different fabric per cuff. Since the outside fabric is already thick I didn’t use fusible interfacing, depending on your fabric you might want to apply interfacing to the upper cuff. Pin the two pieces together, right sides facing, and turn under a seam allowance on the under cuff and press. Stitch the lower edge together. Trim and press open the cuff. 


3. Then sew the short side ends together, trim and press again. 

4. If you want to gather the sleeve before sewing on the cuff, do so now. Then sew the sleeve to the upper cuff, right sides facing. Trim and grade the seam. 

5. Press the seam allowance towards the cuff. Turn the cuff inside along the foldline, wrong sides facing. On the inside of the sleeve sew the under cuff in place either by machine or handstitch.

6. Repeat for the other sleeve and that’s it. 

Pants:

1. This cuff is sewn very similar to the shirt cuff. The main construction difference is that this is a lapped cuff which is used for bound or faced openings. I didn’t use any of these openings since I lined the pants and had my raw seams of the opening sandwiched between the lining and the main fabric. With a lapped cuff you’ll have to sew the cuff onto the knee sleeve with an overlap where the button will be. Sew your pants bearing the same alterations in mind as with the shirt

2. Now to the cuff. Start by sewing a line of piping (with your zipper foot) long enough for two sleeve cuffs. Then cut the cuffs in the desired size (i simply used a cereal bowl to trace the round edges). You’ll need four pieces altogether, I used the same fabric inside as outside in order not to distract from the piping. Pin the piping to the right side of one sleeve cuff. Stitch close to the stitching line on the piping, sewing with your zipper foot.

3. Turn under a seam allowance on the under cuff and press. Place the under cuff over the piping, right sides facing an sew the outer line of the cuff close to the previous stitch and the piping again with your zipper foot. Trim, turn and press the cuff.

4. Now attach the cuff to the knee sleeve as you did with the shirt but leave a seam allowance on one side and an overlap (long enough for your button) on the other side. Sew the cuff to the knee sleeve as you did with the shirt. Fold and press the cuff to itself, right side to right side, so the folded side of the cuff comes to the knee-sleeve-to-cuff seamline. Sew the shirt end in line with the opening and trim. Sew the overlap end along from the knee-sleeve to-cuff-seamline and then down to the cuff. Clip the corners and press the seams open. Push to the right side and finish the edge of the under cuff either by hand or machine.

5. Make a buttonhole on the upper side of the cuff and sew a button on the underside of the cuff. Repeat for the other knee sleeve.

And ready is a cuffy outfit.

bunting tag tutorial

Next week is the kids clothes week challenge! Have you signed up? Do you have a plan? Are you making piles of fabric? My list consists mostly of pants, coats, and some shirts. Not particularly exciting, but it’s what my kids need.

This week I wanted to have a slew of tutorials to get everyone excited to sew next week. There are so many good tutorials out there for simple pants and shirts already. Like these–

tutorials for basic kids clothes

  1. simple pants pattern
  2. basic coat pattern
  3. ringer shirt tutorial
  4. hoodie to pullover refashion
  5. kimono pattern
  6. raglan shirt pattern

So instead of patterns and tutorials for pants or tops, I’ve asked some super fantastic children’s clothes makers (and bloggers) to come up with tutorials for details you can add to basic pieces: patches, hoods, pintucks.  Sounds awesome, right? This week will be like the pre-game party for kcwc!

bunting tag tutorial

I’m going to kick it off with a little detail tutorial of my own: the bunting tag tutorial. I try to remember to put tags in all the clothes I make, because if I don’t my son will inevitably wear his pants backwards. The elsie marley tag I have is gray–nice and subtle, but not very noticeable to a four year old. So I’ve had to come up with other, more visible tags to use. Bunting, banners, triangles on strings, whatever you call them they are everywhere, so I figured why not put them in your pants?

the bunting tag tutorial

bunting tag materials

Materials

  • bias tape–double fold, single fold, it doesn’t matter just use what you have
  • pins
  • scissors
  • iron
  • an article of clothing to put your tags in

bunting tag tutorial steps 1 and 2

Directions

1.  Cut five 2 inch pieces of bias tape. You can use all the same color or different colors, whatever you like. Oh yeah, that is some metallic gold bias tape up there!

2.  Open up one side of the bias tape and iron it flat. Then fold up the folded side to make a triangle–see above photo. 

bunting tag tutorial steps 3,4,5

3.  Turn the triangle over so the fold is in the back. Line them up in the order you like.

4.  Check to see if the triangles are evenly spaced by placing a piece of paper over the raw edges (the bit of cardboard that comes with bias tape works well for this).  This also lets you see what the tag will look like when it’s sewn into your clothes–the triangles overlapping no longer shows and it looks more like a proper bunting.

5.  Pin the triangles and sew or bast them together.  Trim the raw edges to about 1/4 inch.

bunting tags!

6. Insert the bunting where you would normally put a tag (the back, duh) and sew that sucker in. Ta Da! A bunting in your pants!  Now your kids won’t put their clothes on backwards and while you are folding the laundry you’ll smile a little when you see these little tags .


knot shorts

posting a project I did for grosgrain’s free pattern month:

Meg from elsie marley here and I’m very happy to be a part of all of this fantastic freeness on Grosgrain this month. For my contribution I’m going to show you how to alter a plain old pants pattern into one that will make super cute shorts for your little girl: knot shorts!

knot shorts tutorial by elsie marley

Materials

  • an existing kid’s shorts or pants pattern
  • one yard material
  • quarter yard (or so) contrasting material for facing
  • elastic (1 inch wide, or whatever you have lying around)
  • freezer paper, or some other paper to trace patterns

It might seem silly that for free pattern month, you first need to have a pattern. But making a kid’s pants pattern is easy as pie–you just trace some kid pants. Dana from Made has a very clear tutorial for making pants patterns that you can check out if you don’t have a pattern on hand. I have only made these for kids, but I don’t see why altering a grown up pattern in the same way wouldn’t work just as well.

Directions

1. First you need to trace your pattern onto pattern paper, or newsprint, or I like to use freezer paper.

2. Now you need to decided how long the inseam on your knot shorts will be. I made mine 4 inches long. This is a medium length pair of shorts on a 5 year old girl. A one or two inch inseam sounds scandalous, but I’ve made knot shorts that short and they look great. And besides, kids have very short legs, so it’s really not that short at all.

making the pattern for knot shorts

2. Whatever length inseam you choose divide it in half and make a mark. From that mark draw a line through the pattern and extend it 6 inches past the outer seam of the pants.

making the knot for knot shorts

3. From the end of the line draw a nice curve down to the bottom of the shorts. And draw another line that gracefully curves up to meet the outer seam.

4. Repeat the process for the back pattern piece.

making the facing pattern for the knot shorts

5. To make the facing for the shorts, first trace the front pattern piece. Then on your new piece, draw a straight line from the crotch (ugh, I can’t stand that word) to where the tie begins to curve out. Cut on that line. This will be your facing pattern.

6. Now that the pattern is made you can cut your fabric. Cut two front pieces and two back pieces out of your main fabric. From the contrasting fabric cut 4 facing pieces.

sewing inseam for the knot shorts

7.  Sew two facing pieces together, on the short straight side, right sides facing. Then serge or hem the long straight edge on top. Do this  for the other set of facing pieces as well.

8. Sew the inseam together on both legs of the shorts.

9. Open up one leg of the shorts and put the facing on top– as above–right sides facing.

10. Sew all around except where you hemmed (or serged). Clip the corners, turn out, and press.

11. Sew down the outer seams on both legs of the shorts. Stop right after you catch a bit of the facing, then backstitch a few times to secure.

12. Turn one leg inside out and the other right side out

last seam of the knot shorts

13. Put the right side out leg inside the inside out leg–now the right sides are together. Sew all around the crotch (that word again, ugh).

almost done with the knot shorts

14. Turn it out and press. You should have a very funny looking pair of shorts.

15. Make sure you have thread that matches exactly to your main fabric, then sew around the top of the facing to attach it to the shorts. Or if you want the seam to be even more invisible, you can sew it by hand.

tie the knots

16. Tie the knots, silly!

17. Fold the top edge under and press. Sew around to make a casing for the elastic. Insert elastic, insert child to see if they fit, sew up elastic and seam and ta da! Knot shorts!

I hope you enjoyed the knot shorts tutorial! Thanks so much for having me, Kathleen!