bunny lovey

You know how yesterday I made a baby outfit inspired by this page from I Can Fly? Well, after staring at that page for so long, I had to make a bunny too! (more…)
You know how yesterday I made a baby outfit inspired by this page from I Can Fly? Well, after staring at that page for so long, I had to make a bunny too! (more…)

Rashida (of I heart Linen fame) contacted me a long while back to see if I would contribute to her new book, Zakka Style. Of course I said yes! I remade this project, so I could fix the pattern and change the colors a bit. I never did get around to making and selling these pocket pillowcases, but yay for my laziness because now you can make them!

The pattern really is quite easy and makes for a lovely gift. The diamonds are fiddly, I won’t lie, but you could skip them and sew any sort of patchwork your heart desires. The whole book is filled with simple and clever little things to make. And they are designed by some of my favorite people: Holly, Amanda, Leslie, and a good deal more.

I actually made two projects for the book, but the second one didn’t make the cut. Remember this towel I made? Well, I reworked that project as well: a little bigger, nicer patchwork, and in linen. This continuous towel doesn’t fit in my bathroom and though it does look kind of nice in my kitchen, I think it would look better in yours.

That’s right, a little giveaway for this Tuesday: Zakka Style and a zakka stylish linen towel. To enter yourselves in this giveaway, I would like it if you’d answer a question for me. How do you read blogs? Do you use google reader, links from facebook, twitter, flickr, pinterest, old fashioned bookmarks, something else entirely? I want elsie marley to be easily accessible to all of you, which is easier if I know how you are all accessing it :)
psst: if the answer is facebook, well wouldn’t you know elsie marley’s got a facebook page.
Ok so leave your answer before Thursday Feb. 23 at 9am and I’ll let the robots do the picking. This giveaway is open to all my lovely readers, no matter where you live. Good luck!
The giveaway is closed!
Today’s tutorial comes from an amazing Australian seamstress, Sophie from Cirque du bebe. Sophie is new to sewing, though you would never believe it looking at the clothes she makes. They are always super hip and beautifully finished: like this hoodie and this outfit and this stylish number. She can pick a bold print and make it look so effortless, so right. For example she pairs a crazy-glasses-wearing-man print with stripes, pastel blue, and safety orange and it’s awesome! So I knew whatever she was going to come up with for a tutorial was going to be good, but I didn’t know it was going to be this good…
** * * * * * * * * * * * * * * * * * * * * * * * * * * * * * * * * * * * * *
Hello, Sophie here from Cirque Du Bebe. Today we are going to take an ordinary kiddie shirt and transform it into ‘lift-the-flap’ clothing. Because, lets face it, those books are more fun! You will learn how to make a simple ‘stuffie’ (completely removable for washing) and watch your kids turn it into an interactive prop for creative play. You could even make a few and rotate them.
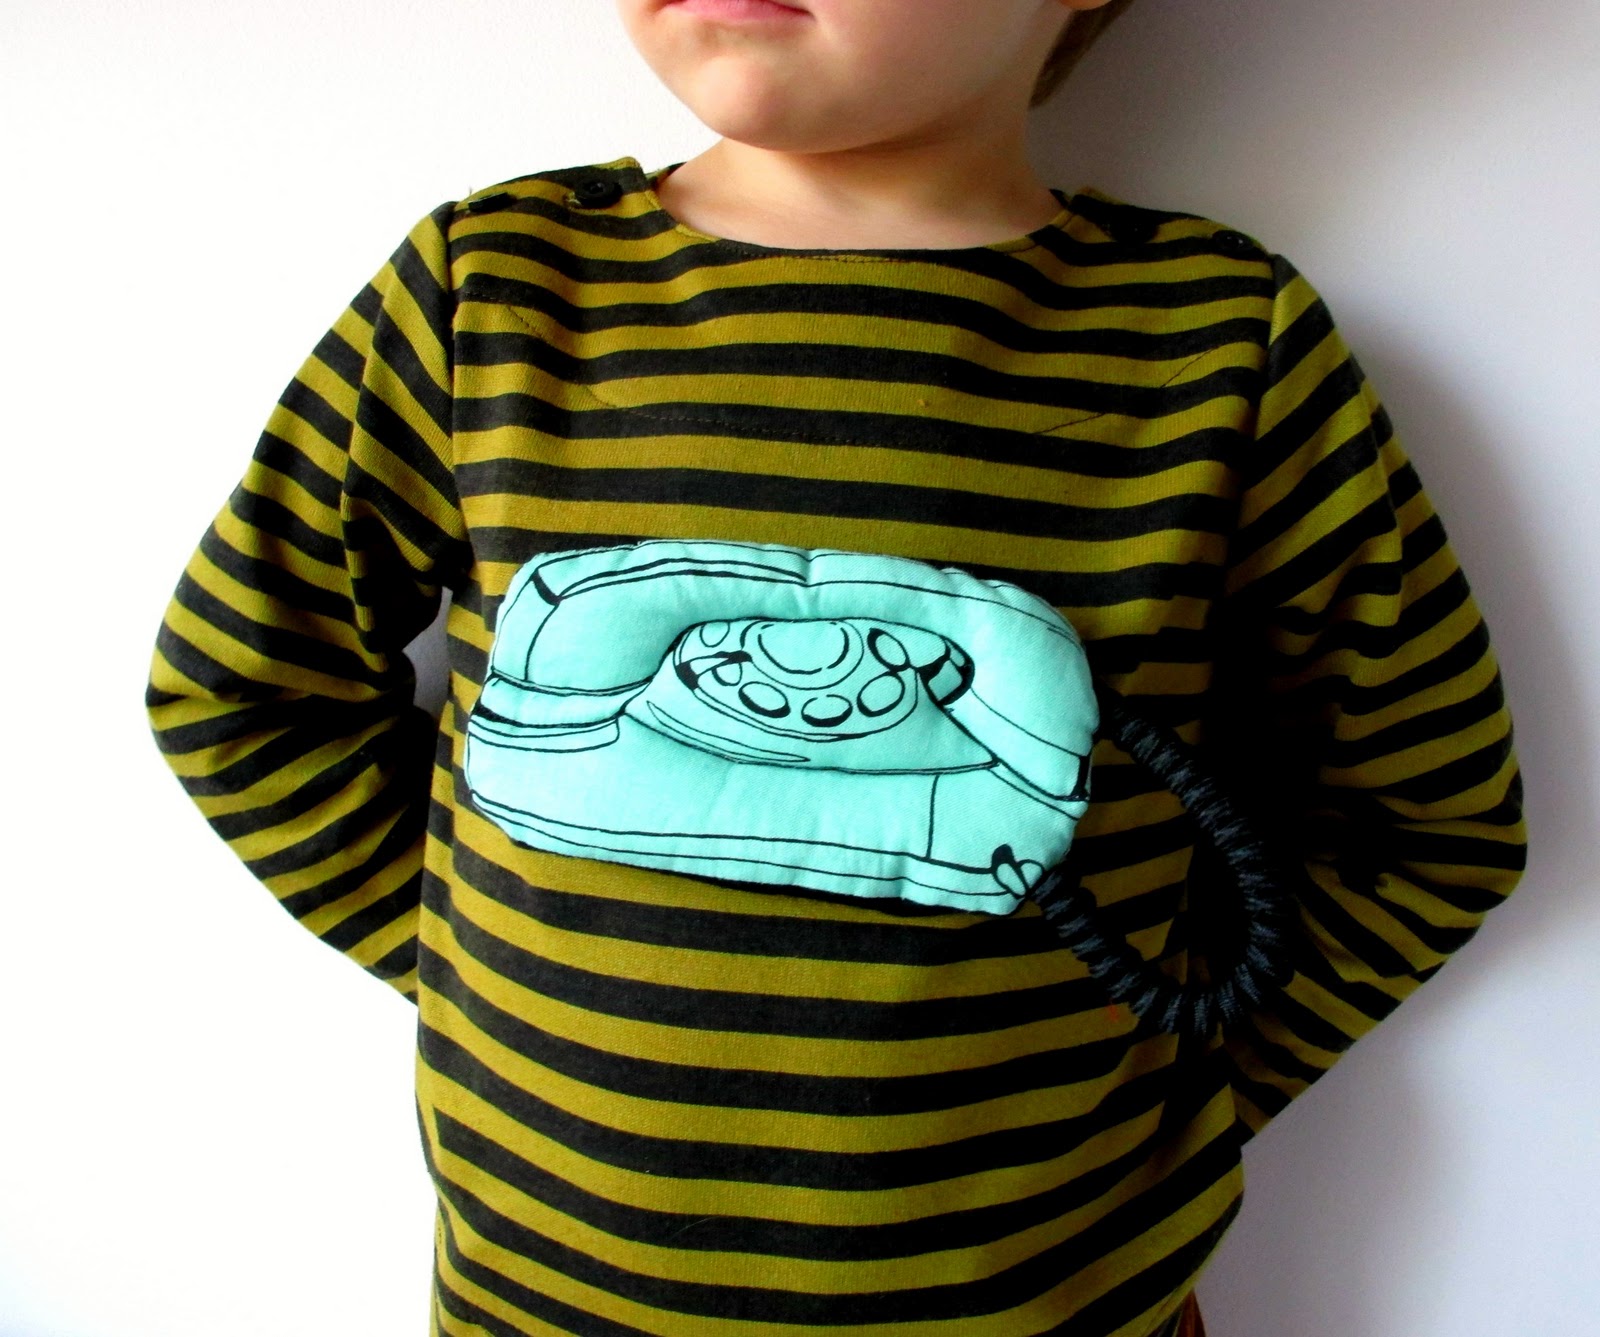
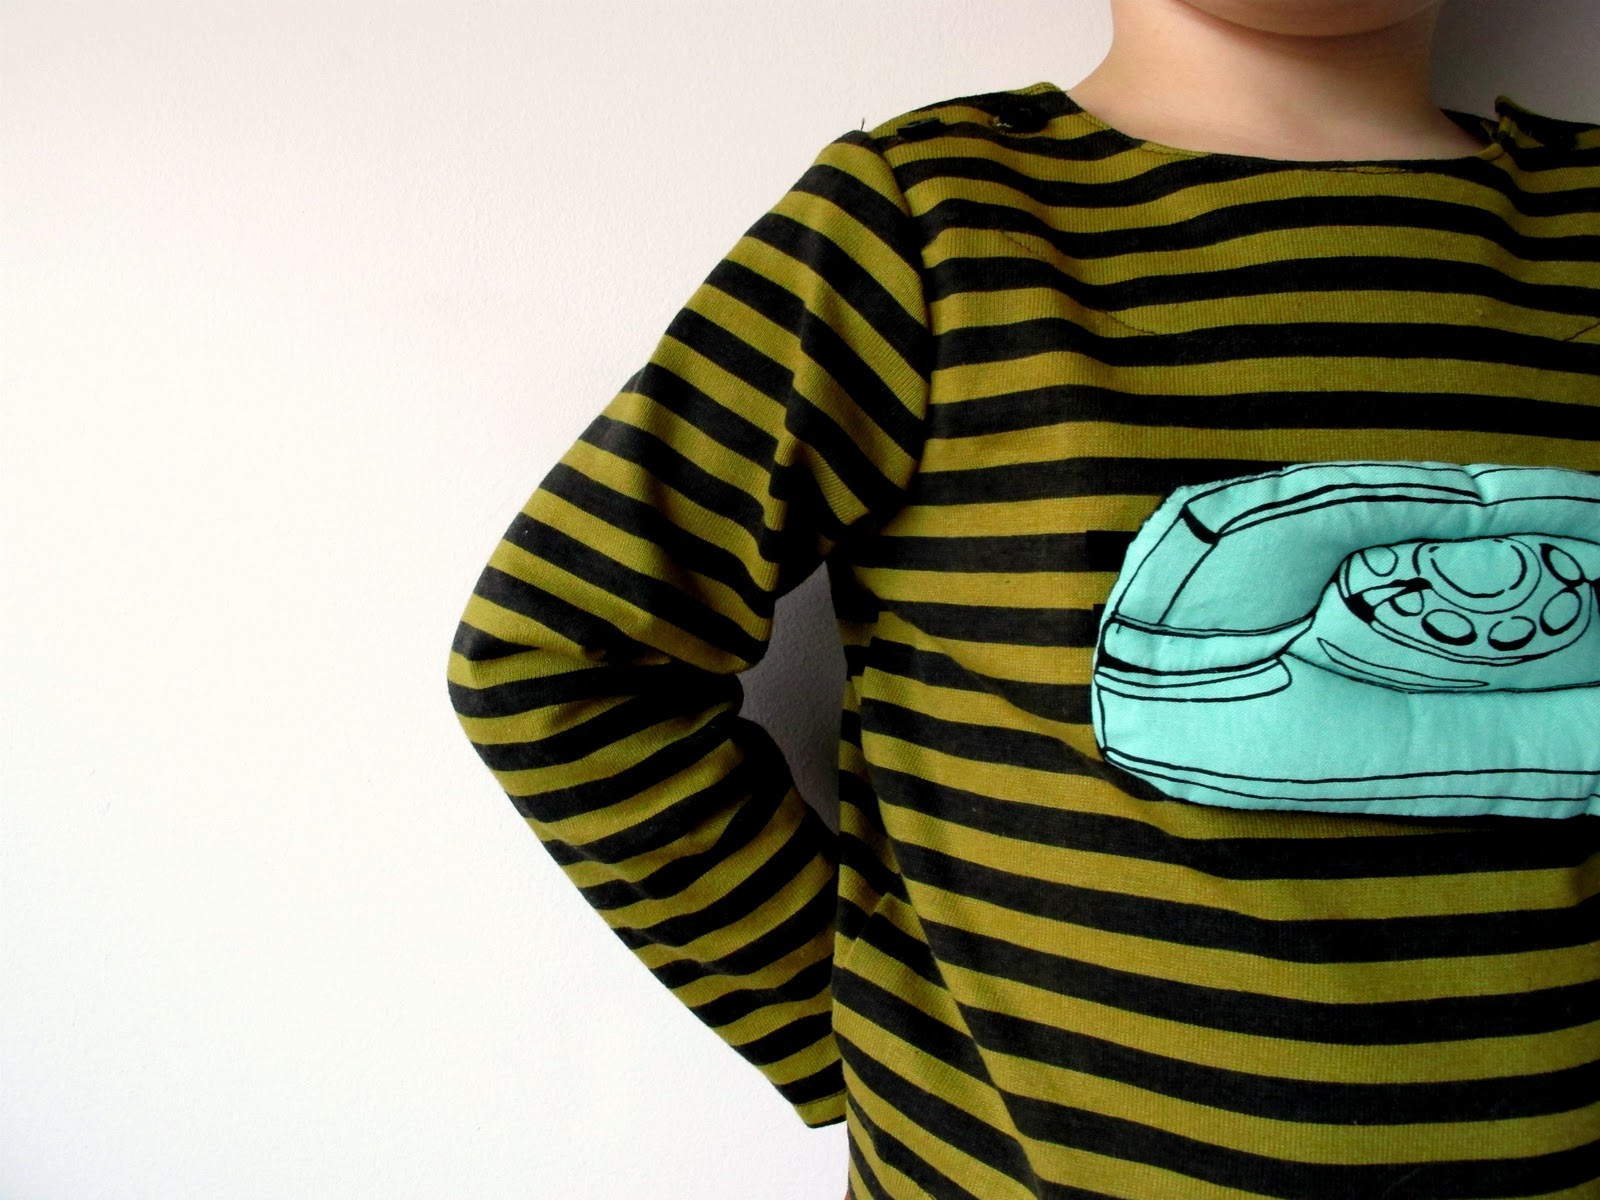
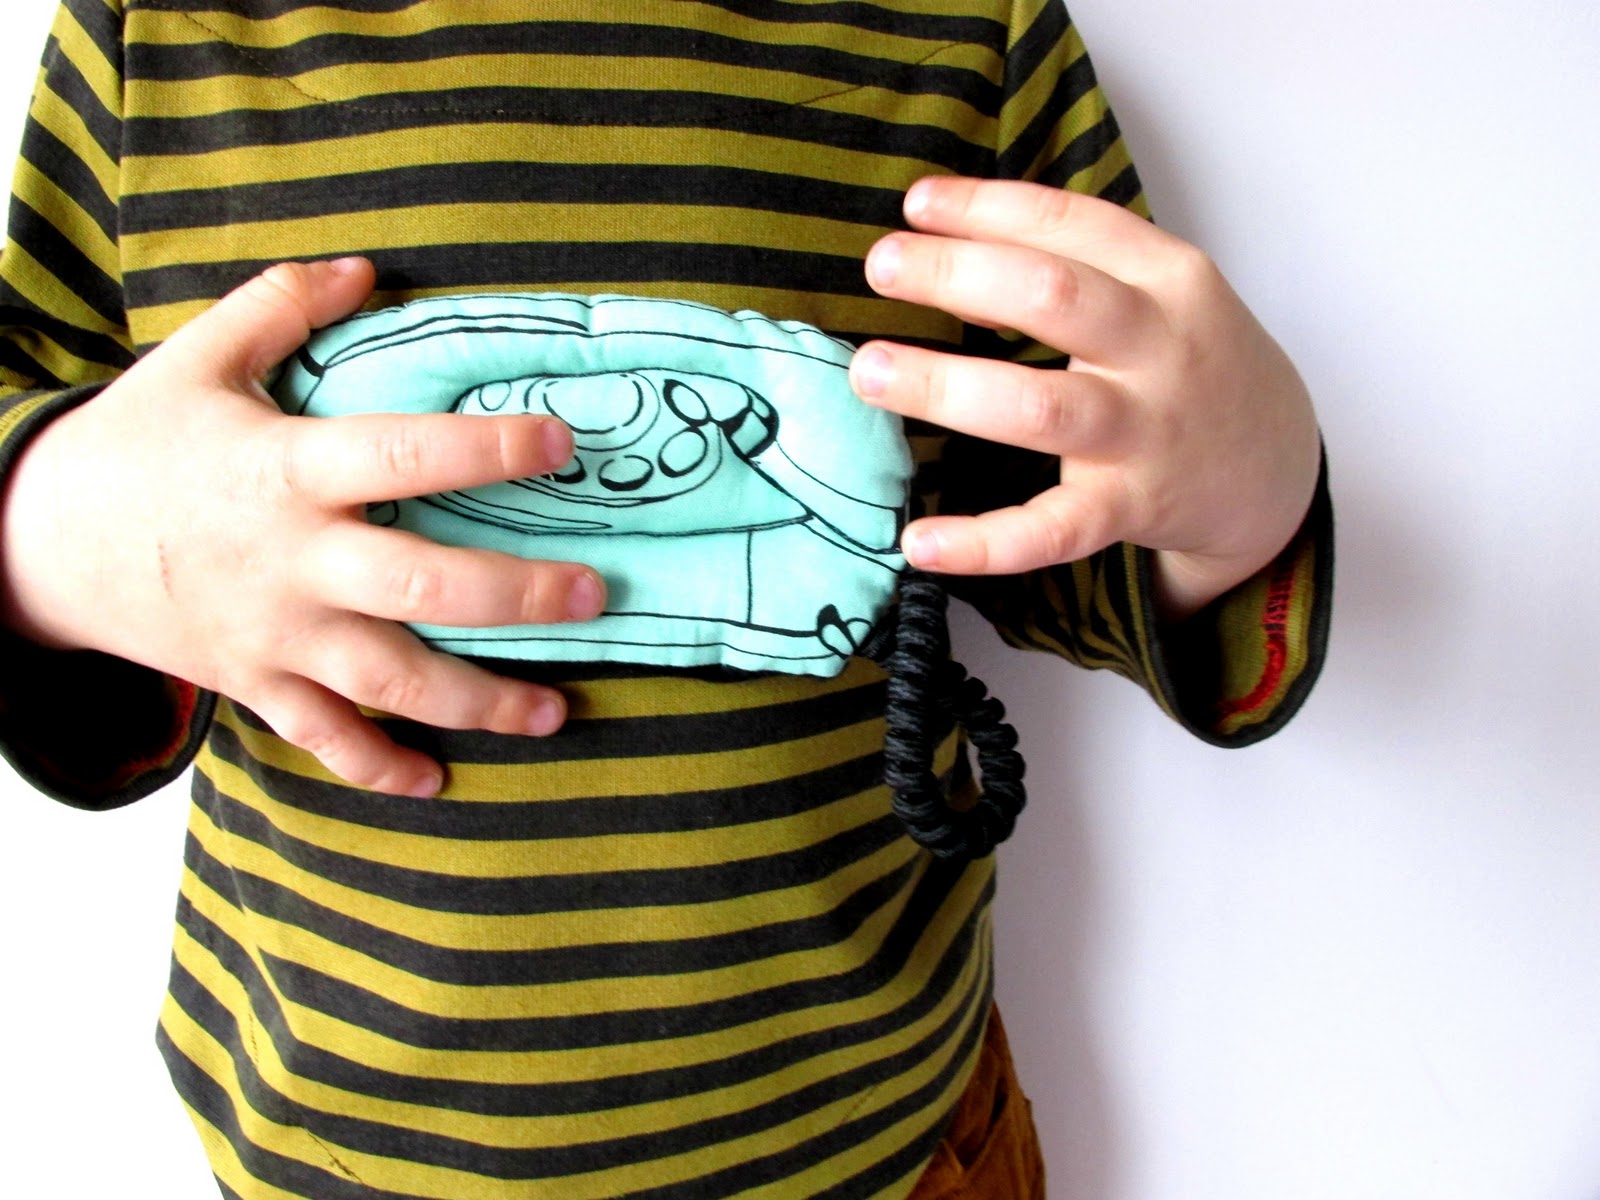


1. Get inspired. What do you think would make a fun prop? A moustache? An ice-cream? An envelope with a felt letter? Your fabric stash can be a good place to draw inspiration…do you have some stripes that scream villain or conveniently, a fabric with a ready made prop lurking in the print (see telephone). You could put something noisy inside; crinkly plastic, a bell. The cord can become part of the game too! You guys are the creatives. Go wild.
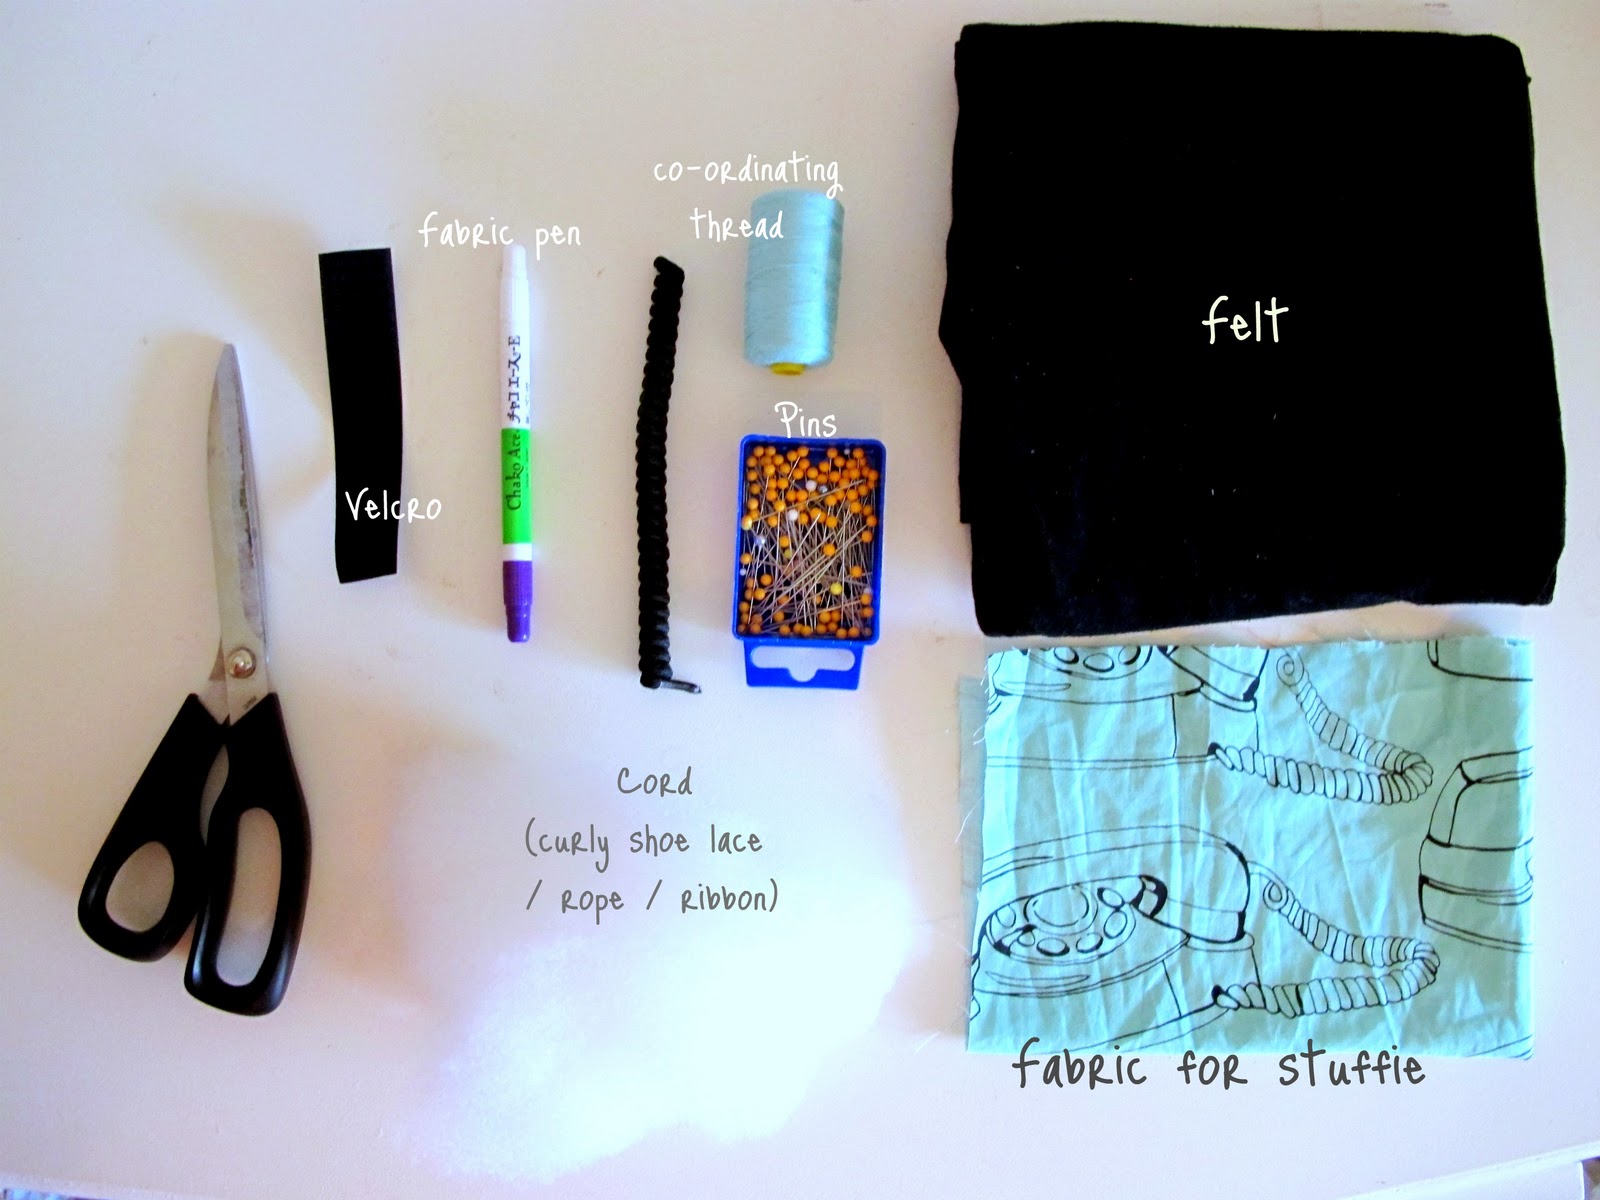
2. Gather materials, including some stuffing to fill the shape with.

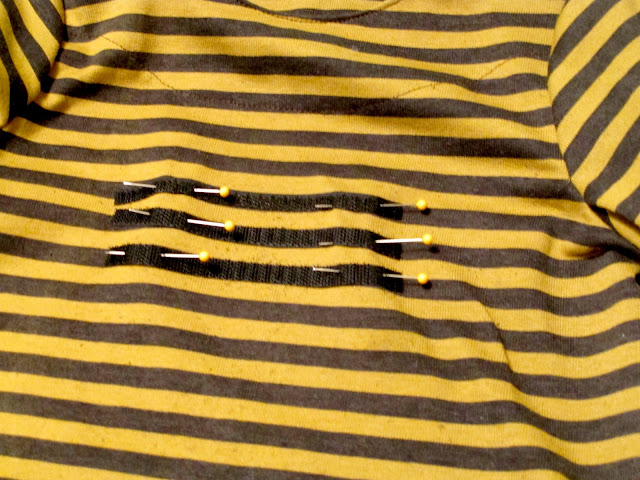
3. Cut the cord and attach velcro. The cord should be long enough to reach where the prop will be used (but not long enough to go around a neck) plus an extra inch that will be fixed inside the stuffie. Cut a narrow strip of velcro (about an inch) and secure it to one end of the cord with a zig-zag stitch, going up and back several times.

4. Draw the sewing line. This will be the perimeter of your stuffie when it is poofed up. This line should be just out from the edge of the image so you don’t lose any of it when you sew.

5. Cut the shape just outside the sewing line this time. This will become the seam allowance.

6. Flip over and re-draw your sewing line on the wrong side.

7. Cut the felt backing. Pin the fabric to your felt and cut around the shape.

9. Attach cord and sew stuffie. With your fabric right side to right side (velcro facing outside), sandwich the cord between the two layers and pin in place, leaving an inch hanging outside and the rest on the inside. Shut the lid and pin around the remainder of the shape. Sew your Stuffie following the line you drew earlier, making sure the cord is still tucked inside. Leave a gap in the stitching large enough to turn stuffie back the right way.

10. Now stuff it. Stuff it real good.

11. Close the opening with small neat hand-stitching, using co-ordinating thread.

12. To add a little extra tactile goodness and give the stuffie a quilted effect, pick a couple of lines to emphasize and sew along them.


Fighting one illness after another postponed my stop on the Artful Bird‘s blog tour, we’re finally better and I’m so excited to share my interview with Abby with you. Abby is not only a talented plush artist, but a generous artist as well: she often shares her sketches and mistakes and let’s us in on her creative process on her fantastic blog, While She Naps. Recently, she has been teaching her readers how to think and sew three dimensionally in a series of posts on sewing soft toys. Abby is a wonderful teacher and makes beautiful soft sculptures, which makes for a pretty fantastic author of a pretty fantastic book.

What made you want to make soft sculpture and toys?
I love thinking in three-dimensions. The challenge of making my sketch come to life as a stuffed fabric toy or sculpture is something I can’t resist. There are so many options, so many beautiful materials and interesting techniques that make it all come together. It just makes me happy to sit down and try. And when it works…man, that’s thrilling. I feel like I could explore softie making forever and never be done.
How do you choose what kind of birds to make?
Each bird came about in its own unique way. For instance, I was out on a walk with my kids in this little nature preserve behind our house and found a piece of tree bark. It was a good-sized piece and was totally intact except for a round hole that had clearly been pecked by a woodpecker. I brought the bark home and made a woodpecker to perch on it.
The flamingo was a dare. Could I balance a bird that was leaning over? Yep. Fun!
The chick was all about the materials. I thought it would be cool to sew a bird from fluffy terry cloth.
So each bird has a story to tell about how it came to be. I just try to be open-minded and not be afraid to accept a challenge.

What roll do mistakes play in your process?
Mistakes are part of each and every sewing project and they are hugely important, no matter how aggravating they can be at times. Each bird pattern started as a prototype. I drafted the pattern, sewed it up in muslin and then stuffed it to see how it looked. Then there’s an editing and redrawing process to fix the mistakes in the prototype. Sometimes the second draft doesn’t quite work either and more editing and redrawing is needed. I try to constantly remind myself that even if something ends up in the garbage, it is not a waste of time. I may not be able to totally fix it now, but in a few days or weeks or years the solution will come to me and I’ll try again.
And hey, sometimes I make beautiful mistakes! The head on the raptor started life as a doll’s head. I had it all sewn up and stuffed on my desk, but the doll’s body just never materialized. So I sewed a bird body instead, attached the doll’s head, and voila! A new bird was born. And I rather like him, too!

I love how you often use contrasting thread to make your birds. Was that an accident or a conscious design decision?
I think it was an accident the first time it happened, or rather laziness on my part. My machine is nearly 20 years old. It is a Bernette 330 and the Bernina dealer is really far away from my house. As a result, I was lacking in basic supplies for many years. For instance, I only had one bobbin. What a huge pain! One day I had a dark thread wound around it and didn’t want to unwind it to switch threads for a white bird because that would have been a big waste of thread. I just threw caution to the wind and decided to sew the bird in dark thread. When I had it turned and stuffed I really liked that each seam was visible. I like that you can see the maker’s hand in the finished piece. After that, contrasting thread became a regular design element in my work.
Do you feel like you’ve given away all your secrets in your book? Or do you have plans for more books?
I had no problem giving away a bunch of my secrets in The Artful Bird. It is amazing to see people making their own birds now, and I’m thrilled that my techniques can be used and adapted by anyone interested in fabric bird making. I do have a plan for one more book. It is actually an idea that pre-dates the idea for The Artful Bird. Let’s keep our fingers crossed.

The profiles of other bird makers at the end of the book is such a lovely and generous thing to do. How did it come about?
I have been inspired for years by the four other fabric bird makers that I feature in the book and I really wanted to include their work so that readers could share in that inspiration. I was so excited when all four of them agreed to participate. Having a conversation with each of them about their processes for making fabric birds was amazing for me. It really was a highlight of the eight months that I worked on the manuscript and projects for the book. I owe each of them a sincere thank you.
*************************************************************************
Thank you so much Abby!

I really wanted to make the sock bunny that Heidi (from My Paper Crane) created, but I didn’t have any of those fantastic red and brown monkey socks. What I do have is baby socks: tons of cute, mismatched, totally useless, never stay on baby socks. Now that my littlest is very much not an infant and too soon will be a toddler it seems kind of silly to keep all those teeny tiny socks. So I made a bunny out of them. And a tutorial too.


This is indeed a quick little bunny. After I figured out the pattern, start to finish each bunny took me just 15 minutes. So if you are anything like me and never get around to the easter baskets until the night before, you can whip up this little softie and still have time to run to the drugstore to score the last bag of jelly beans.

Before you start sewing take second to look at the sock you have. Most of the foot part will be the body and the heel area will be the head. Yours might be a little different, depending on your sock. If you look at the picture below you can almost see the bunny already.

Take some stuffing and stuff the foot part of the sock–not too tight! this is just a little, squishy baby bunny. Where the foot part ends and the heal begins sew a running stitch around the sock and pull to gather it. I like to wrap my thread around where I’ve stitched a few times just so it’s secure. Knot your thread and snip.

On the top of the bunny’s back, sew a circle about an inch in diameter with a simple running stitch. Then pull to gather. You may have to mush the stuffing around so you can pull it tight to make a tail shape. When you have a little bunny tail, wrap your thread around a few times and knot off (do people say “knot off?” does it sound too much like I’m yelling at you to go “knot off!”).

To make the head, put a little stuffing inside the sock and sew a running stitch around the top of the heel. Before you pull it taut make sure all the stuffing is pushed down under your stitches. Then wrap the thread around and knot off!

Cut a big V shape out of the top of the sock. Now trim the top part of each ear to a point. Then fold the two sides of the bottom part of one ear in to meet and sew together. This is a little easier to understand when you look at a picture:


When you sew that seam down the middle of the ear, it’s good to catch some of the back of the ear with your stitches, so the ears are a little thinner.
Okay, that is a dorky title, but this is the fun part. Now you can play around with the ears and the head, moving them to where you want and putting a stitch here and a stitch there so they will stay.

You don’t have to give your bunny an attitude, but you should stitch the back of the head to the body a little, so it looks more bunny like and less like a cinched up sock. There! you did it! Now go dig around in the sock drawer and see what else you can make into a bunny.


