making leaves

November 19th, 2007

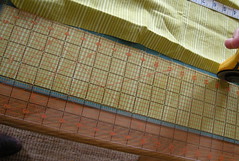
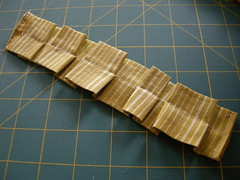
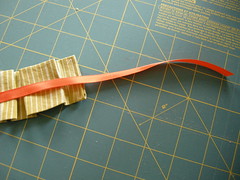
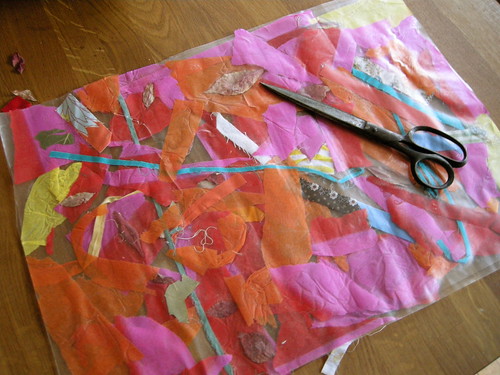
Today is Monday, so my daughter and I had a little crafty time together.  I wanted to try making a collage with contact paper for a while now.  She’s only just 2 and she hasn’t quite mastered the glue stick yet. We gathered our supplies: contact paper, tissue paper, leaves and twigs we picked up on a walk, and fabric scraps.  We slapped everything down –well, I arranged mine–on the sticky side and then put another piece of contact paper (sticky side down) on top of it all. It looked like this:

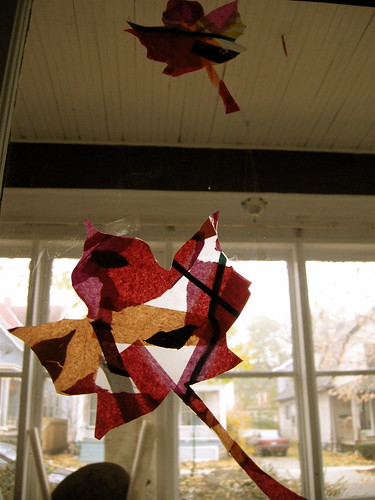
Then I cut out leaves and taped them to the window.  I think this is a good craft for the toddler set.  Tearing paper and sticky things are pretty exciting to my daughter so this project actually held her interest for a while.  Contact paper isn’t all that sticky, so the tissue paper worked best.  But if you are crazy like me and save the tiniest scrap, well they work too and I think thread would look nice.  Leaves work if they’re pressed (ours weren’t) and you get leaves in leaves at the end, which is exciting only to me.  You could, of course, cut any shape out: turkeys, christmas trees, vacuum cleaners, whatever.  When it came time for cutting, my daughter was already on to other things, but 10 quiet minutes is pretty huge.

crafty presents

November 18th, 2007

just a little pincushion (from this tutorial) and a needlebook: christmas presents for a crafty friend.  Have you started making for christmas?  I pulled out all my old martha stewarts for ideas and some unfinished christmas projects from last year as well.  I started making stockings for my family, but never finished.   And though I don’t know much about sewing now, I really didn’t know much then–so there is a lot of ripping and rethinking before they can hang on our mantle.   I’m sure you have all seen the daily gift tutorials on Sew Mama Sew (if not, go look), but did you know Jane (from janeandtheducks) is posting christmas gifts she has made everyday.  Makes me feel like I’m sitting on my ass just a little too much.  So I’m going to get up.      right        now.

mutant gingerbreadmen

November 17th, 2007

I posted about these little guys when I was working on them, but now they are all sewn up and ready to be wrapped.  Five presents down, many many more to go.  My sister (hi judith!) picked up this little tree at her local thrift store for me last summer, but I hadn’t taken it out of the box until today.  It’s a perfect little charlie brown tree! I can’t wait to put it in my daughters room and help her decorate it.  We went to Target the other day and had to go around and around their christmas display a hundred times. I liked christmas before, but christmas with a 2 year old is going to be ridiculously fun.

brown

November 16th, 2007

the last day of color week. I had a nice time playing with my new camera and taking pictures around my home–I don’t do either as much as I should.

There are four of these shelves above my sink. I feel like an ass setting up little vignettes, but the shelves aren’t good for much else.  And really they are nice to look at while I am up to my elbows in dirty dishes.

(Don’t worry the beetle is long dead.)

pleated bracelet

November 15th, 2007

I don’t really wear much jewelry, but I’ve always wanted to try my hand at whipup’s assignments. And this month the theme is fiber jewelry. The only things other than my wedding ring that I wear are bracelets, so I made myself a bracelet. It is basically just a pleated strip of fabric (there may be a special name for this kind of pleat, I don’t know, but if you do please let me know) with a ribbon as a tie. Infinitely customizable and easy to whip up–it would be quick to make to match an outfit before going out. Not that I ever go out. But you do, so here’s a tutorial.

First measure your wrist, then multiply that by 2.5

Cut a large rectangle of fabric that is 4inches by (wrist measurement x 2.5)

fold it in half the long way (hot dog style), right sides facing, and sew down the long edge leaving the ends open.

Turn the resulting tube right side out, fold it in half so the seam is in the middle and press.

Starting about and inch from the raw edge, make one accordion fold one way and press, then another the other way and press, continuing until you’ve used the entire strip. Don’t worry about making them perfectly even–variation in size makes the bracelet interesting.

Pin the pleats in place and (carefully) try the bracelet on. Snip the ends off if it is too long, fiddle with the pleats if it is too small. When the bracelet is the right length, tuck the ends under and sew the opening shut.

Then tack down all the pleats with a long stitch. Go slowly!

Sew a pretty ribbon on top of the stitching you just did, leaving a couple inches at each end to tie a bow.

Put it on and your ready to go.

You could use a button and elastic loop for a closure, or button and button hole, or snap, or whatever you think would work. Even faster and a little more girly, is a ruffle bracelet. Just a strip of fabric (I used linen and left the edges raw) with a ribbon or some lace down the middle.

so there you go: my first whiplash entry and my first tutorial all rolled in one.